Super Soft Cheese-Filled Rolls
There’s nothing quite like biting into warm rolls fresh from the oven, especially when they’re pillowy soft on the outside and oozing with gooey, melty cheese inside. These super soft cheese-filled rolls are pure comfort food that disappear in a flash at my house. The dough is light and tender while the cheese stays wonderfully stretchy and melty—simple, satisfying, and perfect any time you want a cozy treat.
I designed this recipe to be super approachable. You don’t need fancy ingredients or complicated steps, just basics and a little patience, and you’ll get bakery-quality rolls that are rich but never heavy, soft but not gummy, and packed with flavor that’s just right.
Whether you’re serving them as an afternoon snack, a side to dinner, or part of a party spread, these cheesy rolls will quickly become a favorite everyone asks for again and again.
Why These Cheese-Filled Rolls Are Extra Soft
The secret to these ultra-soft rolls comes down to three main things:
- Warm milk — it helps keep the crumb super tender and soft
- Sugar — it feeds the yeast and adds just the right touch of browning
- Proper proofing — allowing the dough to rise enough so it gets nice and light
Unlike plain lean breads, this enriched dough stays soft even after cooling down, which means these rolls reheat beautifully and keep their tender texture for a day or two.
Ingredients You’ll Need
This recipe sticks to a handful of simple, easy-to-find ingredients, so you can make these with confidence without a long shopping list.
For the Dough
- 3 cups all-purpose flour
- 1 cup warm milk
- 2 tablespoons sugar
- 2 teaspoons yeast
- 1 teaspoon salt
For the Filling
- Cheese cubes, for stuffing
Tip: Pick a cheese that melts well—mozzarella, cheddar, or even a mild processed cheese all work great. Using firm cubes helps keep the filling from leaking out as they bake.
How to Make Super Soft Cheese-Filled Rolls
Step 1: Activate the Yeast
Start by pouring warm milk into a large bowl and stir in the sugar until it’s all dissolved. Sprinkle the yeast over the top, give it a gentle stir, and then let this mixture sit for 5 to 10 minutes. You’ll see it get nice and foamy—that means your yeast is waking up and ready to work its magic.
Step 2: Mix the Dough
Now add the flour and salt to your yeast mixture. Stir everything together until it comes together into a rough dough. It might look a little messy and sticky now, but that’s exactly how it should be.
Turn the dough out onto a lightly floured surface and knead with your hands for 8 to 10 minutes. You want it smooth, soft, and stretchy, with just a little tackiness but no stickiness.
First Rise: Creating a Light, Fluffy Texture
Step 3: Let the Dough Rise
Shape the kneaded dough into a ball and pop it into a bowl that’s been lightly greased. Cover the bowl with a clean kitchen towel or plastic wrap.
Place it somewhere warm and cozy and let the dough rise until it doubles in size—this usually takes about 1 to 1½ hours. This slow, steady rise builds that airy texture we’re after and makes the rolls incredibly tender.
Shaping and Filling the Rolls
Step 4: Divide the Dough
After the dough has puffed up nicely, gently press it down to release the air. Then divide it into equal portions—usually enough for about 10 to 12 rolls, depending on your preferred size.
Roll each piece into a smooth little ball with your hands.
Step 5: Stuff with Cheese
Flatten each dough ball slightly in your palm and place a cheese cube right in the center. Wrap the edges of the dough neatly over the cheese, pinching all the seams tight so none of that cheesy goodness leaks out while baking.
Then roll it gently between your palms to seal it up smooth and round.
Second Rise and Baking
Step 6: Second Rise
Arrange the filled rolls on a greased baking sheet or dish with the seams facing down. Leave a little wiggle room between each roll because they’ll puff up and spread.
Cover again and let them rise for 30 to 40 minutes. They should look puffy and soft, just starting to touch each other—this step is key to getting that ultra-soft texture inside and out.
Step 7: Bake
Preheat your oven to 350°F (175°C).
Bake the rolls for 20 to 25 minutes, until their tops turn a light, golden color. When you press them gently, they should feel soft and springy. You want that rich, yeasty aroma filling the kitchen.
Be careful not to bake them too long because overbaking will dry out that lovely tender crumb.
Cooling and Serving
Once out of the oven, let the rolls rest for 5 to 10 minutes. This short cooling time lets the cheese inside settle perfectly while staying molten and delicious.
Serving them warm is the best way to get that irresistible gooey cheese pull and fluffy texture that everyone loves.

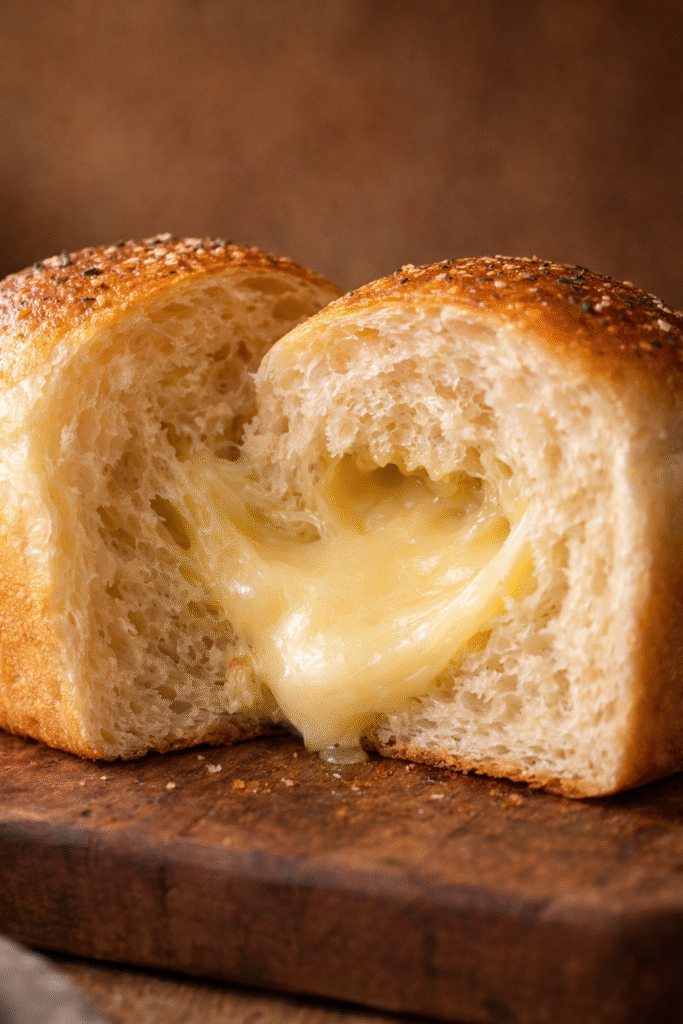
Texture and Flavor Profile
- Crust: Tender and lightly golden, just enough to add a bit of chew
- Interior: Super soft, fluffy, and airy—like a little cloud inside each roll
- Filling: Creamy, melty cheese that oozes with every bite
The slight sweetness in the dough perfectly balances the savory richness of the cheese for a totally dreamy bite.
Serving Ideas
These cheesy rolls really shine in so many ways:
- Grab them as a quick snack or starter before a meal
- Serve alongside soups, stews, or fresh salads for easy comfort food
- Include them on a breakfast or brunch table for a cheesy twist
- Eat them on their own when you need a little cheesy pick-me-up
They’re fantastic for get-togethers, too—easy to eat, universally loved, and sure to disappear fast!
Storage and Reheating
- Keep any leftovers in an airtight container at room temperature for up to 2 days
- If you want them to last a bit longer, refrigerate for up to 4 days
- Warm them gently in the oven or microwave to bring back that gooey melted cheese
To keep them tasting fresh, only reheat what you plan to eat at one time.
Make-Ahead and Freezing Tips
- You can form and fill the rolls, then do an overnight fridge proof before the second rise
- When ready, let them come back to room temperature and rise before baking as usual
- Fully baked rolls freeze well for up to 2 months
- Reheat frozen rolls directly in the oven for the best softness and melty cheese
Common Problems and How to Avoid Them
Cheese leaks out during baking
- The dough seams weren’t sealed tight enough
- Make sure you pinch the edges firmly and bake with the sealed side down
Rolls come out dense
- The dough didn’t rise long enough or wasn’t kneaded enough
- Allow plenty of time for the dough to fully proof for a lighter texture
Rolls are dry
- They may have baked too long or too much flour was used
- Bake just until they’re lightly golden to keep them moist and tender
Frequently Asked Questions
Can I use any type of cheese?
Yes, but pick cheeses that melt nicely like mozzarella or cheddar. Hard or crumbly cheeses won’t work as well for melty centers. For a savory example of melty cheddar in a rolled dough, see Easter Ham and Cheddar Pinwheels.
Can I make smaller rolls?
Definitely! Just keep an eye on baking time and reduce it a bit since smaller rolls cook faster.
Why aren’t my rolls soft enough?
This usually happens if you didn’t knead enough or didn’t let the dough rise long enough. Soft rolls take some patience with kneading and proofing—see our Easy, No-Knead Dinner Rolls for timing cues and extra-soft results.
Final Thoughts
These Super Soft Cheese-Filled Rolls show how a handful of simple ingredients and easy steps can come together to make something really special. The tender, fluffy dough wrapped around melty, gooey cheese is pure comfort food at its best.
Once you try them warm from the oven, I promise they’ll become one of your go-to recipes for everything from everyday meals to special occasions—or anytime you just need a little cheesy comfort.
PrintSuper Soft Cheese-Filled Rolls: Light, tender, and fluffy rolls with a gooey, melty cheese center. Perfect as a snack, side dish, or party treat, made with simple ingredients and enriched dough for softness and flavor.
- Total Time: 2 hours 35 minutes
- Yield: 10 to 12 rolls 1x
Ingredients
- 3 cups all-purpose flour
- 1 cup warm milk
- 2 tablespoons sugar
- 2 teaspoons yeast
- 1 teaspoon salt
- Cheese cubes (mozzarella, cheddar, or mild processed cheese), quantity as needed for stuffing
Instructions
- Activate the yeast: Pour warm milk into a large bowl, stir in sugar until dissolved. Sprinkle yeast over the top, stir gently, and let sit for 5 to 10 minutes until foamy.
- Mix the dough: Add flour and salt to the yeast mixture. Stir to form a rough dough. Turn out onto a lightly floured surface and knead for 8 to 10 minutes until smooth, soft, stretchy, with slight tackiness but not sticky.
- First rise: Shape dough into a ball, place in lightly greased bowl, cover with towel or plastic wrap. Let rise in a warm place for 1 to 1½ hours until doubled in size.
- Divide the dough: Gently punch down risen dough to release air. Divide into 10 to 12 equal pieces and roll each into smooth balls.
- Stuff with cheese: Flatten each dough ball, place a cheese cube in the center, wrap edges tightly over cheese, pinch seams securely to prevent leaks, and roll smooth and round.
- Second rise: Place rolls seam-side down on greased baking sheet with space to spread. Cover and let rise for 30 to 40 minutes until puffy and slightly touching.
- Bake: Preheat oven to 350°F (175°C). Bake rolls for 20 to 25 minutes until lightly golden and springy to touch. Avoid overbaking to keep them moist.
- Cool and serve: Let rolls rest 5 to 10 minutes after baking to let cheese settle. Serve warm to enjoy gooey cheese and soft texture.
Notes
Use cheese that melts well: mozzarella, cheddar, or mild processed cheese recommended., Seal dough seams tightly to prevent cheese leaking during baking., Knead dough adequately and allow full rising times to avoid dense rolls., Avoid overbaking to keep rolls soft and moist., Smaller rolls can be made by dividing dough into smaller pieces; reduce baking time accordingly., Leftovers can be stored at room temperature up to 2 days or refrigerated up to 4 days in airtight container., Freeze fully baked rolls up to 2 months; reheat in oven for best texture and melty cheese., Make-ahead tip: Form and fill rolls, refrigerate overnight before second rise; then bring to room temp and rise before baking.
- Prep Time: 20 minutes
- Cook Time: 25 minutes
- Category: Snack / Bread
- Cuisine: American
Nutrition
- Serving Size: 1 roll
- Calories: Approximately 150-200 calories per roll (depends on cheese type and quantity)
- Fat: 6-10 grams per roll (depends on cheese)
- Carbohydrates: 25-30 grams per roll
- Protein: 6-8 grams per roll (depends on cheese)