Mint Chocolate Kiss Blossom Cookies
Mint Chocolate Kiss Blossom Cookies are not only the cutest Christmas cookies around, they’re out of this world delicious! Anyone that loves mint and chocolate is going to fall in love with these melt-in-your-mouth cookies topped with a big kiss!

You guys! Have you seen a cuter Christmas cookie? I’m totally in love with these cookies!
I’d been dreaming about Mint Chocolate Kiss Blossom Cookies anyway, so I decided to make them for his class! Talk about a hit! They were in love! I’d be in love too if my algebra class sat around and ate goodies instead of graphing inequalities!

Like I said, I’d been dreaming of these cookies for a while. In my mind, they were going to be perfect in every way! I whipped up the first batch and they were gorgeous, but dry, like fall apart in your mouth dry! And they tasted like toothpaste! Not dreamy!
So I played around with a few different recipes and created a new cookie, that come out of the oven flatter than a pancake! Not pretty!
I was determined to make the perfect mint blossom cookie! Giving up wasn’t an option! Thank goodness the third time was a charm!

They’re puffy, perfectly minty, and gorgeous! These cookies are dreamy!

Why should I use real butter in baking?
These cookies have powdered sugar in them and I’m in love with them! It makes the cookies almost taste like a cross between a shortbread cookie and a traditional cookie which is what makes them melt in your mouth!
Another important ingredient in making these cookies is REAL butter! I’m a dairy girl and think all baking should be done with REAL butter! There are a few reasons butter works best in baking.
- Have you noticed the ingredient list on the box of butter? It’s cream. That’s all! Just cream from real milk. Unless you buy salted butter, then it’s cream and salt. Still, you recognize those ingredients and feel safe eating them right?
- Some alternatives to butter contain less fat and more water. That’s going to affect the consistency and overall outcome of your baked goods. Stick with real butter for best results.
- There is nothing like the taste of real butter! There’s no comparison! It has the best flavor and can’t be matched by other products!

Can I omit food coloring in cookies?
When I was in high school my mom took me to a restaurant, not a fancy restaurant but not fast food. The waitress asked me if I’d like butter or margarine. My mom only bought real butter once a year, at Christmas. And she used it to make her famous pastries. Other than that I’d never tried butter.
I told the waitress I’d go ahead and stick with margarine. I’m not very adventurous when it comes to food. My mom looked at me like I was crazy, and instructed the waitress that I really wanted butter! I was in love! To be honest, I haven’t purchased a single cube of margarine since!
Butter is where it’s at! If you’re not in love already, you’ve got to trust me on this one! Butter from now on!
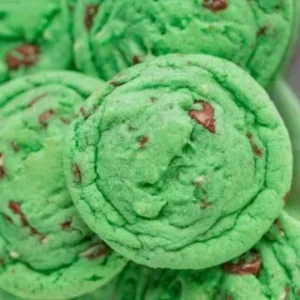
Who’s in love with that green color? Start with just a few drops of food coloring and add more from there. It’s easy to add more, but hard to take it out! I know there are folks out there that aren’t into consuming food coloring. If that’s you, simply leave it out. Obviously, the cookies won’t be green, but they will taste exactly the same!

If you’d like you can roll cookie dough balls in granulated sugar. It adds a pretty texture to the cookies. Or you can leave it off if you don’t want to mess with the extra steps!
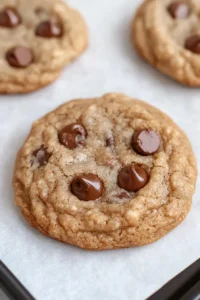
By the way, some of these pictures are from my first batch of cookies. They have cracks in them, which I think is actually kind of pretty, but not tasty! The photos with noncracked cookies are from the recipe I’m sharing with you. You can expect your cookies to look like that as long as you don’t overbake them!

When should I add a chocolate kiss to blossom cookies?
Food nerds like me like to read about questions like this! I can’t help myself and it will save you some time from having to research it yourself!
Remove cookies from the oven, let them sit for about 1-2 minutes. Then gently press a chocolate kiss into cookies. The chocolate will get a little soft, but not to worry. As long as you don’t touch it, it will hold its shape. Remove cookies from the cookie sheet and finish cooling on a cooling rack. Completely cooled cookies can be stored at room temperature in an airtight container.
Adding chocolate too soon will melt the kiss right away and it could make a mess. Waiting too long gives the cookies a chance to firm up a bit, then they crack when the kiss is added.

Cookies and milk are always good snacks!
It’s getting cold and dark here on the dairy and when my boys come in from working they are always starving! Their bodies must burn extra calories trying to stay warm in the winter because I cannot keep them filled up.
I guess you could consider my boys to be cookie experts, and they think a glass of ice-cold milk is a must with these cookies.

Grab the Mint Chocolate Kiss Blossom Cookies Recipe!

MInt Chocolate Kiss Blossom Cookies
4.23 from 44 votes
Author Amy
Course Dessert
Cuisine American
Servings 24 cookies
Cook ModePrevent your screen from going dark
Prep Time 10 minutes mins
Cook Time 16 minutes mins
Total Time 26 minutes mins
Ingredients
1x2x3x
- 10 Tablespoons butter room temperature
- 1 cup powdered sugar
- 1 whole egg
- 1 egg yolk
- 1 teaspoon peppermint mint extract use less if you like a less minty cookies
- 6-12 drops green food coloring
- 2 cups all-purpose flour
- 3/4 teaspoons baking powder
- 1/4 teaspoons Kosher salt
- 24 chocolate kisses
Instructions
- Pre-heat oven to 350 degrees. Line a baking sheet with parchment paper, a silpat, or spray with nonstick baking spray.
- Cream butter and sugar until light and fluffy.
- Add egg, egg yold, peppermint extract, and green food coloring. Start with 6 drops of food coloring, mix until smooth. Gradually add more food coloring until desired color is reached.
- Add flour, baking powder, and salt. Mix until combined.
- Roll cookie dough in 1″ balls. Place on cookie sheet.
- Bake 7-9 minutes. I bake my cookies for 8 minutes and it’s perfect. Be sure not to over bake them or they will be dry.
- Remove cookies from oven. Let sit on cookie sheet for about 2 minutes. Gently, press chocolate kiss into tops of cookies. Move cookies to a wire rack to finish cooling.
Notes
Cookie dough balls may be rolled in granulted sugar before baking if desired.
Be careful to not overbake cookies or they will be dry. Underbaked is better than overbaked with these cookies!
Nutrition
Calories: 125kcal | Carbohydrates: 16g | Protein: 2g | Fat: 6g | Saturated Fat: 4g | Polyunsaturated Fat: 1g | Monounsaturated Fat: 1g | Trans Fat: 1g | Cholesterol: 22mg | Sodium: 84mg | Potassium: 14mg | Fiber: 1g | Sugar: 8g | Vitamin A: 157IU | Calcium: 20mg | Iron: 1mg