Healthy Whole-Wheat Bread (No Maida)
f you’re looking for a wholesome, everyday bread made without refined flour, this healthy whole-wheat bread is exactly what you need. Made entirely with whole-wheat flour and naturally sweetened with honey, this loaf is hearty, nourishing, and deeply satisfying. It’s the kind of bread you can feel good about eating daily—whether toasted for breakfast, used for sandwiches, or served alongside soups and stews.
Unlike white bread made with maida (refined flour), whole-wheat bread retains the bran and germ of the wheat grain. That means more fiber, more nutrients, and a fuller, more complex flavor. This recipe keeps the ingredient list simple and clean while focusing on proper technique to ensure the bread turns out soft, moist, and sliceable—not dense or dry.
Why Choose Whole-Wheat Bread?
Whole-wheat bread offers several benefits over refined white bread:
- Higher fiber content, supporting digestion and satiety
- Slower energy release, helping maintain stable blood sugar levels
- Richer flavor, with nutty, earthy notes
- More nutrients, including B vitamins and minerals
Many people avoid whole-wheat bread because they associate it with heaviness or dryness. This recipe addresses that problem directly by using honey and olive oil to keep the crumb tender and moist.
Ingredients You’ll Need
This recipe uses only the ingredients shown, keeping it simple and natural.
- 3 cups whole-wheat flour
- ¼ cup honey
- 2 tablespoons olive oil
- 1 tablespoon yeast
- 1 teaspoon salt
Note: You will also need warm water to bring the dough together. The amount may vary slightly depending on your flour, but the dough should be soft and pliable, not stiff.
How to Make Healthy Whole-Wheat Bread
Step 1: Activate the Yeast
In a large bowl, combine the yeast with warm water and a small spoonful of the honey. Stir gently and let it sit for 5–10 minutes until foamy. This step ensures the yeast is active and ready to leaven the bread.
Step 2: Mix the Dough
Add the remaining honey, olive oil, and salt to the yeast mixture. Stir to combine.
Gradually add the whole-wheat flour, mixing until a rough dough forms. Whole-wheat flour absorbs more liquid than refined flour, so add water slowly as needed until the dough comes together.
Step 3: Knead Thoroughly
Turn the dough out onto a clean surface and knead for 10–12 minutes. Whole-wheat dough requires longer kneading to develop gluten properly.
The dough should become smooth, elastic, and slightly tacky. Proper kneading is essential for preventing a dense loaf.
First Rise: Building Structure and Flavor
Step 4: Let the Dough Rise
Shape the dough into a ball and place it in a lightly oiled bowl. Cover with a clean towel or plastic wrap.
Let it rise in a warm place for 1½ to 2 hours, or until doubled in size. Whole-wheat dough rises more slowly than white dough—patience is key.
Shaping and Second Rise
Step 5: Shape the Loaf
Once risen, gently punch down the dough to release excess air. Shape it into a log, tucking the seams underneath.
Place the dough into a greased loaf pan.
Step 6: Second Rise
Cover the pan and let the dough rise again for 30–45 minutes, until it crowns just above the rim of the pan. This second rise ensures a lighter texture and better oven spring.
Baking the Bread
Step 7: Bake
Preheat your oven to 350°F (175°C).
Bake the bread for 35–40 minutes, until the top is deep golden brown and the loaf sounds hollow when tapped. If the top browns too quickly, loosely cover it with foil during the last 10 minutes.
Step 8: Cool Properly
Remove the bread from the pan and let it cool completely on a wire rack before slicing. Cutting too soon can cause the crumb to become gummy.
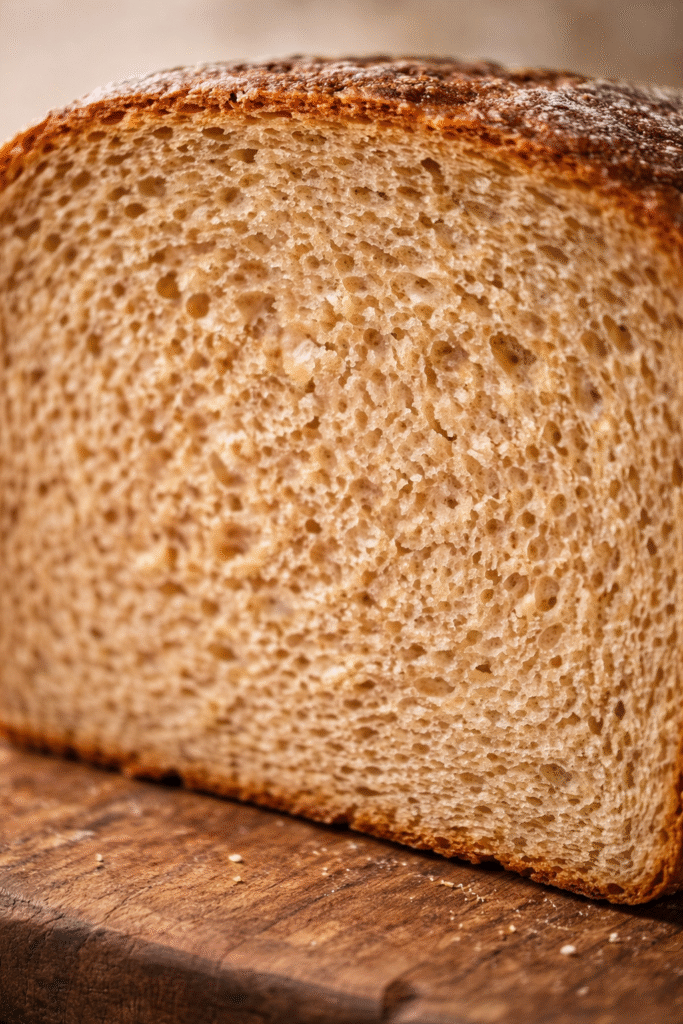
Texture and Flavor Profile
- Crust: Firm but not hard
- Crumb: Moist, hearty, and finely textured
- Flavor: Mildly sweet, nutty, and satisfying
The honey balances the natural bitterness of whole wheat, while olive oil keeps the bread soft even after cooling.
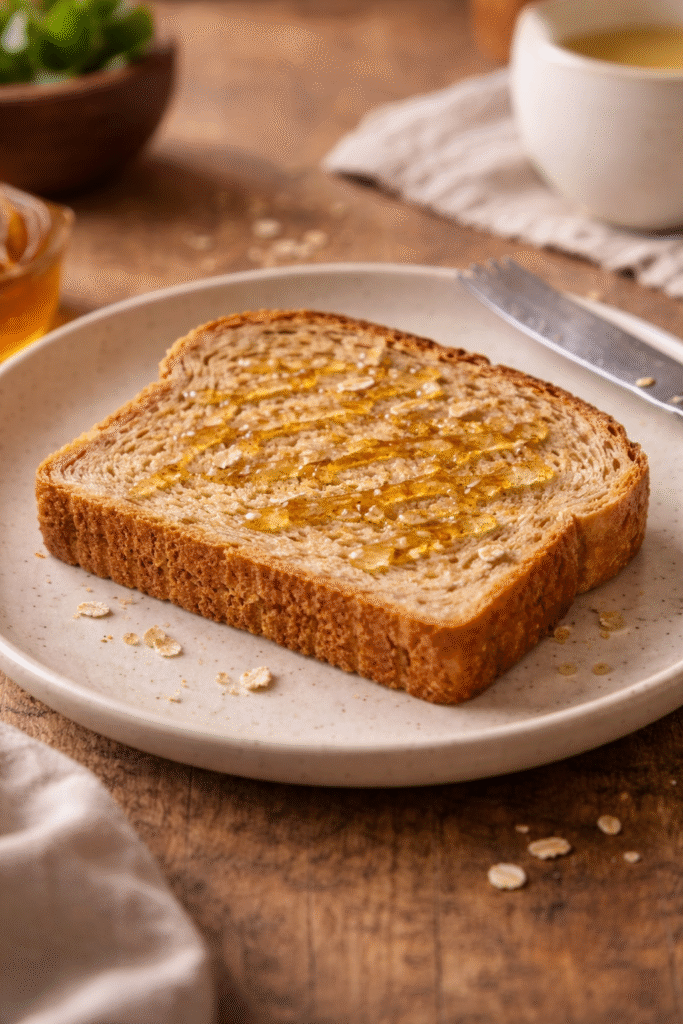
How to Serve Whole-Wheat Bread
This bread is incredibly versatile:
- Toasted with butter or nut butter
- Used for sandwiches or grilled vegetables
- Served alongside soups and lentils
- Enjoyed plain with olive oil
It’s sturdy enough for sandwiches yet soft enough for everyday use.
Storage and Shelf Life
- Store at room temperature in an airtight container for up to 3 days
- Refrigerate for up to 5 days if your kitchen is warm
- Freeze sliced bread for up to 2 months
To refresh, lightly toast or warm slices before serving.
Tips for Success with Whole-Wheat Bread
- Hydration matters: Whole-wheat flour needs more water than white flour
- Knead longer: Gluten development is essential for softness
- Allow enough rise time: Rushing leads to dense bread
- Cool completely before slicing: This sets the crumb
Common Problems and Solutions
Bread is too dense
- Dough may be too dry
- Increase hydration slightly and knead longer
Bread doesn’t rise well
- Yeast may be inactive
- Rising environment may be too cool
Bread tastes bitter
- Under-proofed dough
- Allow full fermentation time
Frequently Asked Questions
Is this bread completely maida-free?
Yes. It uses only whole-wheat flour.
Can I replace honey with sugar?
Honey adds moisture and flavor. Sugar can work, but the texture may be slightly drier.
Why does whole-wheat bread take longer to rise?
The bran interferes with gluten development, slowing fermentation.
Final Thoughts
Healthy Whole-Wheat Bread (No Maida) proves that nutritious bread doesn’t have to be dry, heavy, or bland. With simple ingredients, careful kneading, and proper fermentation, you can bake a loaf that’s wholesome, flavorful, and perfect for everyday meals.
Once you get comfortable with this recipe, it becomes a reliable staple—one that supports a balanced diet while still delivering the comfort of homemade bread.
Print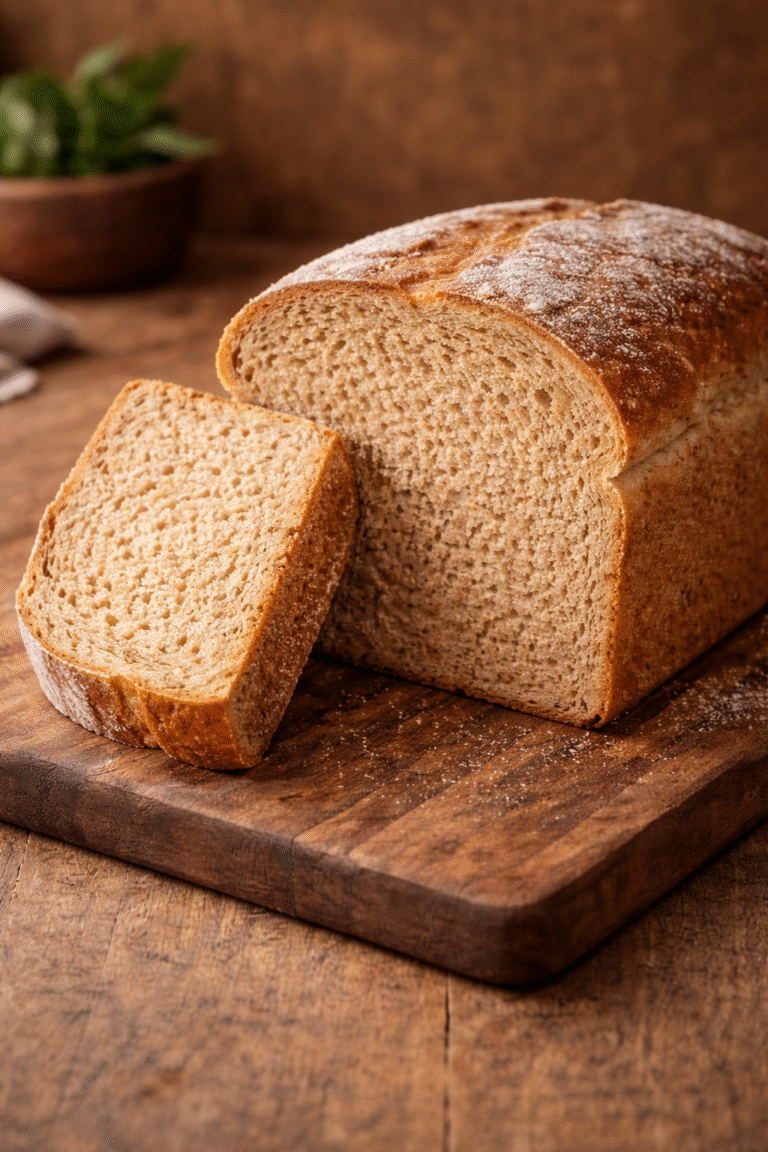
Healthy Whole-Wheat Bread (No Maida)
Ingredients
3 cups whole-wheat flour
¼ cup honey
2 tablespoons olive oil
1 tablespoon yeast
1 teaspoon salt
Instructions
In a large bowl, combine the yeast with warm water and a small spoonful of the honey. Stir gently and let it sit for 5–10 minutes until foamy. This step ensures the yeast is active and ready to leaven the bread.
Add the remaining honey, olive oil, and salt to the yeast mixture. Stir to combine.
Gradually add the whole-wheat flour, mixing until a rough dough forms. Whole-wheat flour absorbs more liquid than refined flour, so add water slowly as needed until the dough comes together.
Turn the dough out onto a clean surface and knead for 10–12 minutes. Whole-wheat dough requires longer kneading to develop gluten properly.
The dough should become smooth, elastic, and slightly tacky. Proper kneading is essential for preventing a dense loaf.
Shape the dough into a ball and place it in a lightly oiled bowl. Cover with a clean towel or plastic wrap.
Let it rise in a warm place for 1½ to 2 hours, or until doubled in size. Whole-wheat dough rises more slowly than white dough—patience is key.
Once risen, gently punch down the dough to release excess air. Shape it into a log, tucking the seams underneath.
Place the dough into a greased loaf pan.
Cover the pan and let the dough rise again for 30–45 minutes, until it crowns just above the rim of the pan. This second rise ensures a lighter texture and better oven spring.
Preheat your oven to 350°F (175°C).
Bake the bread for 35–40 minutes, until the top is deep golden brown and the loaf sounds hollow when tapped. If the top browns too quickly, loosely cover it with foil during the last 10 minutes.
Remove the bread from the pan and let it cool completely on a wire rack before slicing. Cutting too soon can cause the crumb to become gummy.