Easter Basket Sugar Cookie Cups

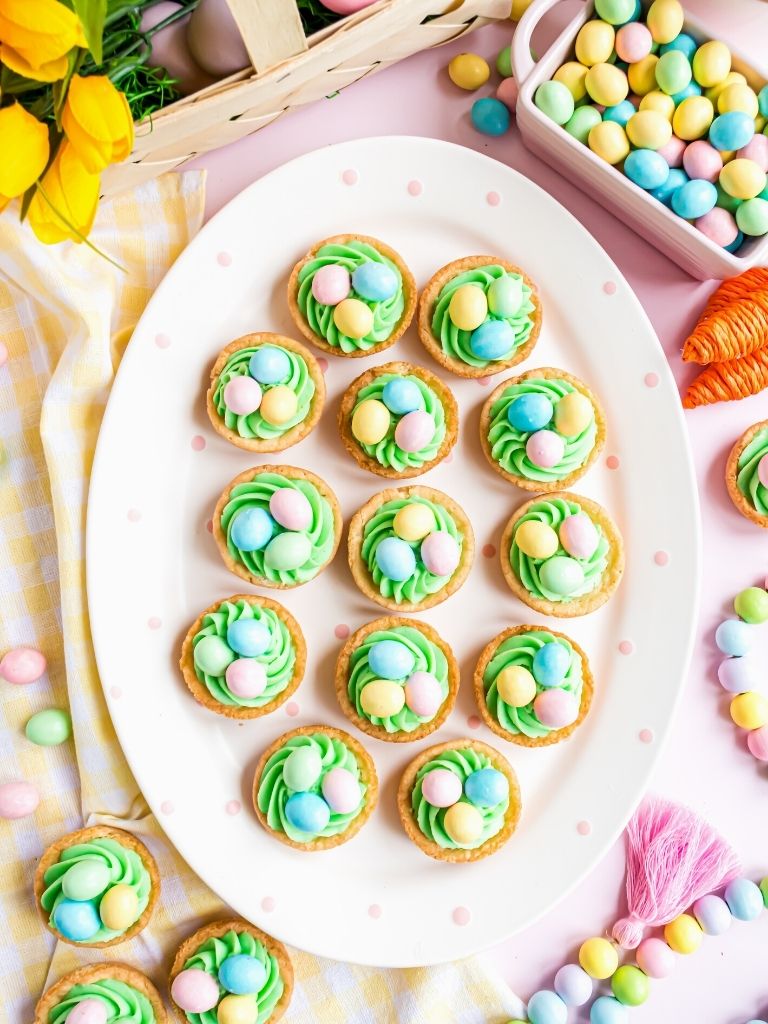
Easter Basket Sugar Cookie Cups start with store-bought sugar cookie dough pressed into a muffin pan to form the basket. They’re filled with creamy vanilla buttercream tinted green to look like grass and topped with colorful chocolate eggs. These charming, festive treats are easy to make and sure to bring smiles all around.
If you’re looking for more Easter sweetness, give these Easter Candy Rice Krispies a try or bake up a beautiful pastel Swirled Easter Cake for extra festive fun.
I’m excited to share this sweet little Easter project with you today. As my kids grow older and get more confident in the kitchen, they really enjoy helping me whip up cute holiday treats like these that look adorable but are a breeze to make.
For the basket base, I use ready-made sugar cookie dough baked right in a muffin tin, which makes shaping so simple. The “grass” filling is a smooth vanilla buttercream frosting colored with green food coloring, and the top gets a festive pop with chocolate eggs.
These cookie cups are such a great, hands-on activity for kids, plus they’re easy to customize by changing the frosting color or swapping out candy eggs for whatever you have on hand.
These Easter Basket Sugar Cookie Cups are super quick to make, so fun for kids to help with, and don’t require any fancy baking skills. Using store-bought sugar cookie dough means most of the work is done for you, and in just about 30 minutes you’ll have 24 adorable bite-sized baskets that look like you spent all day in the kitchen. You can easily swap in different frosting colors, candy eggs, or sprinkles to make them your own, making these perfect for holiday parties, school events, or just a fun family baking afternoon.
- Makes 24 festive, bite-sized Easter baskets in about 30 minutes total.
- Starts with store-bought cookie dough for quick, no-stress prep.
- Super flexible—switch up frostings, colors, candy, or toppings your way.
- Perfect for kids to get involved and help decorate—always a hit with little helpers!
What Makes Them So Great
These Easter Basket Sugar Cookie Cups are a total win because they look amazing but take almost no time or special skills. If you want a holiday treat that’s cute, tasty, and simple, these are it. Here’s why I keep coming back to this recipe year after year:
- Fast and plentiful: With pre-cut sugar cookie dough, you can bake about two dozen cups in half an hour—prep and baking included. Prefer homemade? Try The BEST Sugar Cookies for a from-scratch base.
- Fun for the kids: Kids love pressing the dough, piping the frosting, and adding the eggs. It’s a sweet family project that lets them get creative.
- No fuss baking skills: Because the dough is ready to go and your frosting is simple homemade buttercream (or store-bought if you prefer), no advanced baking know-how is needed.
- Customizable charm: Pick whatever frosting color you like, use your favorite egg-shaped candies, sprinkle on some coconut for a nest effect (or go all-in with Easter Birds Nest Cookies), or try different frosting flavors—all work beautifully.
- Make ahead with ease: Bake your cookie baskets days or weeks in advance (unfrosted, of course) and decorate them right before your event. They freeze well, too!
- Shortcuts welcome: Use ready-made frosting to save time, or swap to a gluten-free dough if needed. This recipe is flexible and forgiving.
- Party-perfect: They’re small, portable, and super cute to serve. Ideal for Easter celebrations, school parties, or potlucks.
Simply put: these cookie cups are quick to whip up, customizable to your style, and loved by everyone. They make festive Easter fun genuinely doable and delicious.
Ingredients and Smart Swaps

- 1 package (16 oz) Pillsbury Sugar Cookie Dough *see note
- 1 cup (2 sticks) salted butter
- 3 cups powdered sugar
- 2 tablespoons heavy whipping cream
- 1 teaspoon vanilla extract
- 2 bags (9 oz each) Hershey’s Egg Candies or something similar
Make the Cookie Baskets
- Preheat oven to 350°F and liberally spray two 12-cup muffin pans with cooking or baking spray.
- Separate premade sugar cookie dough into squares and place one square into each muffin cup.
- Bake cookies 10–14 minutes until very lightly browned, starting with the minimum time to avoid overbaking.
-
Immediately after baking, gently press the center of each cookie with a shot glass or the bottom of a spice jar to form a shallow indentation.

- Let cookies cool in the pan 10 minutes, run a butter knife around the edges to loosen, transfer to a cooling rack, and cool completely.
- Beat 1 cup (2 sticks) butter until fluffy, about 2 minutes.
- Add 3 cups powdered sugar, 1 cup at a time, mixing on low after each addition; then increase speed to medium and beat about 1 minute until fluffy.
-
Add 1 teaspoon vanilla and 2 tablespoons heavy cream; beat until desired consistency, adjusting with more cream or powdered sugar as needed.

- Add green food coloring (2–3 drops or to desired shade) and mix until evenly colored.
- Transfer frosting to a piping bag fitted with a large star tip (or use a Ziplock bag with a corner snipped).
- Pipe frosting into the indentation of each cookie cup to create the grassy nest.
-
Top each frosted cookie cup with about 3 egg-shaped candies.

Tips for Perfect Cookie Cups
Here are some practical tips from me to help you nail this recipe and impress your family with these adorable Easter treats. For more festive baking inspiration, see our Easter cookies collection.
- Don’t Overbake : Your cookie cups should come out of the oven just starting to brown. Overbaking will make them crumbly and tough to remove from the pan. I recommend setting your timer to the minimum bake time, checking, then baking a minute or two more only if needed. The cookies should be pale and look fully baked without shiny or doughy spots.
- Piping Made Easy : To get that beautiful, fluffy swirl on top, use a piping bag fitted with a large star tip like a Wilton 1A or 2A. Fill the bag using a spatula, twist the top as you squeeze down to pipe. If you don’t have a piping bag, no worries! Fill a Ziplock bag, snip off a corner big enough for thick frosting to squeeze out, and pipe away.
- Pressing the Basket Space: Gently press down the center of each baked cookie with your chosen tool. It’s similar to making our Lemon Curd Thumbprint Cookies—don’t push too hard or deep; you just need a shallow dip. Poking too deep can crack your cookie cups. Don’t stress if they crack some; the frosting hides most of that.
- Pan Prep Is Key: Spray your muffin pan generously with cooking spray to prevent sticking. For extra assurance, use Baker’s Joy (cooking spray with flour) available in the baking aisle—it’s a game changer for baked goods like these.
- Cool Completely : Make sure your cookie cups are fully cool before you add frosting. If they’re warm, the buttercream can melt and lose its shape. Patience here pays off!
- Easy Release Tip : Run a butter knife around the edges of each cookie cup to gently loosen them from the muffin tin. This helps keep your baskets intact.

Flavor and Topping Ideas
- Swap out your candy eggs: try Cadbury Mini Eggs, Reese’s Mini Eggs, pastel Easter M&M’s, or even jelly beans—or top with homemade Peanut Butter Easter Eggs—to change things up.
- Use store-bought frosting: for a super quick version, use vanilla or cream cheese frosting from the store instead of making your own buttercream.
- Experiment with frosting colors and flavors: chocolate buttercream, cream cheese frosting, or pastel pinks and blues are lovely alternatives to green.
- Make a coconut nest: tint shredded coconut green and sprinkle on top of the frosting before placing the eggs for a fun texture that looks like grass.
- Try a different cookie base: any flat, pre-cut sugar cookie dough package works, or grab a gluten-free option like Lemon Cut Out Cookies (Gluten Free, Paleo) to suit dietary needs.
- Mix up toppings: stir mini chocolate chips into your frosting, add pastel sprinkles, or finish with a small candy flower for extra charm.
Storing and Make-Ahead Tips
- Unfrosted cups keep well at room temperature in an airtight container for up to one week. You can also freeze them in a single layer and then transfer to a freezer bag—store frozen for up to three months. For another freezer-friendly make-ahead cookie, try slice-and-bake brown sugar shortbread cookies. Just thaw to room temp before frosting.
- Once frosted and decorated, store these cookie cups at room temperature in an airtight container. They taste best within two to three days. If your kitchen is warm, keep them in the fridge for up to three days, then let them sit at room temperature before serving to bring back that perfect buttery softness.
- To prep ahead: bake your cookie bases a day or two before, store plain, and frost right before your event. This keeps things fresh and stress-free—and if you’re assembling an Easter dessert spread, you can also make chocolate covered pretzels for Easter ahead of time.
- If stored cups seem a tad stale, warm them gently in a 300°F oven for 3–5 minutes (don’t heat after frosting), or just let thawed frozen cups come fully to room temperature before decorating.

Common Questions Answered
-
What can I use to make the basket indentation?
- Several household items work great: a tart shaper, the bottom of a shot glass, or a spice jar bottom with the perfect size circle.
- A small measuring cup or drinking glass with a flat bottom will also do the trick.
- You can even carefully use a plastic spoon and your fingers to shape the nest gently.
-
How do I store leftover cookie cups?
- Unfrosted cups store in an airtight container at room temp for up to a week.
- Frosted and decorated ones keep best at room temperature, eaten within three days for optimal flavor.
-
Can I freeze these?
- Yes! Unfrosted cookie cups freeze for up to three months. Just thaw completely before adding frosting and decorating.
-
What substitutions work well?
- For a fast fix, use store-bought frosting instead of homemade buttercream.
- Add Easter sprinkles to your frosting or sprinkle on top for extra festive flair—we always do this at our house!
- Choose any egg-shaped candy that you like—from jelly beans to Reese’s eggs, or even homemade Easter Egg Oreo Cookie Balls—you can’t go wrong.
- Switch up the frosting color. While green gets the grass look, pastel pink and light blue are equally charming for different themes.
- Pick a different cookie dough package if you want. Just make sure it’s the flat one with pre-cut squares for easy prep.
-
Can I make these ahead?
- Absolutely! Bake the cookie cups ahead and store in an airtight container or Ziploc at room temp for up to two days. For freshest taste, I recommend frosting and decorating no more than a day before serving.
-
I don’t have a piping bag or decorating tip—how can I decorate these?
- I use a piping bag with a large star tip (Wilton 1A or 2A) for pretty frosting swirls.
- If you don’t have a bag or tip, just scoop frosting into a Ziplock bag, snip off a corner big enough for frosting to come out thicker, and use that to pipe frosting into each cookie cup. You’ll get a more rustic look but still delicious!
Easter Basket Sugar Cookie Cups
Author Jessica – Together as Family
Course Cookies, Dessert, Easter
Cuisine American
Prep Time 20 minutes minutes
Cook Time 10 minutes minutes
Total Time 30 minutes minutes
Ingredients
- 1 package (16 oz) Pillsbury Sugar Cookie Dough *see note
- 1 cup (2 sticks) salted butter
- 3 cups powdered sugar
- 2 tablespoons heavy whipping cream
- 1 teaspoon vanilla extract
- 2 bags (9 oz each) Hershey’s Egg Candies or something similar
Instructions
Sugar Cookie Cups
- Preheat oven to 350° F. Liberally spray a 12-cup muffin tin with cooking spray or baking spray (cooking spray + flour).
- Separate the premade cookie dough and put one section into each well in the muffin pan.
- Cook for 10-14 minutes until very lightly browned. * It’s best to not over-cook, set the timer for the lowest time, and go from there.
- Immediately after baking, use a shot glass or bottom of a spice jar, to lightly and slowly press the center of the cookies down to form a ‘basket’ or ‘nest’. This will create a small indentation for the frosting.
- Let the cookies cool in the pan for 10 minutes. Carefully remove them by using a butter knife to help lift them and remove them from the wells. Transfer to a cooling rack so they can cool completely.
Buttercream Frosting
- In a mixing bowl with an electric hand mixer or you can use a stand mixer, beat the butter until it’s fluffy and lighter in color. About 2 minutes.
- Add in the powdered sugar, 1 cup at a time, mixing on low speed after each addition. Increase speed to medium after all the powdered sugar has been added, and beat for about 1 minute until combined and fluffy.
- Add vanilla extract and heavy cream. Beat until desired consistency is reached. Add more milk or more powered sugar depending on if you want it thinner or thicker texture. * If using anything other than heavy cream in the frosting, start at 1 tablespoon and go from there. You won’t need as much milk if using a lower-fat milk than heavy cream.
- If using food coloring, add 2-3 drops (or more), and mix until desired color is reached.
- Put frosting into a piping bag with a large 1A or 2A star tip and pipe the frosting into the indentation of the cookie cup. Top each basket with 3 eggs. * If you don’t have the piping supplies, simply put the frosting into a Ziploc bag, snip off one of the bottom corners and pipe it on that way into each sugar cookie cup.
Notes
Pillsbury Sugar Cookie Dough : Be sure to grab the flat package, not the log. The flat one comes pre-cut into squares which makes it easy to pop one into each muffin cup with no fuss.
Egg Candy : Plan on 3 eggs per cookie cup—that means about 72 candies total for 24 cups. Feel free to mix and match candies like jelly beans, Cadbury Mini Eggs, or Reese’s peanut butter eggs for variety.
Tip : Sprinkles add an extra bit of cheer! I love sprinkling pastel Easter sprinkles onto the frosting before adding my chocolate eggs. It makes them so festive and fun.
Making the Basket Indentation : Use whatever you have handy to create the frosting nest — a tart shaper, bottom of a shot glass, spice jar, small cup, or even a spoon and gentle fingers will do the job nicely.
Nutrition
Calories: 213kcal | Carbohydrates: 27g | Protein: 1g | Fat: 12g | Saturated Fat: 6g | Polyunsaturated Fat: 1g | Monounsaturated Fat: 4g | Trans Fat: 1g | Cholesterol: 24mg | Sodium: 116mg | Potassium: 32mg | Fiber: 1g | Sugar: 22g | Vitamin A: 262IU | Vitamin C: 1mg | Calcium: 5mg | Iron: 1mg