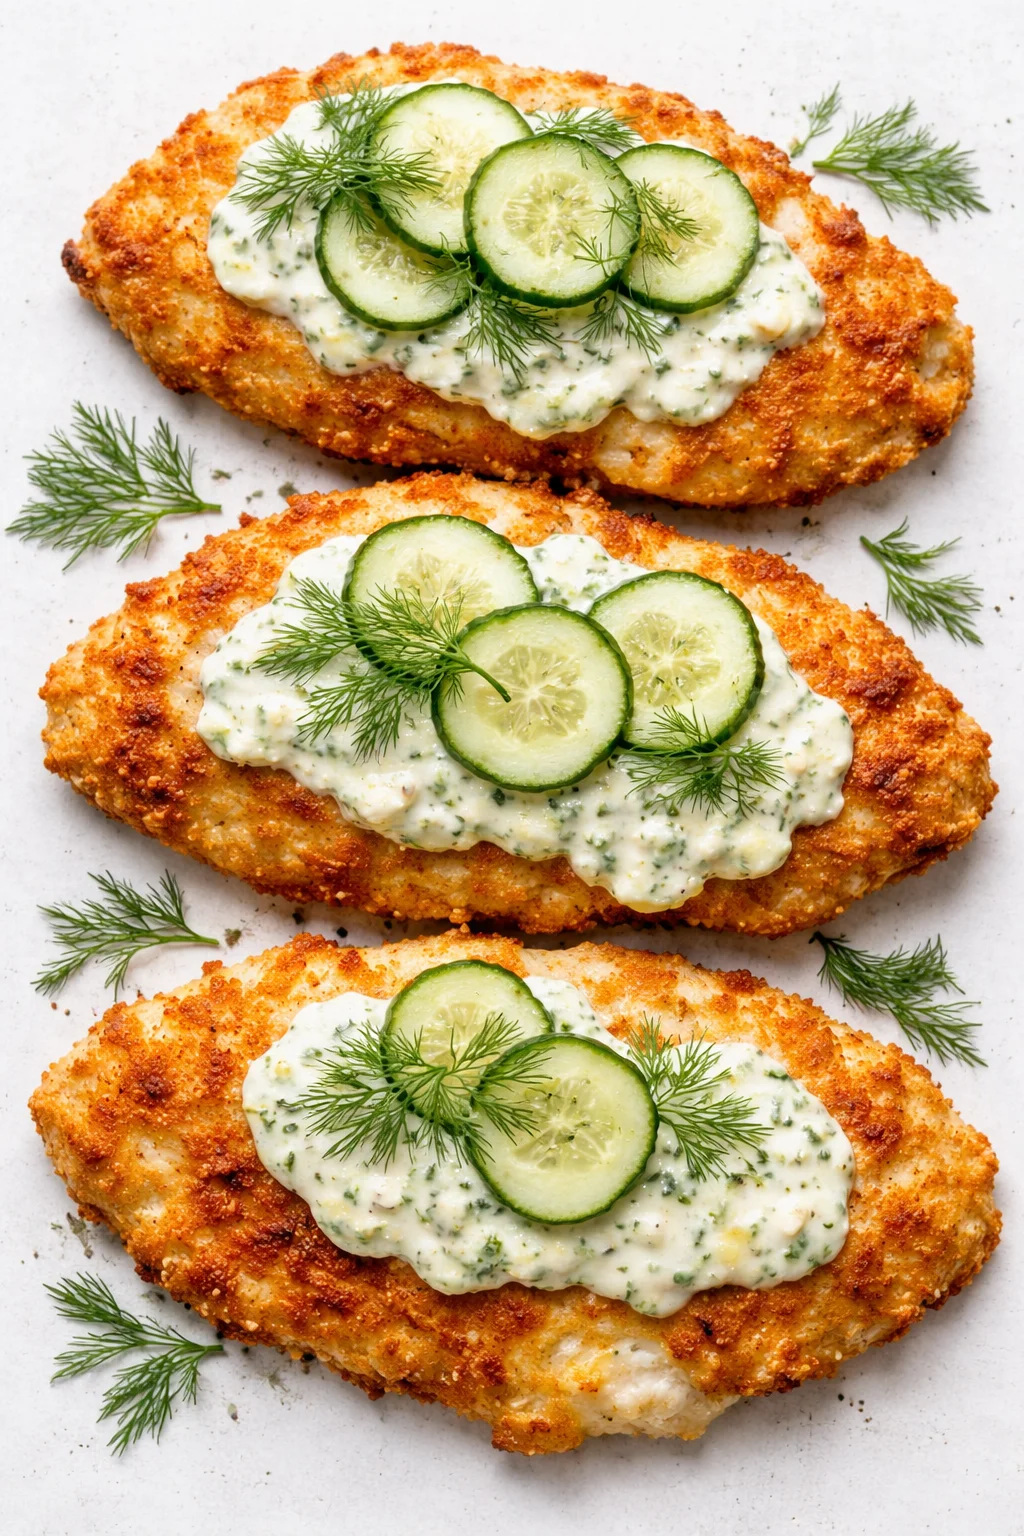
The Best Crispy Dill Pickle Parmesan Chicken
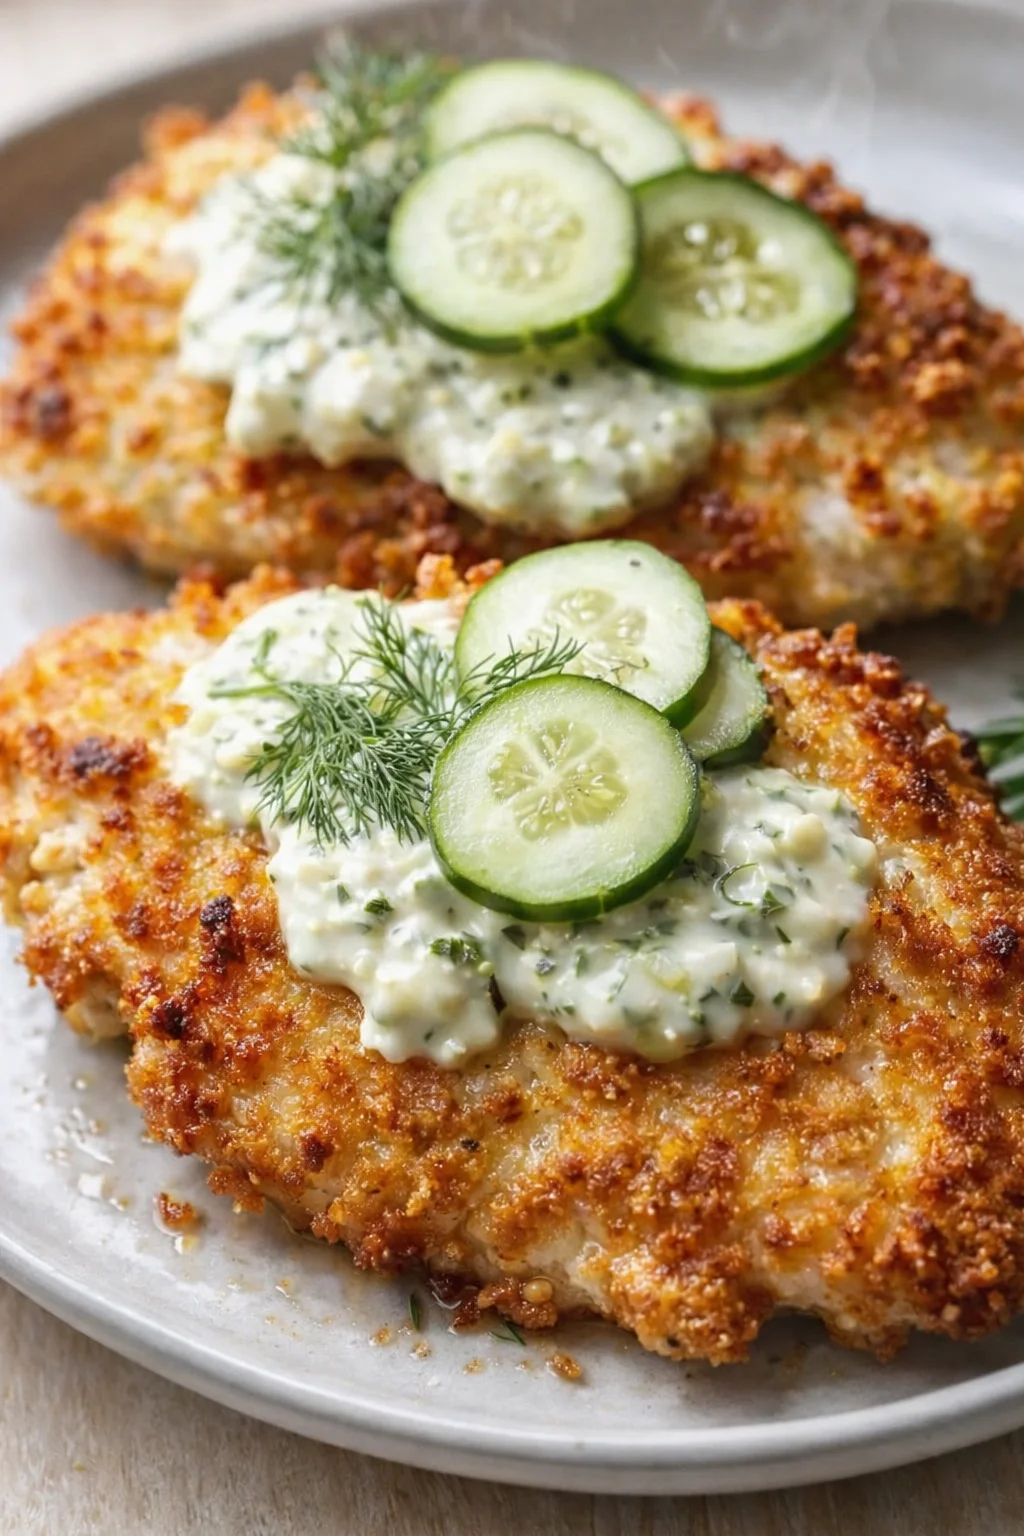
Get ready to find your new go-to for fried chicken that’s bursting with flavor! This Crispy Dill Pickle Parmesan Chicken is an absolute winner — a straightforward recipe that delivers juicy, tender chicken cutlets wrapped in a crackling, golden crust. The magic happens when you soak the chicken in dill pickle juice, which acts like a briny tenderizer, adding a hint of tang that’s subtle but unforgettable. Then you’ll coat each piece in a delicious Parmesan and seasoned breadcrumb mix, making this pickle brined chicken a total family crowd-pleaser.
Perfect for those busy weeknight dinners, a simple yet impressive easy chicken recipe for your family, or even serving guests, this crispy chicken breast has all the hallmarks of a restaurant dish but comes together with real-home-cook ease. Whether you pan-fry, bake, or air-fry, you’ll enjoy that gorgeous crunch outside paired with irresistibly juicy chicken inside every single time.
This Crispy Dill Pickle Parmesan Chicken is a total game-changer! Brined in dill pickle juice to lock in juicy tender goodness, then coated in a crunchy Parmesan breadcrumb crust and cooked to perfection. It’s juicy, flavorful, and crispy all at once — a dinner sure to impress.
Prep Time 15 minutes mins
Cook Time 15 minutes mins
Total Time 1 hour hr
Course Dinner, Main Dish
Cuisine American, Comfort Food
Servings 4 cutlets
Calories 460 kcal
Equipment
- Shallow dishes
- Large skillet
- Wire Rack
- Tongs
Ingredients
- 4 boneless, skinless chicken breasts
- 1 cup dill pickle juice (from a jar of pickles)
- 1 cup seasoned breadcrumbs
- 1/2 cup grated Parmesan cheese
- 1/2 cup all-purpose flour
- 2 large eggs, whisked
- 1 tsp garlic powder
- 1 tsp onion powder
- 1/2 tsp paprika
- salt and pepper, to taste
- cooking oil, for frying
Instructions
- Place chicken breasts in a shallow dish or zip-top bag. Pour the dill pickle juice over the chicken so it’s completely covered. Refrigerate and let it marinate for 30 minutes to 2 hours. This brine really works wonders by tenderizing the meat and giving it a subtle tang.
- Next, set up your breading station with three shallow dishes: one with the flour mixed with garlic powder, onion powder, paprika, salt, and pepper; one with the whisked eggs; and one with the Parmesan mixed with the breadcrumbs.
- Remove the chicken from the brine and gently pat dry with paper towels — this is key for the coating to stick. Dredge each piece first in the seasoned flour, then dip into the egg, and finally press it into the breadcrumb-Parmesan mix until it’s fully coated.
- Heat about 1/2 inch of oil in a large skillet over medium-high heat. When the oil reaches 350°F, carefully add the chicken breasts. Fry for 5 to 7 minutes on each side until they’re a beautiful golden brown and cooked through (internal temp should reach 165°F).
- Lift the chicken out and place it on a wire rack to drain excess oil—this keeps the crust crisp. Let it rest a few minutes before serving hot and crispy!
Notes
If you want a lighter option, try baking or air-frying the chicken instead of pan-frying — check the FAQs below for details.
Keyword crispy chicken, fried chicken, parmesan chicken, pickle brined chicken
Welcome! You’re about to whip up one of the most rewarding weeknight dinners: Crispy Dill Pickle Parmesan Chicken. Picture juicy chicken breasts soaked in dill pickle juice, locking in moisture and a subtle tang, then coated in a Parmesan-and-breadcrumb crust that bakes or fries to golden perfection. It’s familiar comfort food done with a smart twist, leaving you with reliably tender and tasty chicken every time.
This recipe is simple and flexible. Stick with classic pan-frying for the crispiest skin, or opt for baking or air-frying for a lighter meal with less oil. The whole process runs about an hour, including the brine, and serves four — perfect for family meals, batch cooking, or serving friends.
Here’s what you’ll find below:
- A short list of pantry-friendly ingredients (including that jar of pickle juice you might usually toss)
- Easy-to-follow steps for brining, coating, and cooking your chicken
- A bonus creamy pickle-ranch Parmesan sauce to take things to the next level
- Helpful tips, swap ideas (air fryer/oven methods), storage info, and answers to your burning questions
Keep reading and you’ll have crispy, juicy chicken on your table before you know it!
Why It’s So Tender and Crispy
This pickle brined fried chicken is a must if you love crispy, juicy chicken with a punch of flavor.
- Incredibly Juicy and Tender: Dill pickle juice is the secret star! The acidity in the brine softens the chicken fibers, making your meat juicy and tender every time. It’s exactly what gives Chick-fil-A chicken that melt-in-your-mouth quality.
- Perfectly Crispy Crust: A three-step breading method finished off with a cheesy Parmesan breadcrumb coating gives you a crispy, golden crust that looks and tastes just like restaurant fried chicken.
- Packed with Flavor: From the tangy brine to the spiced crust featuring garlic powder, onion powder, and paprika, every bite is full of savory goodness.
- Quick and Easy: Don’t be fooled by the gourmet taste — this 30-minute chicken recipe is straightforward and perfect for busy weeknights.
- Multiple Cooking Methods: Whether pan-frying, baking, or air-frying, this versatile chicken breast recipe fits your kitchen and lifestyle.
- Budget-Friendly: Uses simple, affordable ingredients and turns ordinary chicken breasts into a special meal that’s both tasty and wallet-friendly.
This Crispy Dill Pickle Parmesan Chicken recipe combines the viral sensation of pickle brined chicken (hello, Chick-fil-A!) with the cozy familiarity of classic Italian-American Parmesan chicken. The result? Restaurant-quality fried chicken you can make right at home with basic ingredients and simple steps.
The pickle juice brine is the real game-changer here. It’s a smart zero-waste way to use that leftover pickle juice—especially if you make your own sweet and spicy dill pickles—and it naturally tenderizes and seasons the chicken. Paired with the crispy Parmesan coating, you get amazing layers of flavor and texture, making it one of the best easy chicken breast recipes you’ll turn to over and over.
Whether you have picky eaters who love chicken nuggets, want to impress guests with a gourmet touch, or just want quick dinners without sacrificing flavor, this recipe won’t let you down. The choice of pan-frying, air-frying, or oven-baking means you can make it your own.
Essential Ingredients

- 4 boneless, skinless chicken breasts
- 1 cup dill pickle juice (from a jar of pickles)
- 1 cup seasoned breadcrumbs
- 1/2 cup grated Parmesan cheese
- 1/2 cup all-purpose flour
- 2 large eggs, whisked
- 1 tsp garlic powder
- 1 tsp onion powder
- 1/2 tsp paprika
- salt and pepper, to taste
- cooking oil for frying (vegetable, canola, or peanut oil are ideal)
- ½ cup mayonnaise
- ¼ cup sour cream or plain Greek yogurt
- 1-2 finely chopped dill pickles (or cornichons)
- 1 tablespoon fresh chopped dill (or 1 teaspoon dried dill)
- 1 minced garlic clove
- ¼ cup pickle brine (from the jar)
- Pinch of salt and pepper to taste
- Optional: A splash of hot sauce, chopped chives, or a squeeze of Dijon mustard
Brine, Breading, and Cooking
- Pound chicken breasts to an even thickness of about 1/2 inch.
- Place chicken in a shallow dish or zip-top bag, pour dill pickle juice over to fully cover, and refrigerate 30 minutes to 2 hours.
- Mix flour with garlic powder, onion powder, paprika, salt, and pepper in one shallow dish.
-
Place whisked eggs in a second shallow dish.

- Combine seasoned breadcrumbs and grated Parmesan in a third shallow dish.
- Remove chicken from the brine and pat completely dry with paper towels.
- Dredge each breast in the seasoned flour, shaking off excess.
-
Dip each floured piece into the whisked eggs.

- Press each piece firmly into the breadcrumb-Parmesan mixture until fully coated.
- Pour about 1/2 inch of cooking oil into a large heavy skillet and heat over medium-high until the oil reaches 350°F.
- Carefully add breaded chicken to the hot oil without crowding and fry 5–7 minutes per side until golden brown and the internal temperature reaches 165°F.
-
Transfer fried chicken to a wire rack set over a baking sheet to drain excess oil.

- Let the chicken rest 3–5 minutes.
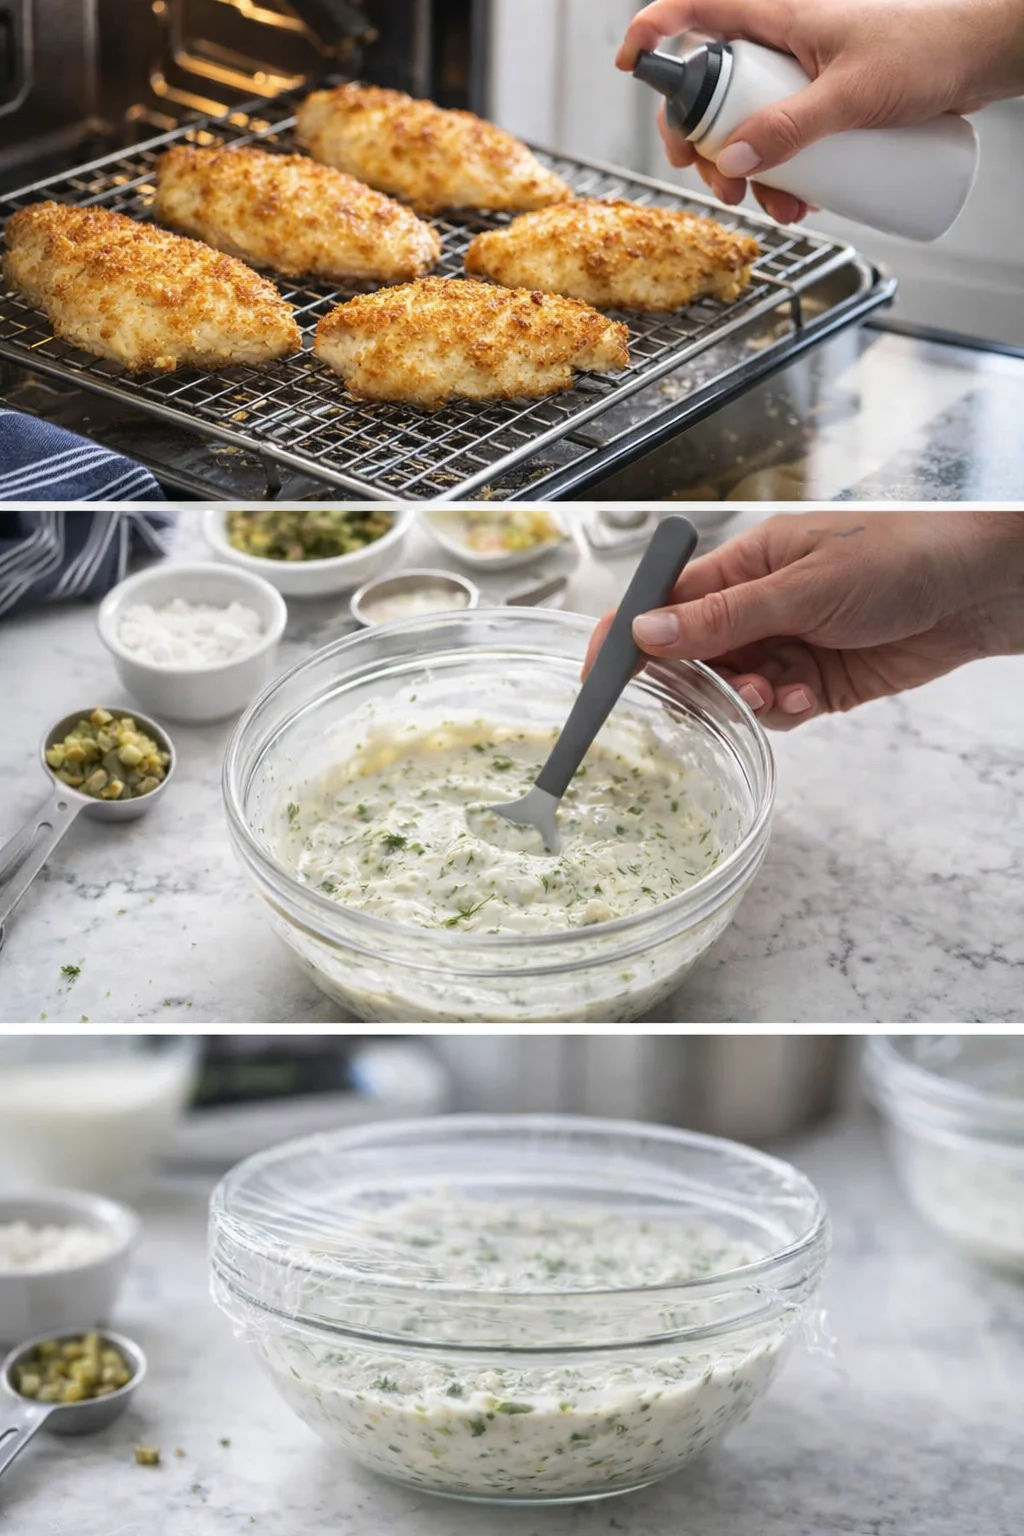
- Air fryer alternative: preheat air fryer to 375°F for 3–5 minutes.
- Spray both sides of breaded chicken with cooking spray, place in a single layer in the air fryer basket, and air-fry 15–20 minutes, flipping halfway, until golden and 165°F.
-
Oven alternative: preheat oven to 400°F (200°C).

- Arrange breaded chicken on a wire rack over a baking sheet, spray all over with cooking spray, and bake 20–25 minutes, flipping halfway, until golden and 165°F (optionally broil 2–3 minutes at the end for extra crispiness).
- Optional sauce: whisk together mayonnaise, sour cream (or Greek yogurt), minced garlic, finely chopped pickles, chopped dill (or dried dill), pickle brine, salt, and pepper until smooth.
-
Refrigerate the sauce, covered, at least 15–30 minutes to let flavors meld.
How to Get Extra-Crispy Chicken
Here are some quick tips and things to watch out for to get that perfect crunch:
- Pat chicken completely dry once it’s out of the pickle brine. Wet chicken won’t let your breading stick and can make the crust soggy.
- Pound to even thickness: Flatten chicken breasts to about ½ inch thick so they cook evenly and finish at the same time.
- Don’t over-brine: Between 30 minutes and 2 hours is ideal. Going longer (over 4 hours) risks salty, mushy chicken.
- Discard the used brine: Don’t reuse pickle juice that had raw chicken in it — it could spread bacteria. Always use fresh pickle juice for marinating.
- Maintain oil temp: Keep your frying oil around 350°F, checking with a thermometer if you can. Too low and the chicken soaks oil; too high and the crust burns before it’s cooked inside.
- Don’t crowd the pan: Fry in batches so the oil stays hot and the coating stays crispy.
- Press the crumbs firmly: When coating the chicken, press the Parmesan breadcrumb mix well so the crust sticks and cooks up sturdy.
- Use Panko for extra crunch or a breadcrumb mix that includes crushed cornflakes for a super crispy texture.
- Air fryer / oven tips: Preheat your air fryer or oven, arrange pieces in a single layer, and spray generously with cooking spray. Spray again halfway for the best crispiness.
- Drain on wire racks: Skip paper towels after frying. Use a wire rack so steam escapes and the bottom stays crispy.
- Reheat carefully: Warm leftovers in a 375°F oven or air fryer to bring back crispness. Avoid microwaving, which makes the coating soggy.
- Make ahead / freezing: You can bread chicken up to 4 hours in advance and keep refrigerated. Cooked chicken freezes well for 2 months. For raw breaded pieces, flash-freeze on a tray, then store in bags and thaw overnight before cooking.
- Pickle juice choice: Refrigerated dill pickle juices like Claussen or Grillo’s work best for the perfect mix of vinegar and salt. Avoid sweet pickle juices if you want that classic dill flavor.
- Adjust cook time: Thicker breasts or bone-in pieces will need longer cooking. Use a meat thermometer — aim for 165°F internal temperature.
Alternate Cooking Methods and Swaps

If you’re after a healthier, less messy way to make this crispy chicken breast, the air fryer is a fantastic choice!
Air Fryer Instructions:
- Brine and bread your chicken just like the pan-fry method.
- Preheat your air fryer to 375°F for 3 to 5 minutes.
- Spray both sides of the breaded chicken liberally with cooking spray to get that golden crunch.
- Place your chicken in the air fryer basket in a single layer, avoiding crowding. Cook in batches if needed.
- Air fry for 15-20 minutes, flipping halfway, until golden brown and cooked to 165°F internally.
- Rest your chicken 5 minutes before enjoying.
Air Fryer Pro Tips:
- Don’t skip the cooking spray — it’s what gives that crispy exterior.
- Use a meat thermometer to know when it’s perfectly cooked.
- For extra crunch, give the chicken a quick spray after flipping.
This air fryer chicken breast method cuts oil use by 70%, making it a go-to healthy dinner recipe without sacrificing texture.
Want hands-off cooking or need to feed more folks? The oven is your friend for this baked chicken recipe.
Oven-Baked Instructions:
- Preheat your oven to 400°F (200°C).
- Brine and bread the chicken as usual.
- Arrange the pieces on a wire rack over a baking sheet. This keeps the bottom crispy by letting air circulate.
- Spray the chicken all over with cooking spray.
- Bake for 20-25 minutes, flipping halfway, until golden and cooked through to 165°F.
- Optional: Broil for the last 2-3 minutes to amp up crispiness. Watch carefully to avoid burning.
Oven-Baking Advantages:
- You can cook multiple chicken breasts at once
- More hands-off than frying
- Less mess and splatter on your stove
- Still gets wonderfully crispy results
This oven-fried chicken method is perfect for easy family dinners when you’re cooking for a crowd.
This versatile chicken dinner pairs beautifully with so many sides. Here are some favorites to try:
Classic Comfort Sides:
- Mashed Potatoes: Creamy and dreamy mashed potatoes with that crispy chicken? Yes, please!
- Mac and Cheese: The ultimate comfort duo for when you’re craving indulgence
- Coleslaw: Its tangy crunch contrasts the savory chicken perfectly
- Biscuits: Fluffy buttermilk biscuits soak up every last drop of sauce
Lighter, Healthier Options:
- Green Beans: Simply sautéed or roasted they add fresh green goodness
- Caesar Salad: Crisp romaine with zesty dressing balances out the richness
- Roasted Vegetables: Brussels sprouts, asparagus, or broccoli bring color and nutrition (try Roasted Parmesan Asparagus)
- Corn on the Cob: Sweet and simple, a classic chicken side dish
Starchy Favorites:
- French Fries: Because what’s fried chicken without fries?
- Sweet Potato Fries: A slightly healthier option with a touch of natural sweetness
- Rice Pilaf: Fluffy, simple rice that soaks up all those tasty flavors
- Potato Salad: The perfect picnic side for that Southern fried chicken vibe
Creative Serving Ideas:
Chicken Sandwiches: Slice your crispy chicken and layer on toasted brioche buns with lettuce, tomato, pickles, and that dreamy dill pickle sauce for the best chicken sandwich recipe around.
Chicken Salad: Chop and serve over a bed of greens with cherry tomatoes and cucumbers dressed with our Healthy Dill Pickle Cottage Cheese Ranch for a lighter lunch option.
Chicken Wraps: Roll up slices of chicken with lettuce, cheese, and pickle sauce in a flour tortilla — perfect for quick, tasty lunches.
Chicken and Waffles: Serve crispy chicken atop waffles with maple syrup drizzled over for a sweet and savory brunch treat.
Storing and Reheating Tips
Storing Cooked Chicken:
Keep any leftovers in an airtight container in the fridge for up to 4 days. To keep that crispy texture, reheat in the oven or air fryer following the methods above — avoid microwaving to prevent sogginess.
Meal Prep:
This recipe is a meal prep superstar. Bread your chicken up to 4 hours beforehand and refrigerate until ready to cook, or fully cook the chicken ahead and reheat for quick dinners during the week. Sliced cold chicken also makes for delicious salads (like Dill Pickle Chicken Salad) and wraps.
Freezing:
Freeze cooked chicken wrapped tightly in plastic wrap then stored in freezer bags, good for up to 2 months. Thaw overnight in the fridge before reheating, or shred and add to soups like Lemon Chicken Orzo Soup.
Common Questions Answered
Q: Does the chicken taste strongly of pickles?
A: Not at all! The pickle juice mainly acts as a tenderizing brine. It adds just a subtle, pleasant tang that complements the seasoned crust, but the chicken never tastes overly pickley. Most people just notice how remarkably juicy and flavorful it is without pinpointing the pickle juice.
Q: Can I bake or air-fry this chicken instead of pan-frying?
A: Absolutely! For a lighter version, baking or air-frying works great.
- To Bake: Place breaded chicken on a wire rack over a baking sheet, spray well with oil, and bake at 400°F (200°C) for 20-25 minutes, flipping halfway. Cook until crispy and internal temp reaches 165°F.
- To Air-Fry: Spray breaded chicken with cooking spray, air fry at 375°F (190°C) for 15-20 minutes, flipping halfway for even crispness. See air fryer tips above!
Q: What should I serve with this Crispy Dill Pickle Parmesan Chicken?
A: This versatile chicken breast dinner is lovely with comforting mashed potatoes and green beans, on a brioche bun as a classic chicken sandwich, or sliced over a fresh salad like Lemon Parmesan Kale Salad. Check the “Best Side Dishes” section for plenty of great ideas!
Q: Can I prepare this ahead of time?
A: Yes! While the chicken tastes best fresh, you can bread it up to 4 hours in advance and keep in the fridge before cooking. Marinating overnight in pickle juice is also fine for extra tender chicken and saves time on a busy night.
Q: How long should chicken marinate in pickle juice?
A: Aim for at least 30 minutes and up to 4 hours max. One to two hours is ideal for tenderness without over-salting or mushy texture because pickle juice is very concentrated.
Q: Can I use chicken thighs instead of breasts?
A: Yes! Bone-in or boneless, skinless chicken thighs are a great alternative. They’re more forgiving and juicy, but might need a few extra minutes to cook fully.
Q: What kind of pickles should I use for the brine?
A: Use dill pickles juice for that classic tangy flavor. Refrigerated brands like Claussen or Grillo’s tend to have the best balance of salt and vinegar. Avoid sweet or bread-and-butter pickle juices if you want a true dill flavor. Homemade works too—try this spicy garlic dill pickle recipe if you want extra punch.
Q: Can I freeze this chicken?
A: Yes! Cooked, cooled chicken can be frozen up to 2 months. Reheat in the oven to keep it crispy. Don’t microwave or you’ll lose that crunch.
Q: How do I reheat leftovers while keeping them crispy?
A: Reheat in a 375°F oven on a wire rack for 10-15 minutes or use the air fryer at 350°F for 5-7 minutes. This brings the crispness back. Avoid microwaving, which softens the crust.
Q: Is this recipe gluten-free?
A: Not as written since it uses flour and breadcrumbs. But you can swap in gluten-free all-purpose flour and breadcrumbs or crushed gluten-free cereal for a gluten-free version that tastes just as good.
Q: Can I make this without eggs?
A: Sure! Use buttermilk or a mixture of ¼ cup milk plus a tablespoon of vinegar as an egg substitute. The coating won’t stick quite as tightly but it still works well.
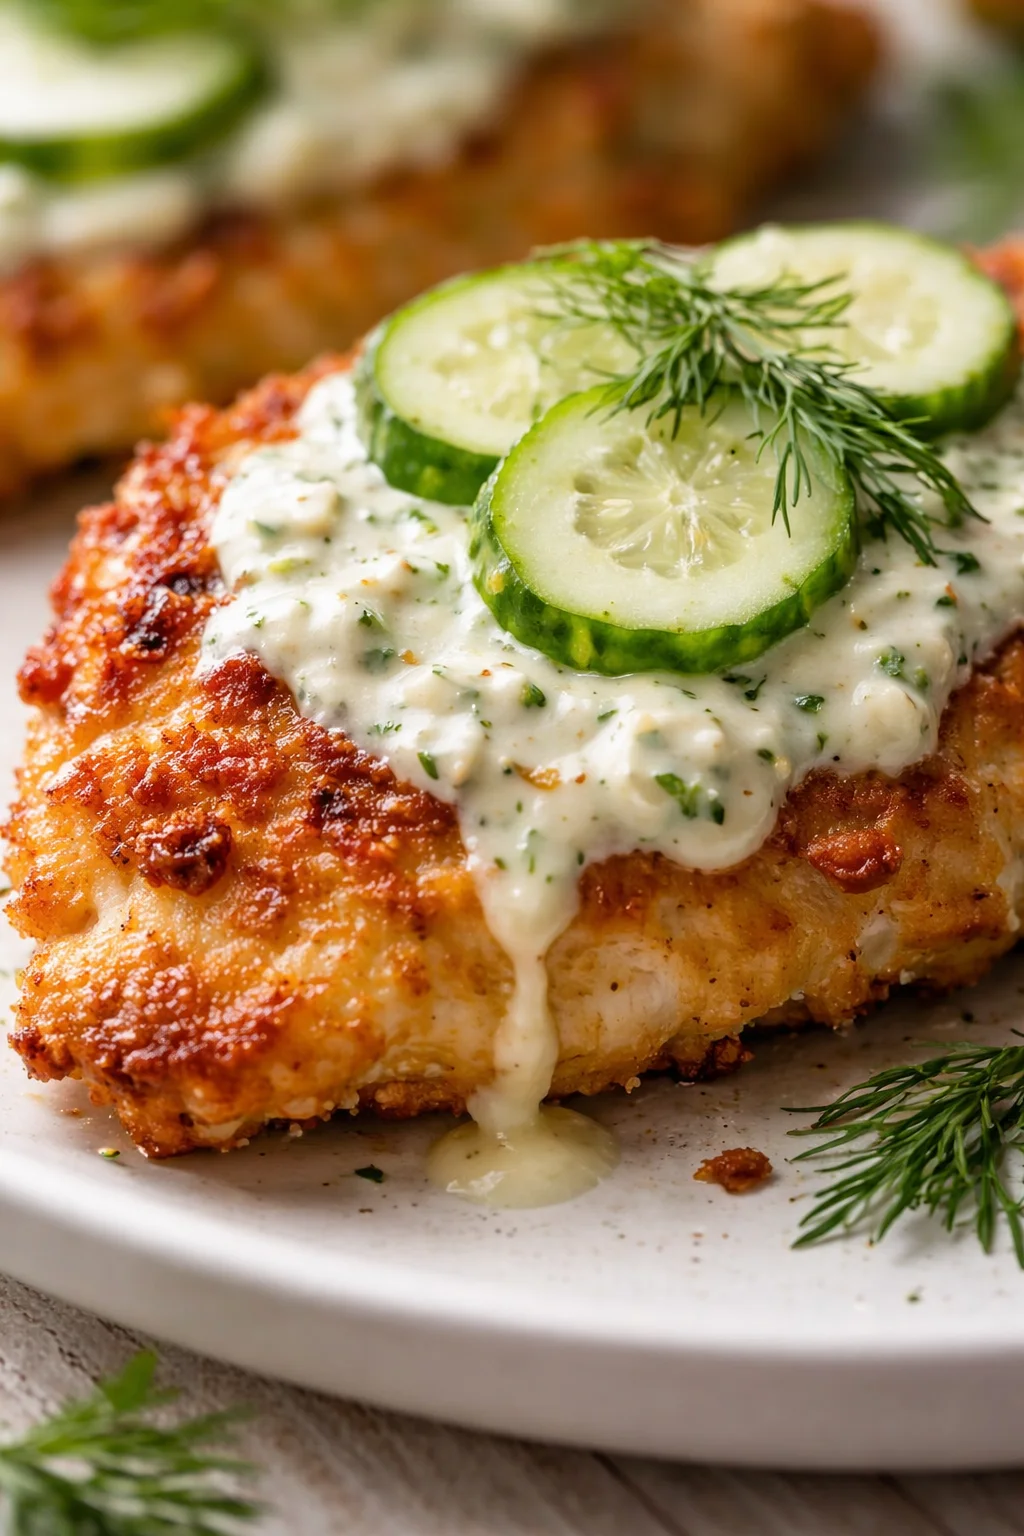
Juicy, tender chicken breasts marinated in dill pickle juice, coated in a Parmesan breadcrumb crust, and cooked to golden perfection. Versatile cooking methods include pan-frying, baking, or air-frying, resulting in a flavorful and crispy dinner option.
- Total Time: 1 hour
- Yield: 4 cutlets 1x
Ingredients
- 4 boneless, skinless chicken breasts
- 1 cup dill pickle juice (from a jar of pickles)
- 1 cup seasoned breadcrumbs
- 1/2 cup grated Parmesan cheese
- 1/2 cup all-purpose flour
- 2 large eggs, whisked
- 1 tsp garlic powder
- 1 tsp onion powder
- 1/2 tsp paprika
- Salt and pepper, to taste
- Cooking oil for frying (vegetable, canola, or peanut oil recommended)
Instructions
- Place chicken breasts in a shallow dish or zip-top bag. Pour dill pickle juice over chicken to completely cover. Refrigerate and marinate for 30 minutes to 2 hours.
- Set up three shallow dishes: mix flour with garlic powder, onion powder, paprika, salt, and pepper in the first; whisk eggs in the second; mix Parmesan cheese with seasoned breadcrumbs in the third.
- Remove chicken from brine and pat dry with paper towels. Dredge each piece first in the seasoned flour, then dip into the whisked eggs, and finally press into the Parmesan breadcrumb mixture to fully coat.
- Heat about 1/2 inch of cooking oil in a large skillet over medium-high heat to 350°F. Carefully add chicken breasts and fry 5 to 7 minutes per side until golden brown and cooked through (internal temperature 165°F).
- Place cooked chicken on a wire rack to drain excess oil and keep crust crisp. Let rest for a few minutes before serving hot.
Notes
For a lighter version, bake or air-fry the chicken instead of pan-frying., When baking, preheat oven to 400°F, arrange chicken on wire rack over baking sheet, spray with cooking spray, and bake for 20-25 minutes, flipping halfway. Optionally broil for 2-3 minutes for extra crispiness., For air frying, preheat air fryer to 375°F, spray breaded chicken with cooking spray, air fry 15-20 minutes flipping halfway, then rest 5 minutes., Pat chicken dry after brining to ensure coating sticks and stays crisp., Avoid marinating in pickle juice longer than 4 hours to prevent overly salty taste., Use a thermometer to maintain oil at 350°F for best frying results., Do not crowd the pan during frying. Cook in batches if needed., Store cooked chicken in an airtight container refrigerated up to 4 days; reheat in oven or air fryer to maintain crispiness., Can bread chicken up to 4 hours ahead and refrigerate before cooking., Freezes well for up to 2 months when wrapped properly and thawed overnight before reheating.
- Prep Time: 15 minutes
- Cook Time: 15 minutes
- Category: Dinner, Main Dish
- Cuisine: American, Comfort Food
Nutrition
- Serving Size: 1 cutlet
- Calories: 460 kcal