Rhubarb Jelly • Easy Canning Recipe
“Thanks so much for sharing this gorgeous rhubarb jelly recipe! I made it for my local county fair and it walked away with BOTH 1st Place and Best of Show! Absolutely delicious!” ~Melissa
Making jelly is one of my favorite kitchen projects. I never get tired of watching fresh juice turn into a beautiful, shimmering jelly. What I love too is playing around with new ideas—pretty much any fruit or veggie can become jelly, and it’s extra rewarding when the results are bright, full of flavor, and just plain delicious like this rhubarb version. Rhubarb is perfect for jelly because it’s naturally tart, so it balances all the sugar beautifully.
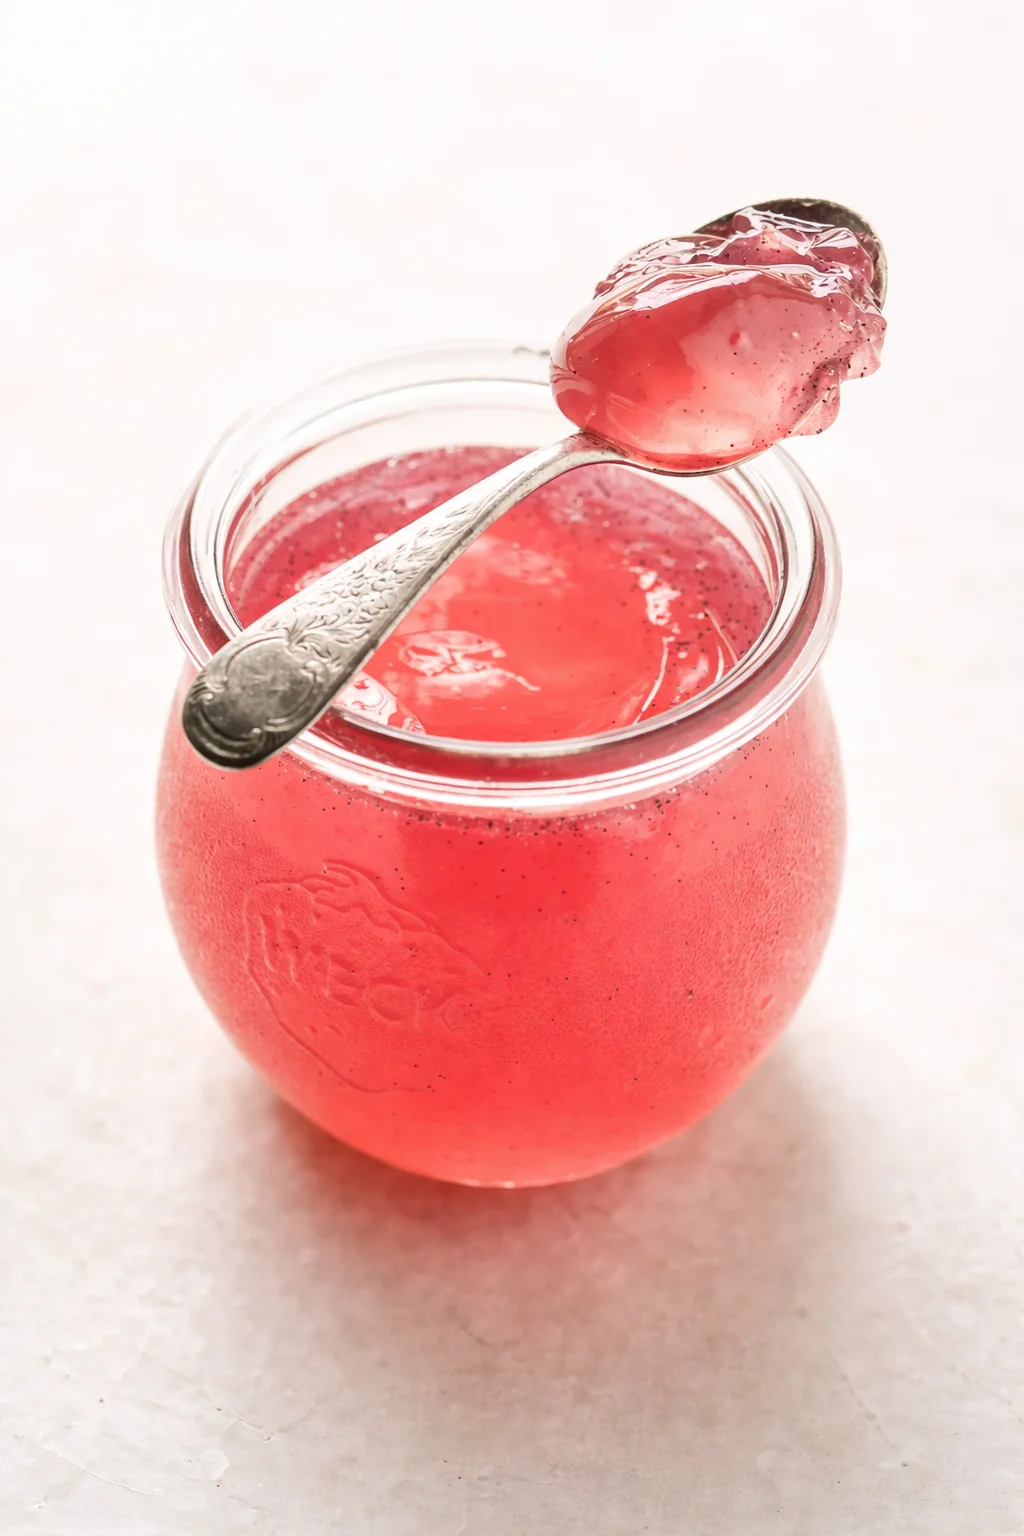
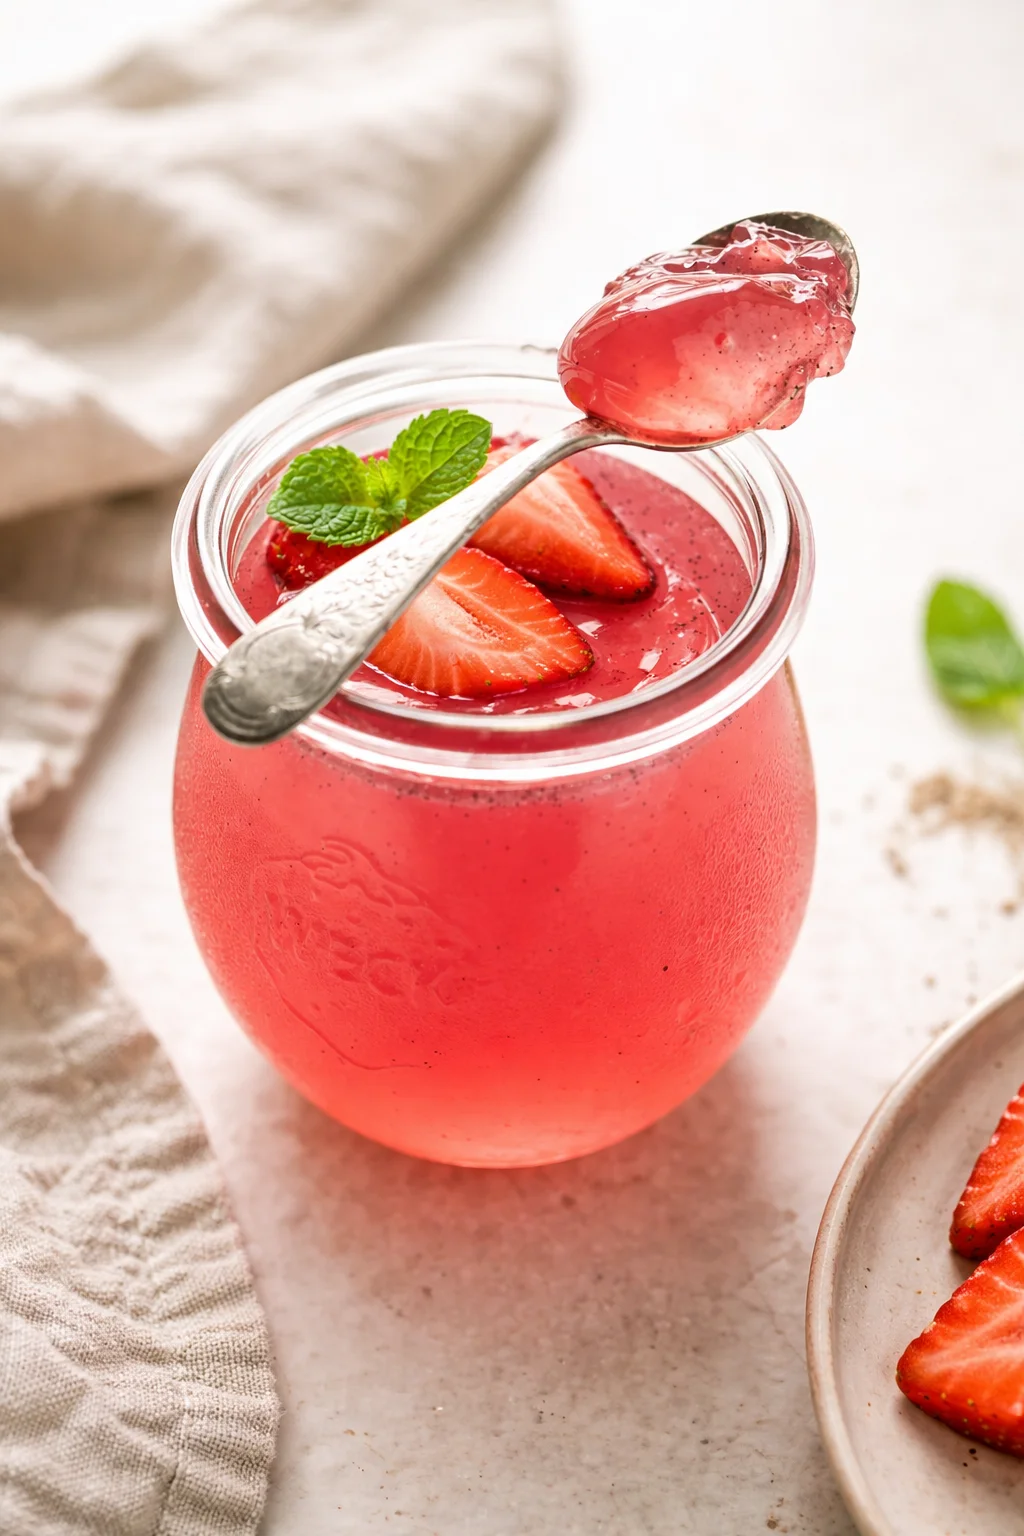
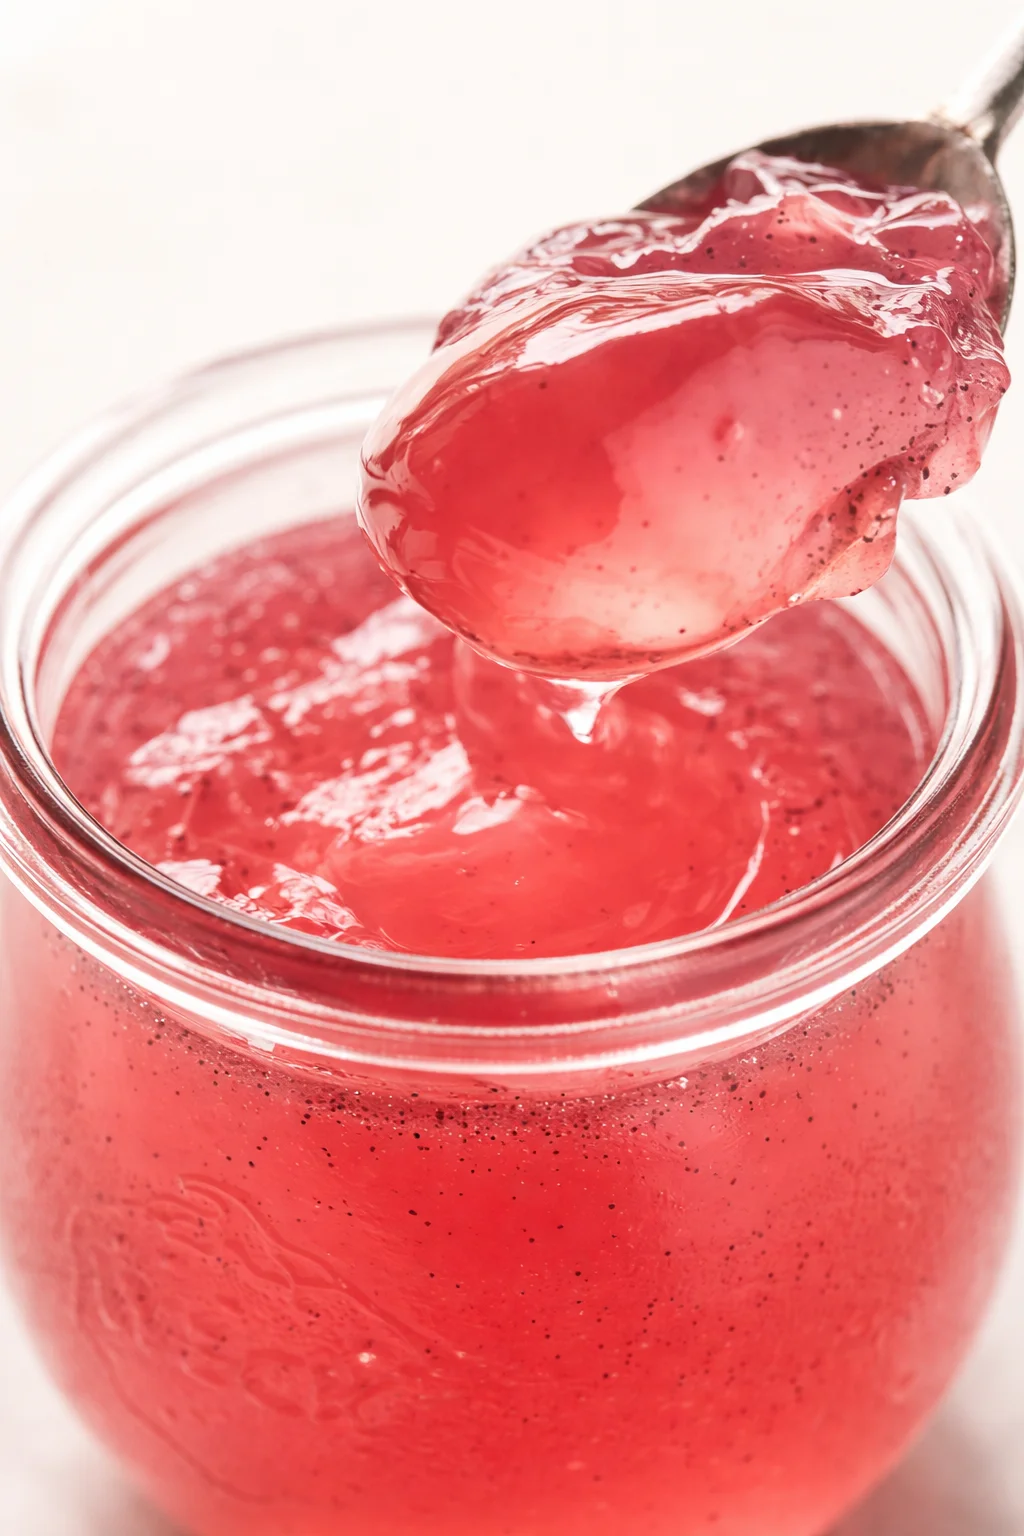
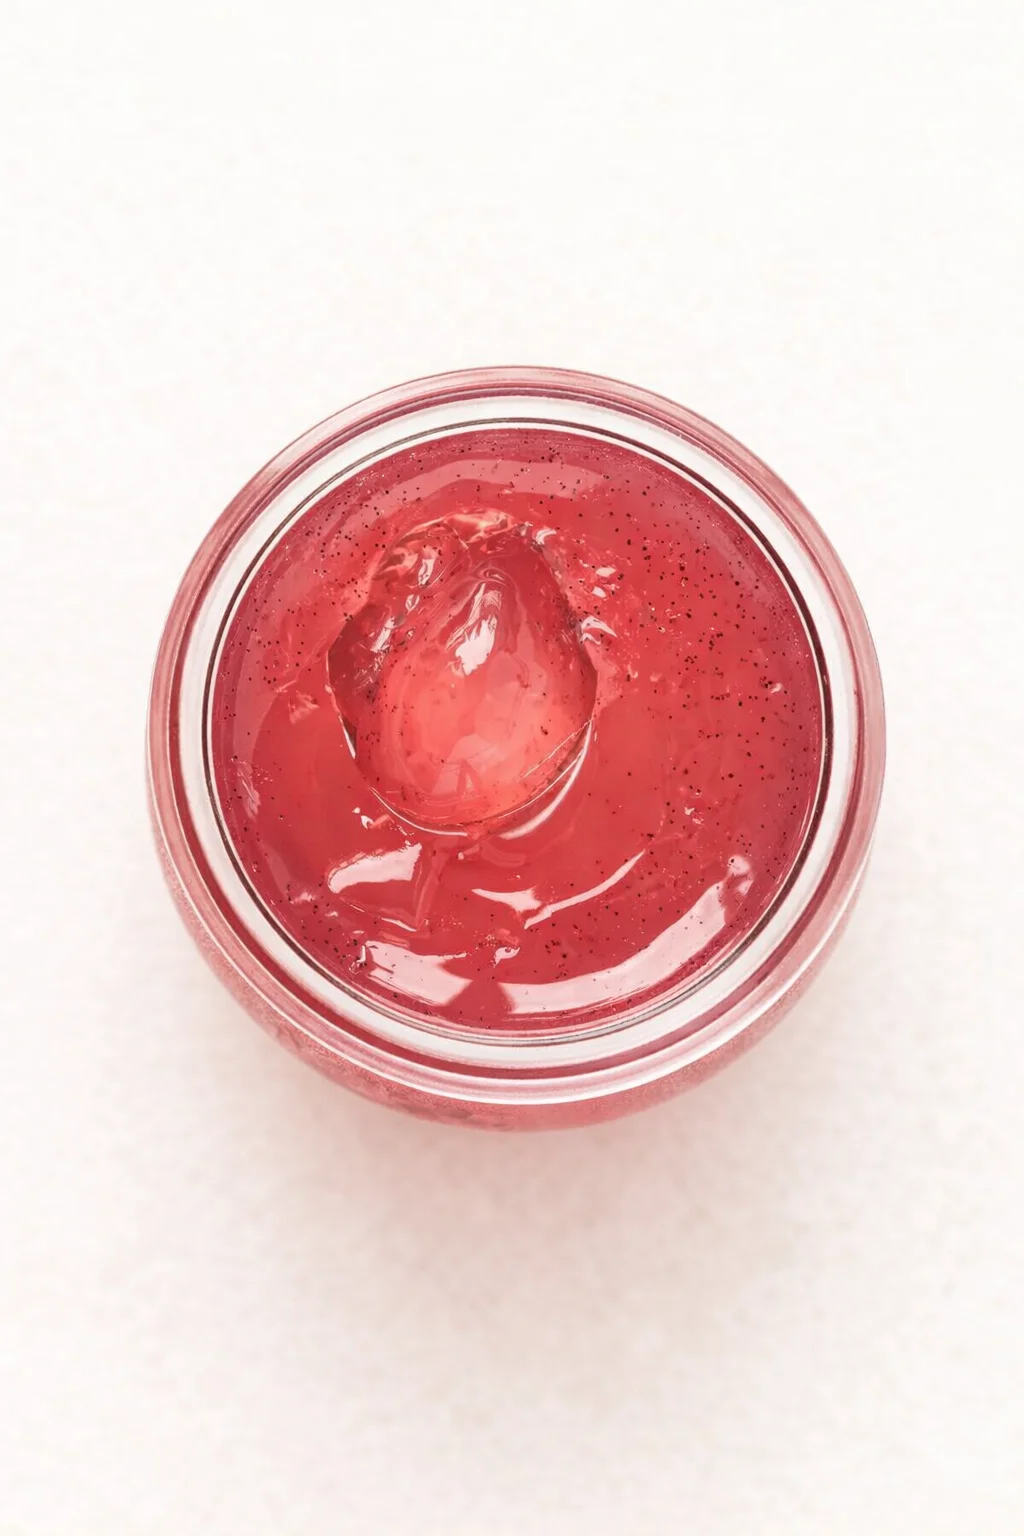
This rhubarb vanilla bean jelly bursts with flavor and comes together quicker than you’d expect. The sharp tang of rhubarb mixes with sweet sugar to create a clear, sparkling jelly that’s dotted with real vanilla bean seeds—a real treat for your toast or sandwiches. It’s made with simple tools, doesn’t demand perfect timing, and the color can vary with your rhubarb but the taste always shines.
- Active prep and cook time: about 30 minutes from start to finish.
- Super versatile: slather it on toast, in peanut or almond butter sandwiches, dollop on yogurt, or brush on roast meats for a glossy finish.
- Lovely as gifts: the small jars look charming on holiday tables or farmer’s markets.
- Flexible storage: you can safely water-bath can the jars or simply freeze smaller portions for later.
What Makes This Jelly Special
If you want a homemade jelly that’s bright, flavorful, and fuss-free, this recipe is just what you need. It taps into rhubarb’s natural tanginess so the end result is sparkling, never overly sweet, and the tiny vanilla specks add a delicious, almost fancy touch. Here’s what keeps me coming back to this recipe again and again:
- Quick & rewarding: You’re only active in the kitchen for about 30 minutes, delivering a gorgeous jelly without taking over your day.
- Easy & forgiving: This method is straightforward and works beautifully with any rhubarb color or thickness. If you’re new to the stalk, see how to prepare, store, freeze, and cook with rhubarb. When you follow the pectin directions, the jelly sets up perfectly every time.
- So many uses: Spread it on everything, from toast to yogurt, or use it as a shiny glaze on pork or chicken—this roasted rhubarb barbecue sauce is a great savory example.
- Looks good as a gift: Those clear jars filled with jewel-like jelly and vanilla seeds look absolutely charming. And yes, they make awesome presents! (See Melissa’s county fair win above.)
- Minimal equipment and options: You just need a blender or food processor and a jelly bag or fine strainer. You can shelf-stabilize with a water bath or stash frozen jars in your freezer.
- Tweak it your way: This recipe is a great base for experimenting—swap pectin types, add berry juices, or a little zing from spices or citrus without changing the simple technique (see variations below).
In a nutshell, it’s speedy, tasty, pretty, and practical—a small-batch project that gives you and your loved ones something truly special.
Ingredients and Tools You’ll Need
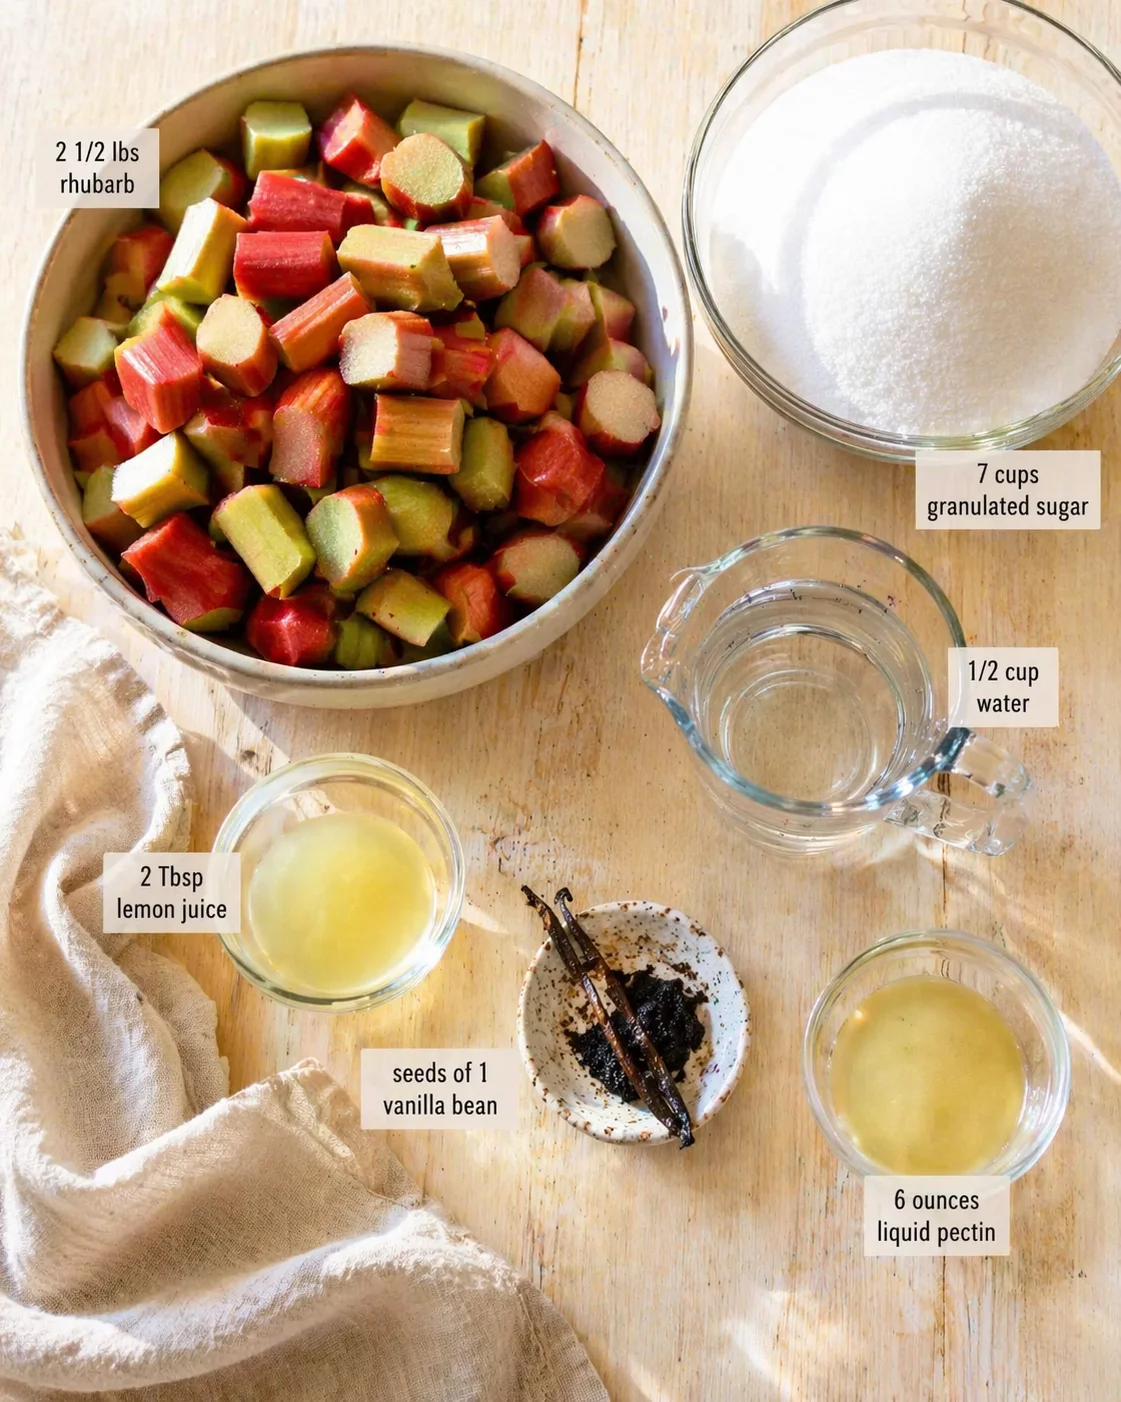
- 2 1/2 lbs rhubarb, washed, trimmed, and sliced
- 1/2 cup water
- 7 cups granulated sugar
- 2 Tbsp lemon juice
- seeds of 1 vanilla bean
- 6 ounces liquid pectin
How to Make and Can the Jelly
- Combine rhubarb and water in a high-speed blender or food processor and blend until smooth, working in batches if needed.
- Pour the rhubarb puree into a fine jelly bag or nut milk bag and hang over a large bowl to drip; avoid squeezing too hard and gently squeeze occasionally until you have about 3 1/2 cups juice.
- If using powdered pectin, whisk 4 tablespoons powdered pectin into the sugar.
-
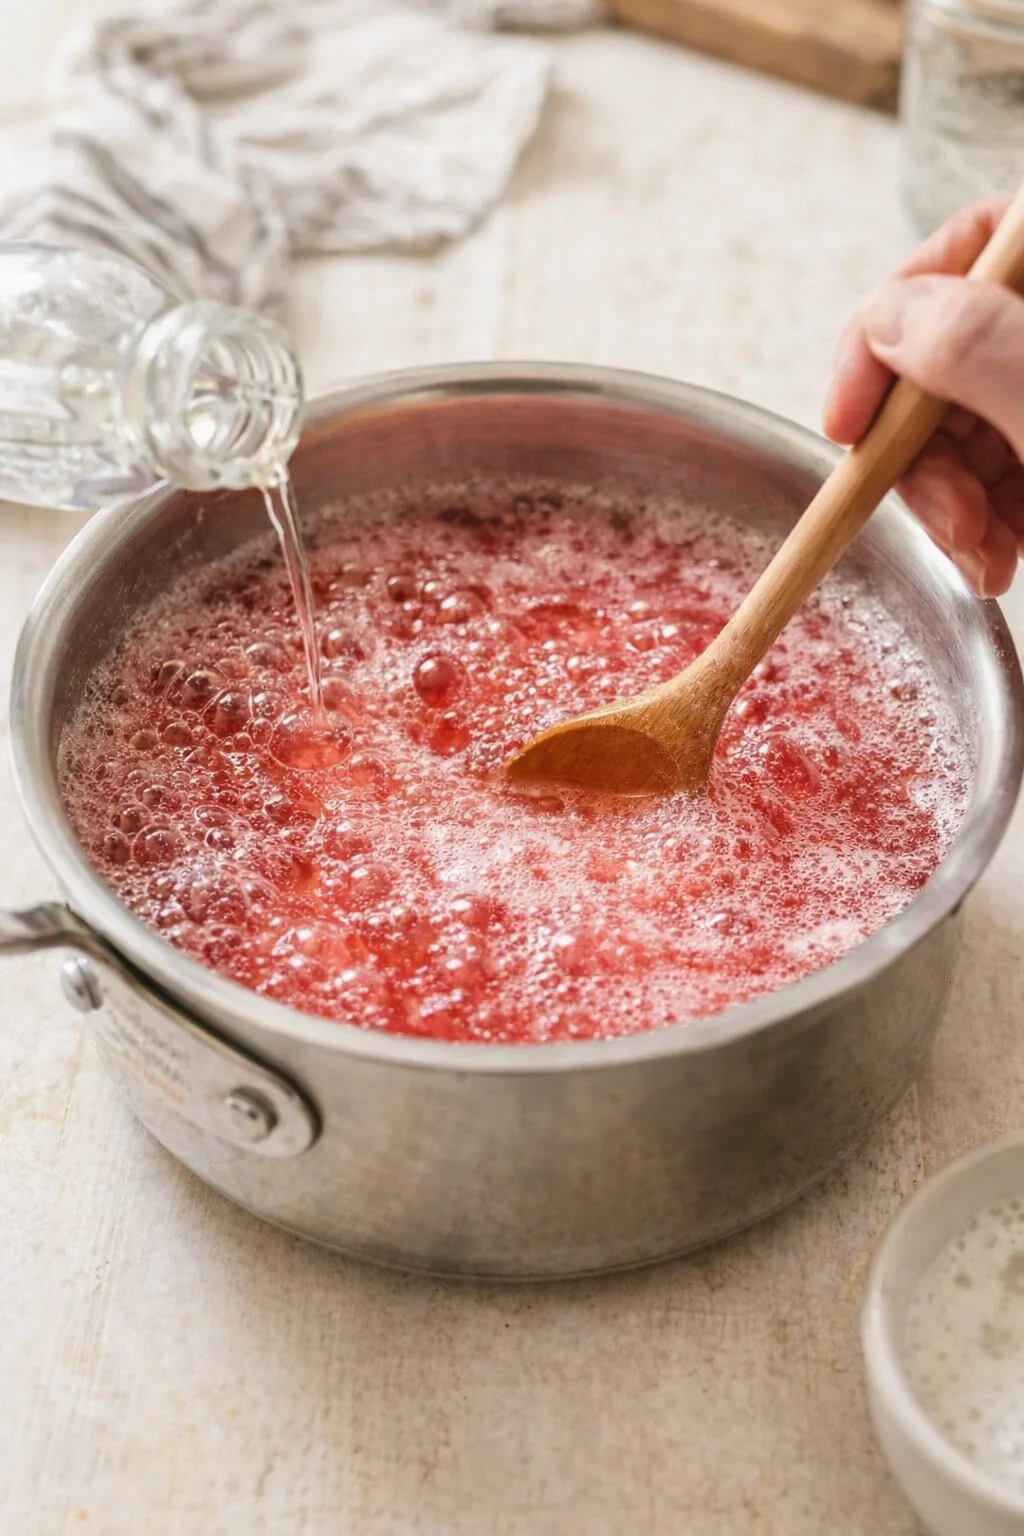
Pour the rhubarb juice into a large stainless steel pot and add the sugar (with powdered pectin if used), lemon juice, and vanilla bean seeds; stir to combine.
- Bring the mixture to a boil over medium heat, stirring almost constantly to dissolve the sugar.
- When it reaches a full rolling boil, boil hard for 3 minutes, stirring gently and watching for foam.
- If using liquid pectin, stir in the liquid pectin, return to a full rolling boil, and boil for 1 minute.
-
Remove the pot from heat and skim off any foam.
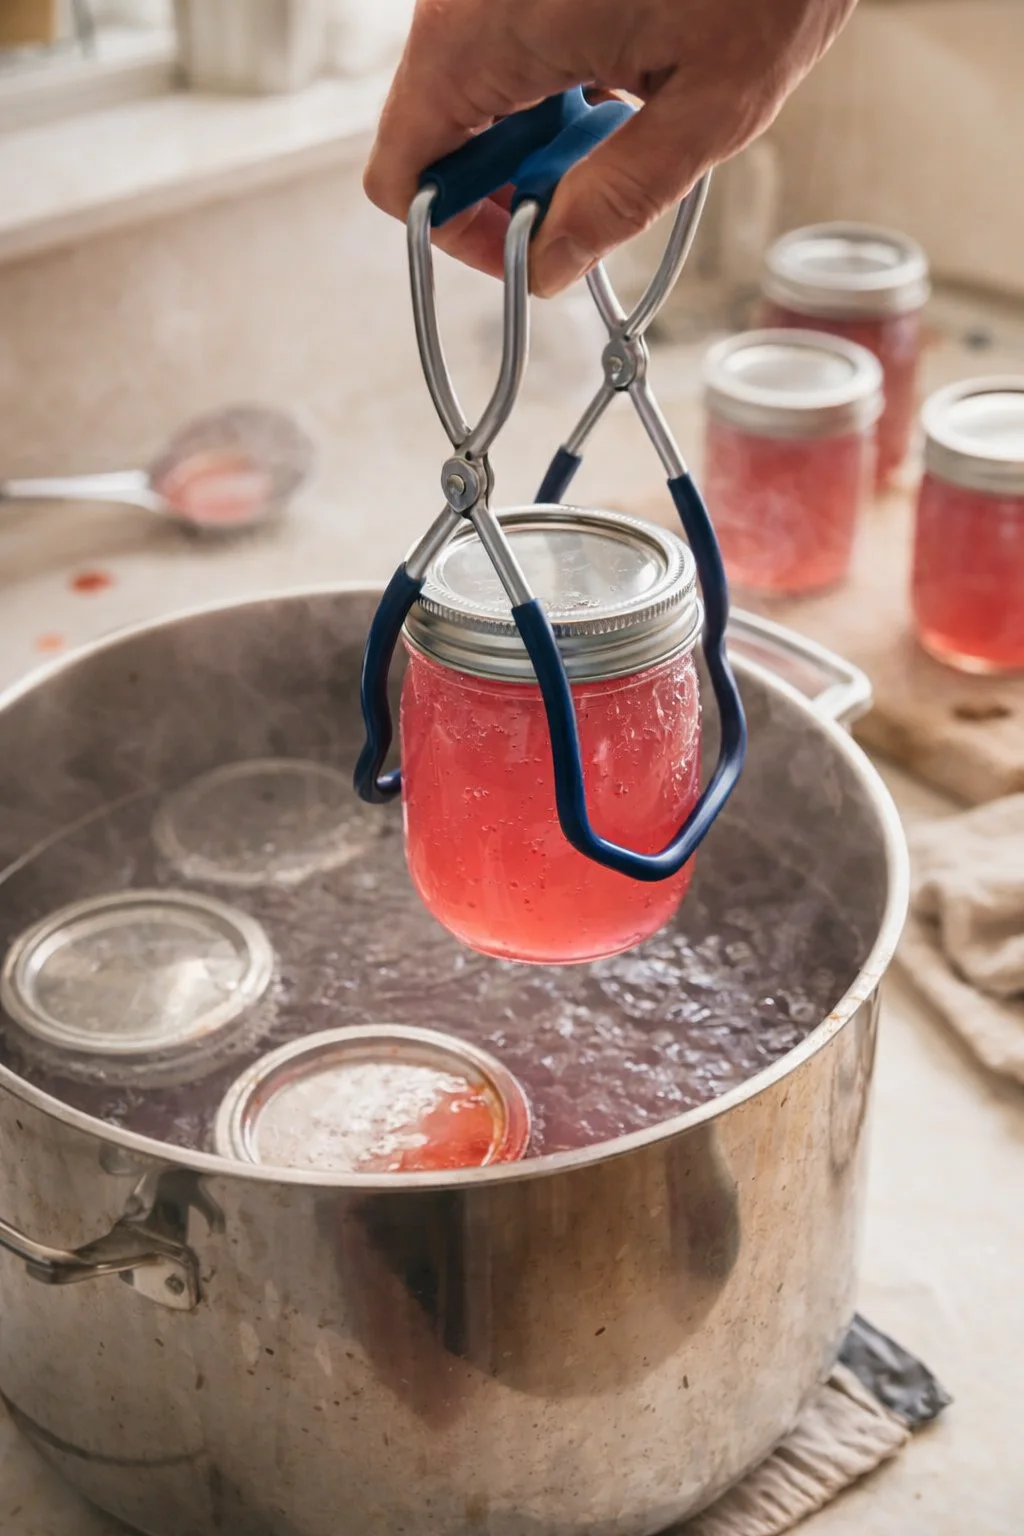
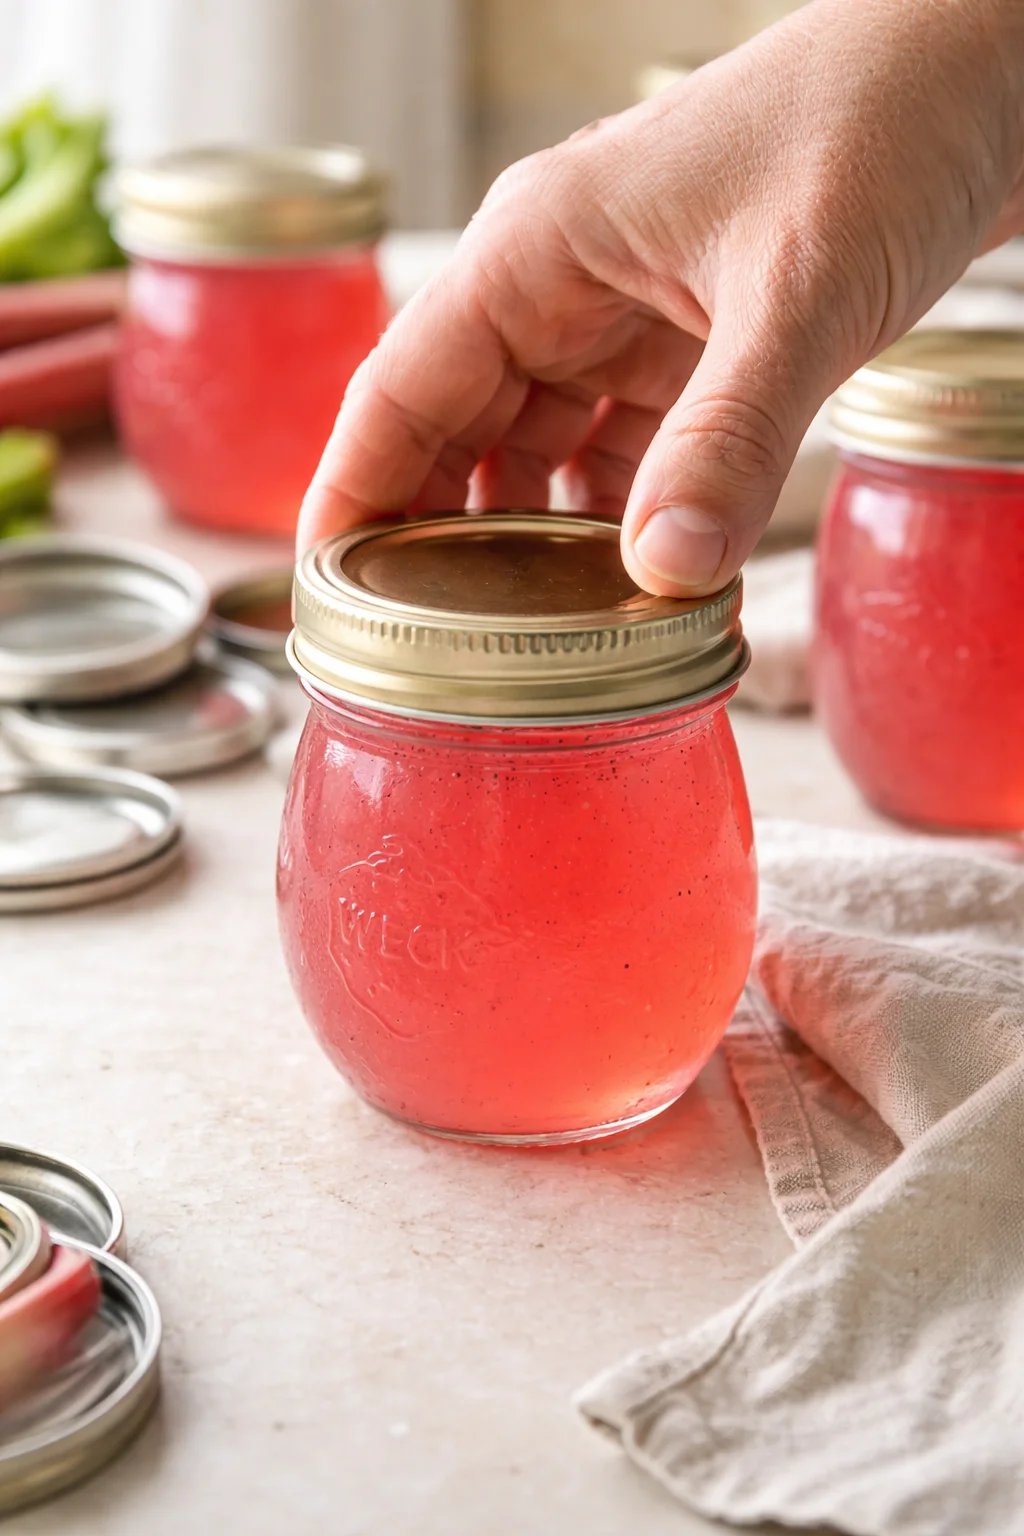
- Pour the hot jelly into sterilized jars, leaving about 1/4 inch headspace.
- Wipe jar rims clean, put on lids, and screw on bands until snug but not overly tight.
- If canning: place jars on a rack in a pot of boiling water so they are covered by at least 1 inch of water, cover, bring the water back to a boil, and process jars for 10 minutes (add 1 minute per 1000 ft altitude).
-
Remove jars from the water and let them cool undisturbed for 12 hours on the countertop away from drafts.
-
If not canning: let the jelly cool, then seal the jars.
Expert Tips for Perfect Texture
These jars not only hold delicious jelly but make such sweet, unexpected gifts for the holidays and beyond. Plus, the jars themselves are just as stunning as the jelly inside!
- Jelly happens when you cook fruit juice with sugar and then add pectin to thicken it.
- Pectin is what creates that perfect gel-like texture we all want in a jelly. Prefer to go pectin-free for small, non-canned batches? Try a rhubarb jam without added pectin to see how gelling can work without commercial pectin.
- Sugar not only sweetens but is also a key player in helping the jelly set properly.
- When you plan to can your jelly, it’s super important to stick to a trusted recipe exactly, because any changes might affect how safe your jelly is to eat later on.
-
If you like experimenting, try making just a small batch to keep refrigerated or frozen—something like a refrigerator-friendly chia seed jam—before risking a big batch for canning.
- This recipe calls for quite a bit of sugar, but it’s well balanced for the rhubarb’s tartness, and it won’t taste overly sweet compared to other jellies you’ve tried. I trust this classic recipe because when it comes to canning, off-the-cuff changes aren’t safe.
- New research shows sugar isn’t actually important for canning safety like we used to think.
- The sugar mainly helps jams and jellies gel, so if you want less sugar, find a “no sugar” or “low sugar” pectin like the one I’ve successfully used in many recipes. Just remember to never create your own canning recipe from scratch—if you want to tweak, refrigerate or freeze your batches instead for safety.
Easy Swaps and Add‑Ins
Want to mix it up but keep the same easy steps and results? Here are some quick swaps and ideas to try. Just remember if you change sugar or pectin amounts and plan to can, stick with a tested method for safety, or skip canning and refrigerate or freeze small portions instead.
- Powdered pectin swap: Use 4 tablespoons powdered instead of liquid pectin. Whisk it into the sugar before mixing with juice (see notes).
- Lower sugar: Use a no-sugar or low-sugar pectin following the package directions. Don’t tweak canning proportions unless following a tested low-sugar recipe; refrigerate or freeze your variations.
- Fruit combos: Blend in other berry juices or purees—strawberry-rhubarb or raspberry-rhubarb are classic. For flavor ratio guidance, see a strawberry rhubarb jam recipe, and test small batches in fridge or freezer before canning to make sure the set and flavor work well.
- Spices & citrus: Add a little fresh grated ginger (1–2 tsp), cardamom (1/2–1 tsp), or citrus zest (1–2 tsp) for a fresh twist. For gentler flavor, add vanilla or other extracts after cooking. Avoid alcohol-based flavorings if canning.
- Vanilla alternatives: No vanilla bean? No problem. Add 1–2 teaspoons vanilla extract after removing from heat for that lovely vanilla boost.
Storage, Freezing, and Sourcing
If you’re lucky enough to have rhubarb growing in your yard, this is the perfect use for it! Rhubarb’s season is short but if you have established plants, they often keep going into summer. You can also find rhubarb in many grocery stores from spring through summer. To freeze, simply wash and dry stalks, slice them, arrange in a single layer on a baking sheet, freeze until firm, then transfer to heavy-duty freezer bags, pressing out as much air as possible before sealing. For another make-ahead option, turn extra stalks into strawberry rhubarb pie filling to keep dessert-ready fruit on hand.
Answers to Common Jelly Questions
Rhubarb comes in shades from pale green to deep red, but no matter the color, the flavor stays wonderfully tart and consistent — so no worries about your color variations! Your jelly’s shade will depend on your rhubarb, but it will always look pretty and bright. The vanilla beans add a subtle, delicious depth of flavor that complements that fresh tang beautifully.
Honestly, this might be the best peanut butter and jelly sandwich you ever make! I went for almond butter and rhubarb jelly, and let’s just say it’s a total game changer 🙂 It’s also fantastic spread over warm cinnamon rhubarb bread. If you love a berry twist, try strawberry rhubarb jam.
[tasty-recipe id=”13511″
More in easy meals
Chewy Protein Chocolate Chip Cookies
double chocolate chip cookies