Peppermint Chocolate Chip Cookies
Soft, chewy, and bursting with holiday spirit — these Peppermint Chocolate Chip Cookies are about to become your go-to Christmas treat! Whether you’re bringing them to a cookie swap or sneaking a few for yourself, these festive cookies loaded with crushed candy canes and lots of chocolate chips will definitely make Santa smile extra wide this year!

The moment the holidays roll around, my cravings for chocolate and peppermint kick into high gear, and I’m not picky about how I get them. This recipe is absolutely my favorite holiday cookie on the blog, and once you make these chewy peppermint chocolate chip treats packed with crushed candy canes, you’ll get why they’re a tradition in my kitchen every year.
These cookies have been a staple at our holiday gatherings for several years now — soft, chewy, pepperminty, and just pure comfort. Seriously, Christmas wouldn’t be Christmas without them!
Why We’re Crazy About These Peppermint Chocolate Chip Cookies
For nearly a decade, these peppermint chocolate chip cookies have been my absolute “must bake” for the holidays. They’re always the standout at cookie exchanges and get nothing but love from everyone who tries them.
Bake them once, and I promise you’ll understand why they’re a fan favorite.
- Classic cookie, festive twist. You just can’t beat a chocolate chip cookie, but these add a magical holiday spin with peppermint and crushed candy canes. They bring that unmistakable holiday vibe right to your cookie plate.
- Kid approved (and easy to get them involved!). Letting the kids crush candy canes is such a simple joy and always turns into a fun little baking adventure — yes, it can get messy, but hey, that’s part of the fun! My little guy practically begs to help every year.
- Tastes amazing. Let’s be real, the biggest reason we bake cookies is for the flavor. These are the cookies that disappear first at any holiday party — trust me, you’ll want to make a double batch!
Ingredient Notes
You’ll find the full ingredient list with exact amounts down below in the recipe card, but let me share some helpful details here to get you started.
- Butter: I always use unsalted butter here. If you only have salted, go easy on the added salt later. You want your butter softened to room temp but not so soft it’s squishy — press a finger in and it should just leave a dent.
- Flour: Use all-purpose flour. If you have a scale, weighing your flour is best. If not, fluff it up, spoon it into your cup, and level it off so you don’t pack too much in. Scooping straight from the bag can easily pack in extra, which leads to dry cookies.
- Baking soda: Freshness here really matters! Expired baking soda can cause your cookies to flop instead of rise, so check that date.
- Vanilla extract: I love it for flavor, but if you want to max out the mint, add ¼ to ½ teaspoon of peppermint extract too — it gives that extra holiday pop.
- Candy canes: Crushed candy canes are the surprise star of these cookies! If candy canes aren’t in season, peppermint candies work too. You can even press peppermint bark pieces on top of the cookies after baking or mix them into the dough for a fun twist.
- Chocolate chips: White and dark chocolate chips together give a beautiful mix of flavors. Milk or bittersweet chips work just as well if that’s what you have on hand. You might also find special peppermint chips during the holidays, which make a great swap!
Step-By-Step Instructions

Step 1: Using an electric hand or stand mixer, cream together the softened butter and sugars until your mix is light and fluffy.
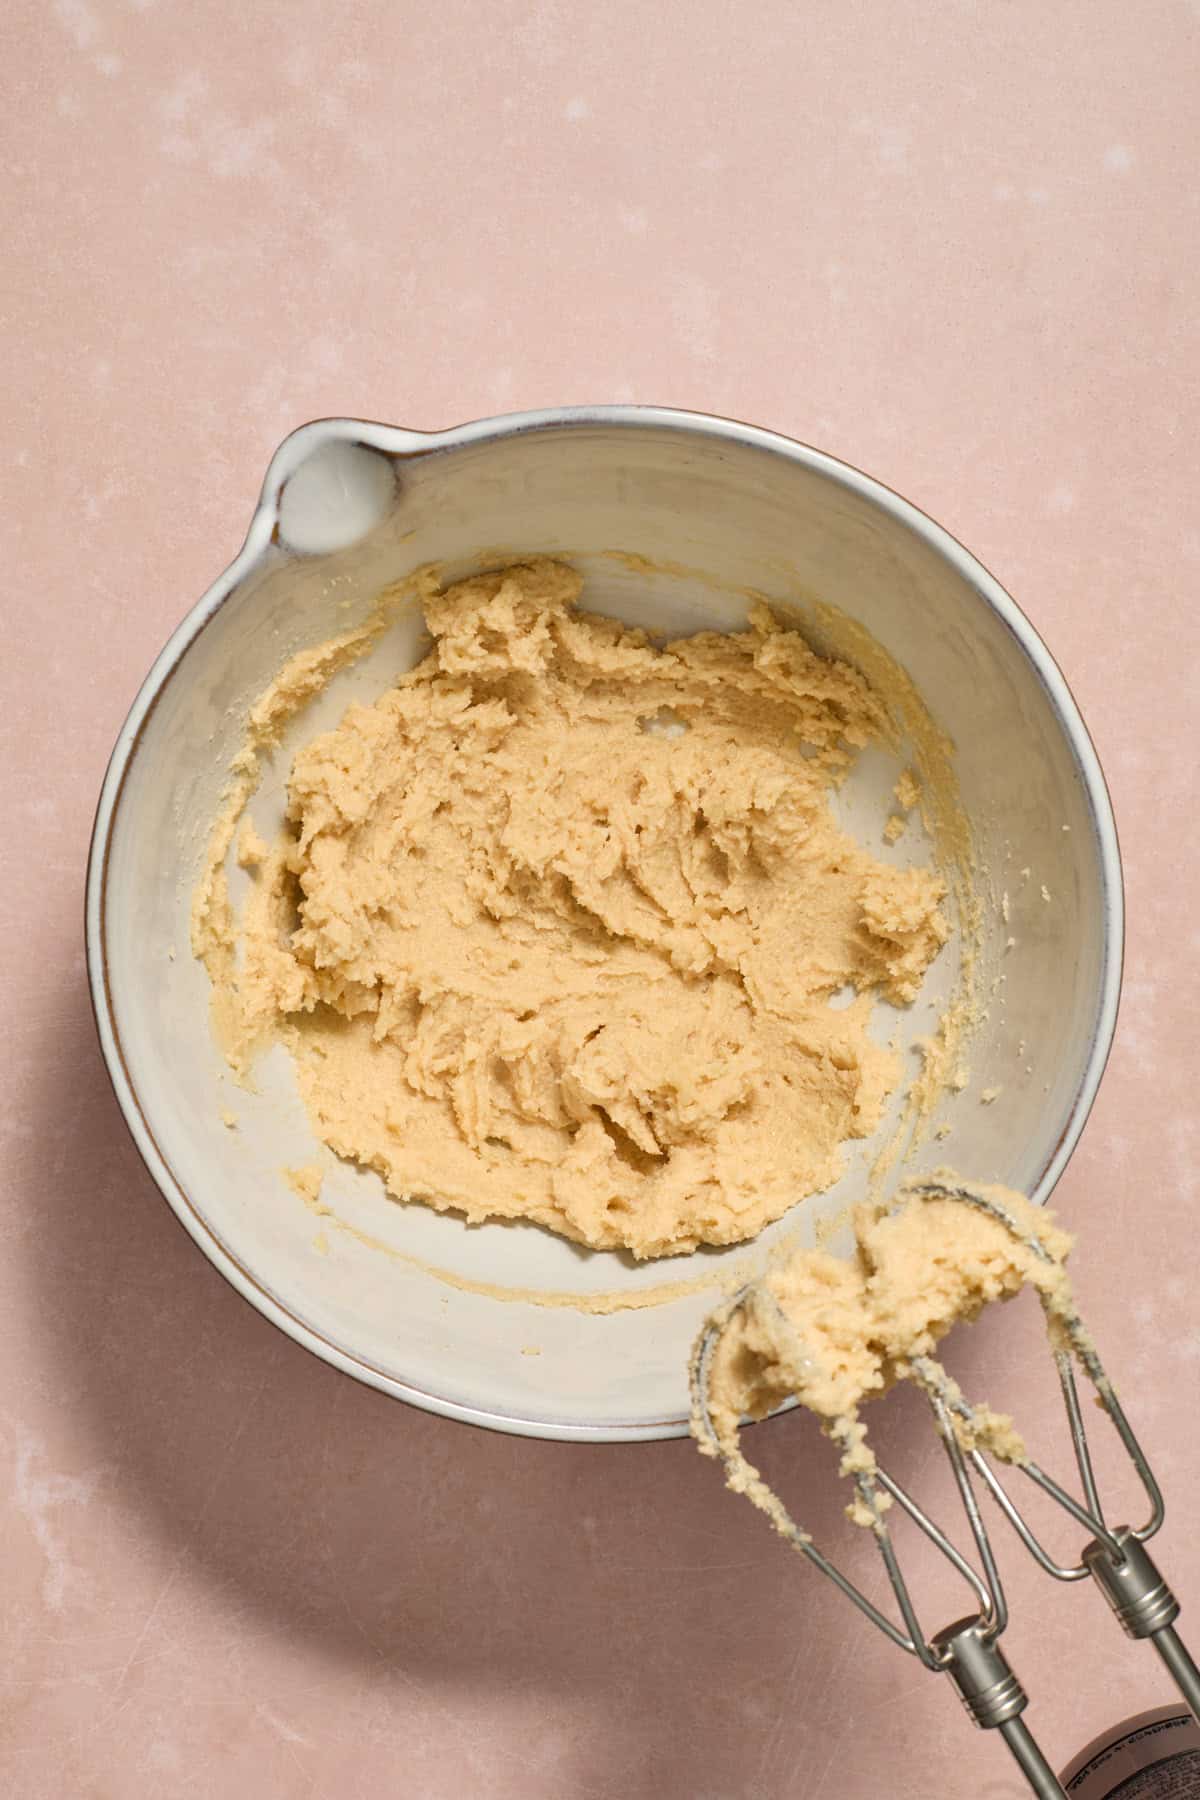
Step 2: Beat this mixture for about 3 minutes. This step is important because it traps air to give you that perfect rise and texture in your cookie.

Step 3: Add the egg and vanilla extract.

Step 4: Mix just until combined.

Step 5: In a separate bowl, whisk together your salt, flour, and baking soda. Then add these dry ingredients slowly to your wet mixture, stirring until just incorporated.

Step 6: Be careful not to over-mix here — too much stirring can make the cookies tough and flat when baked.

Step 7: Fold in your mix of white and dark chocolate chips along with those lovely crushed candy canes.

Step 8: Pop the cookie dough in the fridge for 30 to 60 minutes. Use a cookie scoop or spoon to roll the dough into balls about 1½ inches wide. Chilling helps the cookies bake up thick and chewy. If you chill longer than two hours, just let them sit out for a bit before baking.

Step 9: Arrange your dough balls on a parchment-lined baking sheet, leaving about 2 inches of space between them. Bake until the cookies’ edges turn a lovely light golden brown.

Step 10: When the cookies come out of the oven, you can gently press them into round shapes with a biscuit cutter or wide-lipped jar lid, if you want. Then, press a few extra chocolate chips and candy cane pieces onto the tops for a pretty finishing touch — totally optional, but so pretty!

Recipe Tips
- Big candy cane chunks can melt and run near the cookie edges. This is really the only tricky part with these cookies. To keep that peppermint magic from oozing everywhere, check your dough balls before baking. If you see large pieces near the edges, either press them in or carefully remove them. A little running won’t ruin your cookies, but keeping it in check makes them look extra pretty.
- Really crunch your candy canes into small pieces. Tiny bits help avoid that melting mess. Skip the big chunks for a neater cookie, but still full of peppermint goodness!
- Chill your dough. Chilling solidifies the butter so your cookies bake slower, resulting in thicker, chewier cookies. If you’re in a rush and skip chilling, your cookies will still be good but less chewy and more spread out.
- Always use fresh baking soda. Old leavening can mess up your cookies’ rise and leave you with sad, flat cookies.
- Want to share with everyone? Double it! This recipe doubles beautifully, so feel free to make extra. I’ve doubled it many times, and the cookies turn out just as wonderful.
- Don’t skimp on the chips. The magic of chocolate chip cookies is in the chips! Pile them in the dough and press a few more on top right out of the oven for that melty, extra chocolatey look.
Storage
Keep baked cookies fresh by storing them in an airtight container at room temperature. They’re best eaten within the first couple of days, but last up to 5 days if stored right.
Freeze your cookies by layering them in a freezer-safe container with parchment or wax paper between layers. They’ll keep well for up to 2 months. You can also freeze unbaked dough balls—just pop them on a tray to freeze for an hour, then transfer to a freezer bag.
Baking frozen dough takes a few extra minutes (about 2–3) or you can thaw them first for regular baking time.

Are Your Cookies Flat?
If your cookies are coming out flat, here are some common culprits to check:
- You might not have enough flour. Try baking one cookie first. If it’s flat, mix a tablespoon or two more flour into the dough to help it hold shape and rise.
- Your dough could be too warm. Make sure your dough chills before baking to avoid spreading. Also, if the butter was too soft at the start, it can affect how well your cookies puff up. If you’re unsure, chill your dough for 30 minutes before baking.
- Over-mixing the dough. Once you add the dry ingredients, only stir until just combined. Over mixing can make your cookies dense and flat.
- Butter was too warm or soft. Softened butter should still hold some shape. If it’s overly soft and greasy, your cookies will spread too much and turn out flat. Test your butter by pressing a finger in — it should leave a slight indentation but still have some resistance.
- Leavening agents could be old or expired. Even if your baking soda is in date, too much air exposure can weaken it. Fresh soda is your best bet for perfectly puffed cookies.

Soft, chewy peppermint chocolate chip cookies packed with crushed candy canes and a mix of white and dark chocolate chips, perfect for the holiday season.
- Total Time: 30 minutes
- Yield: 24 cookies 1x
Ingredients
- 1/2 cup unsalted butter, softened (1 stick)
- 1/2 cup sugar
- 1/3 cup light brown sugar, packed firmly
- 1 1/2 tsp vanilla extract
- 1 large egg
- 1 1/2 cups all-purpose flour (204 g)
- 1/2 tsp sea salt
- 1/2 tsp baking soda
- 3/4 cup white chocolate chips
- 3/4 cup dark or regular chocolate chips
- 5 candy canes, crushed into fine pieces (about 1/4 cup plus a tablespoon)
Instructions
- Use a hand or stand mixer to cream the softened butter, sugar, and brown sugar together until creamy and light, about 3-4 minutes.
- Add vanilla extract and egg, then beat just until everything is mixed, about 20 seconds; avoid overmixing to prevent tough cookies.
- Whisk together flour, sea salt, and baking soda in a separate bowl.
- Gradually stir dry ingredients into the wet mixture until just combined; avoid overmixing to keep cookies tender.
- Fold in white and dark chocolate chips along with the crushed candy canes.
- Seal dough tightly and chill in the fridge for 30 to 60 minutes, or up to 3 days. If chilled longer than two hours, let sit out 10-15 minutes before baking.
- Preheat oven to 350°F (175°C). Shape dough into balls using a scoop or hands and place spaced about 2 inches apart on a parchment-lined baking sheet.
- Bake for 9-12 minutes, until cookies are lightly golden around edges. Optional: gently nudge edges into round shape with a biscuit cutter after baking.
- Let cookies cool on the baking sheet for a few minutes before transferring to a wire rack to cool completely.
Notes
Use softened but still cool butter—not mushy—to achieve the best texture; it should spring back with slight indentation when pressed., Flour weight can vary; 204 grams works best. If not measuring by weight, keep extra flour on hand to adjust., Don’t skip creaming butter and sugar for 3+ minutes to trap air bubbles for better rise., If doubling the recipe, adjust flour to 408 grams; for triple, 612 grams., Watch candy cane placement on cookie edges to prevent melting and running; press large pieces in or remove them., Crush candy canes finely to avoid messy melting and maintain cookie appearance., If dough spreads too much, add 1-2 tablespoons more flour., Always use fresh baking soda for proper rise and texture.
- Prep Time: 15 minutes
- Cook Time: 10 minutes
- Category: Dessert
- Cuisine: American
Nutrition
- Serving Size: 1 cookie
- Calories: 152 kcal
- Fat: 7 g
- Carbohydrates: 20 g
- Protein: 2 g