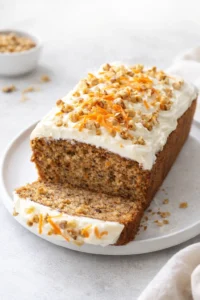
My Mother’s Peasant Bread
This no-knead bread has been my mom’s trusted recipe for over 45 years. From mixing to slicing, it only takes about three hours tops. It bakes right in well-buttered Pyrex bowls — no need for any preheated baking dishes — and always turns out golden-brown with a crunchy crust and soft, tender inside. 🍞🍞🍞🍞🍞

If I had to share just one recipe to boost your home cooking, it would be my mom’s peasant bread. Seriously, this bread is a total game changer. I mean, if I only ever showed you this recipe and nothing else, I’d feel like I’d done something really good for your kitchen skills. Once you master this, fresh homemade bread becomes your new kitchen superpower.
Why do I love it so much? Homemade bread is pure magic at any meal. Every time I serve this bread, people are amazed it’s homemade. They ask, “Did you really make this from scratch?” And usually, they follow up with, “Did you use some fancy bread machine?” Then comes the best part: “Is there anything better than fresh, warm homemade bread?”
There’s just something special about that fresh-baked smell and taste that makes you feel like you’ve pulled off a little kitchen miracle. Put this bread on the table next to some sharp cheese and a crisp salad, and suddenly the whole meal feels elevated. Even if dinner isn’t perfect, that bread and sides will keep everyone happy and chatting long after the plates are empty.
The Secret to This Peasant Bread
You might wonder what makes this recipe stand out since there are so many no-knead breads out there. The secret is actually pretty simple. First, it’s totally no-knead. I know — lots of folks hype the popular no-knead recipes, but here’s the difference:
You can start this dough around 4 p.m. and have fresh bread ready on your table by 7 p.m. No waiting overnight! It bakes right in well-buttered Pyrex bowls, no need to preheat your pans. The crust bakes golden and crisp all on its own—no fancy steam or spritzing water involved. This isn’t trying to be some delicate artisan loaf; it’s honest-to-goodness peasant bread: soft, spongy, moist inside, with a buttery, crisp crust on the outside.
Ways to Mix It Up
Once you’ve got the basics down, this dough becomes your go-to for a whole bunch of recipes here on my site — like my overnight fridge focaccia and easy homemade pizza dough. It even inspired my simple pita bread and the wildly popular no-knead dinner rolls everyone raves about.
How to Make Peasant Bread, Step by Step
You’ll start with yeast.
The instant yeast I always use is SAF Instant Yeast. It’s great because you can stir it right into the flour — no need to proof it first. If you prefer active dry yeast, don’t worry. I’ve included tips on how to use that below.
Begin by whisking together the flour, salt, sugar, and yeast. Then pour in lukewarm water.

Stir everything until you form a sticky dough ball. Set it aside to rise for about an hour and a half to two hours…

…until it looks full, bubbly, and alive like this:

Next, punch down the dough using two forks. Yes, forks! It’s super simple and keeps things easy.
Then split the dough in half with the forks again.

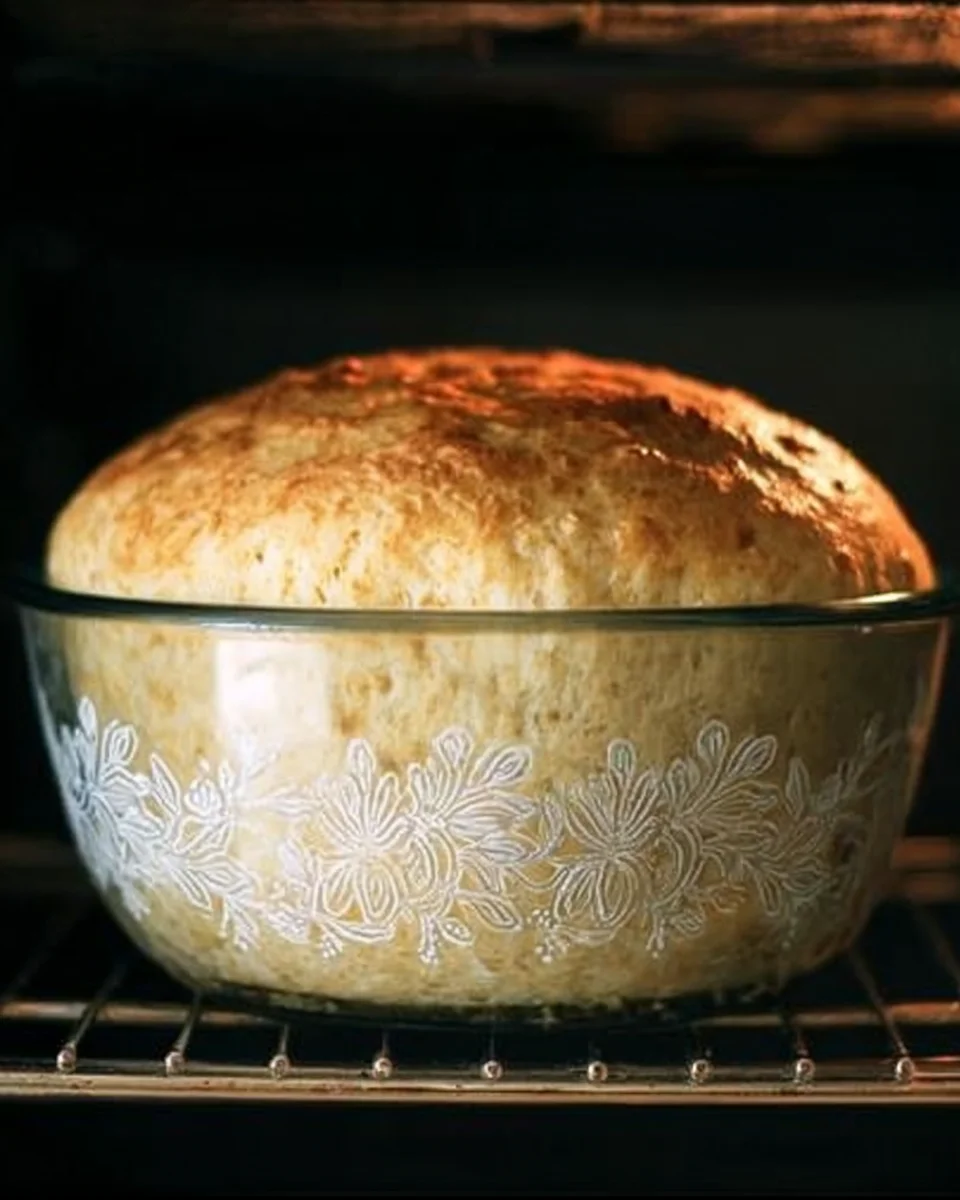
This dough is pretty wet, so you want to bake it in an oven-safe bowl. I love using the Pyrex 1L 322 size, but really any similar oven-proof bowl works just fine.

Generously butter those bowls, then divide your dough between the two.

Let the dough rise again in the bowls until it just spills over the rims — about 30 minutes.

Then pop those bowls right into your oven to bake:


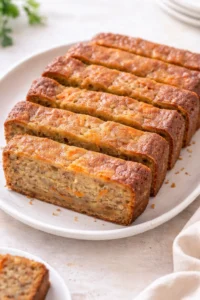
Fresh from the oven, this bread is pure bliss. But don’t stop there — it also makes incredible toast the next day and turns into the dreamiest grilled cheese or sandwich bread you can imagine.


How to Store Your Bread for Freshness
If you’re eating your bread within 3 to 4 days, I recommend storing it in a ziplock bag. I’ve tried reusable and eco-friendly bags galore, but honestly, nothing keeps bread moist and fresh longer quite like a good old ziplock. Plus, you can reuse them several times — big win!
If you want to save it longer than a few days, freezing is your best bet. Once the bread cools, slice it right away, pop the slices into a ziplock, and freeze. That way, every slice stays fresh and ready to toast or warm whenever you need it.
One thing to keep in mind: storing bread in a ziplock can soften the crust over time. That’s why I always reheat bread before serving. Toasting slices for breakfast is my go-to, and for dinner, I warm half or quarter loaves in a 350ºF oven for 15 to 20 minutes. That oven heat brings back the crust’s wonderful crunch beautifully.
Make-Ahead Tips
You can mix the dough a few hours ahead or even the night before. Just cover it well and refrigerate. The slow chill allows the flavors to deepen, and you’ll still get that beautiful crust and soft interior when you bake it fresh.
If you’re planning to bake it later in the day, bring the dough to room temperature before shaping and the second rise for best results.
Variations
- Seeded loaf: Add sunflower, pumpkin, sesame, or flax seeds into the dough or on top for extra crunch.
- Herb bread: Mix in fresh or dried herbs like rosemary, thyme, or oregano to give the bread a fragrant, savory twist.
- Cheesy bread: Fold in shredded Parmesan or cheddar for a cheesy surprise in every bite.
- Whole wheat or mixed grain: Swap some or all of the all-purpose flour for whole wheat, spelt, or rye flours for a nuttier taste and heartier texture.
Serving Suggestions
This bread is incredibly versatile. Serve it warm with butter or olive oil and sea salt for a simple snack. It’s perfect alongside soups, stews, or pasta dishes to sop up every last bit of sauce. Use it for sandwiches, toast with jam for breakfast, or turn it into hearty grilled cheese sandwiches for family dinners.
One of my favorite ways to enjoy this bread is sliced thick, toasted until golden, and topped with ripe avocado, a squeeze of lemon, and a sprinkle of chili flakes for a quick and satisfying lunch.
Recipe FAQs
- Can I use active dry yeast instead of instant yeast? Yes! Just dissolve it in lukewarm water with a pinch of sugar and let it sit for 5-10 minutes until foamy before mixing it into your dry ingredients.
- What if I don’t have Pyrex bowls? Any oven-safe, buttered bowl or deep dish will work. Just make sure it’s about the same size to keep the bread thickness right.
- Why does my bread come out dense? Be sure to let the dough rise until doubled and bubbly before baking, and don’t rush the second rise once divided in the bowls.
- Can I make this bread in a stand mixer? Absolutely! Use the paddle attachment just until the dough comes together; no need to knead longer.
- How do I know when the bread is done? The crust should be a deep golden color, and the bread should sound hollow when tapped on the bottom.
No-knead peasant bread that bakes in well-buttered glass bowls; crusty outside with soft, tender inside, ready in about 3 hours.
- Total Time: 3 hours
- Yield: 2 loaves 1x
Ingredients
- 4 cups (480g) all-purpose flour
- 1 1/2 teaspoons salt
- 2 teaspoons sugar
- 2 teaspoons instant yeast (SAF Instant Yeast recommended)
- 1 3/4 cups (420ml) lukewarm water
- Butter (for greasing bowls)
Instructions
- In a large mixing bowl, whisk together the flour, salt, sugar, and instant yeast.
- Add lukewarm water and stir until a sticky dough ball forms.
- Cover the dough and let it rise for 1.5 to 2 hours until doubled and bubbly.
- Using two forks, punch down the dough gently, then divide the dough in half with the forks.
- Generously butter two oven-safe Pyrex bowls (approximately 1L size).
- Divide the dough between the two buttered bowls.
- Let the dough rise again in the bowls for about 30 minutes until dough spills over the rims.
- Preheat the oven to 425°F (220°C).
- Place the bowls with dough directly into the oven and bake for 40-50 minutes until the crust is deep golden brown and the bread sounds hollow when tapped on the bottom.
- Remove bread from the oven and turn out onto a cooling rack.
- Let cool before slicing; bread can be served fresh or toasted.
Notes
If using active dry yeast, dissolve it in lukewarm water with a pinch of sugar and let sit for 5-10 minutes until foamy before mixing with dry ingredients., Any oven-safe, buttered bowl or deep dish of similar size can be substituted for Pyrex bowls., For longer freshness, store bread in a ziplock bag for 3-4 days. To maintain crust, reheat in a 350°F oven for 15-20 minutes., Dough can be made a few hours ahead or refrigerated overnight to develop flavor; bring to room temperature before second rise and baking., Variations include adding seeds (sunflower, pumpkin, sesame, flax), fresh or dried herbs (rosemary, thyme, oregano), shredded cheese (Parmesan, cheddar), or substituting some/all flour with whole wheat, spelt, or rye., Use paddle attachment in a stand mixer to combine dough; no kneading required.
- Prep Time: 10 minutes
- Cook Time: 45 minutes
- Category: Bread
- Cuisine: European / American
Nutrition
- Serving Size: 1 slice
- Calories: Approx. 180-200 kcal per slice
- Fat: Approx. 1 gram per slice
- Carbohydrates: Approx. 36 grams per slice
- Protein: Approx. 6 grams per slice