Easy Dipped Spring Oreos
Spring is just around the corner… if only the snow would hurry up and melt! It’s the perfect time to whip up these simple and cheerful Spring Dipped Oreos! The best part? No oven needed! Plus, they’re made with my absolute favorite cookies! Of course, feel free to swap in any Oreos you love — I’m even thinking about trying these with Double Chocolate Chip Cookies next time!
Also, don’t miss these Beautiful Bouquet Cupcakes! They’ll have you dreaming of spring in no time — at least your taste buds will be ready!

Spring is such a great excuse to make something bright, easy, and tasty — that’s exactly where these Spring Dipped Oreos come in. No baking is needed, ingredients are few, and the end result looks fabulous. These cookies will brighten up any table and take only a handful of steps to pull off.
Here, I’ll walk you through everything—from the short ingredient list (Oreos, about 4 ounces of vanilla almond bark, and your favorite sprinkles), to the quick process (melt, dip, sprinkle, and let set), plus plenty of tips on getting that clean dip, fun variations to try, storage advice, and troubleshooting common hiccups. This recipe makes around 12 dipped Oreos and takes about 10 minutes from start to finish — I’ve even included photos to help along the way.
- No baking and totally kid-friendly — perfect for last-minute goodies or some family fun decorating time.
- Super customizable — swap out cookies, pick your colors, and use any sprinkles to match your spring vibe.
- Full easy-to-follow instructions below — step-by-step guides, pro tips, flavor ideas, and storage tricks.
What Makes Them Special
These Spring Dipped Oreos are a lifesaver when you want a quick, no-bake treat that looks as good as it tastes. Using store-bought Oreos and melted vanilla almond bark means you get a pretty, polished dessert without stress. Plus, they’re great for getting kids involved and can be tailored with different cookie types, coatings, and decorations. They shine on spring dessert tables (pair them with a bright, make-ahead Strawberry Lasagna), at showers, or as homemade gifts like White Chocolate Strawberry Truffles.
- No baking needed — ready in about 10 minutes flat.
- Customizable — swap out cookies, colors, or sprinkle styles however you like.
- Kid-friendly and easy to make — fun for decorating together.
- Beautiful presentation — ideal for spring gatherings, baby showers, or school parties.
Ingredients You’ll Need

- 1 package of Oreos
- 4 oz. vanilla almond bark
- sprinkles of your choice
Dipping and Decorating Steps
- Line a baking sheet with parchment paper or a silicone baking mat.
- Heat 4 ounces vanilla almond bark in the microwave in 30-second bursts, stirring after each, until fully melted and smooth.
- Hold each cookie by the edges or place in small cupcake liners to avoid fingerprints.
-
Dip each Oreo halfway into the warm almond bark.

- Tap the utensil on the bowl’s edge to shake off excess coating.
- Place the dipped Oreo gently on the prepared baking sheet.
- Immediately sprinkle decorations onto each Oreo while the coating is still wet.
-
If the coating thickens as you go, warm it briefly (about 10–20 seconds) and stir until smooth, then continue dipping.

-
Let the coating fully set at room temperature or chill in the fridge for 5–10 minutes until firm.

Tips for Smooth Coating
- Microwave the almond bark in 30-second bursts, stirring well between each to keep it smooth. Overheating will make it grainy, so be patient! For a visual walkthrough of melting and dipping candy coating, see the step-by-step tips in our Red Velvet Truffles recipe.
- Use parchment paper or a silicone baking mat on your tray to keep the Oreos from sticking and make cleanup a breeze.
- Dip each cookie halfway and gently tap the utensil on the bowl’s edge to shake off extra coating — this helps keep the look neat and tidy.
- Add your sprinkles right after dipping, while the coating is still wet, so they stick perfectly.
- If the coating thickens as you go, just warm it again briefly (about 10–20 seconds) and stir until silky smooth.
- For the best finish, let the Oreos dry at room temperature. If you’re in a hurry, a quick chill in the fridge for 5–10 minutes helps, but don’t leave them cold too long or you might get some condensation.
- Hold cookies by the edges or use small cupcake liners to avoid leaving fingerprints on the coating — mini liners like the ones we use for Strawberry Cheesecake Truffles work perfectly.
Flavor and Decoration Ideas
- Switch up your cookies: try Golden Oreos, Double Chocolate Oreos, or even thinner sandwich cookies for different tastes and looks.
- Play with color: use colored candy melts in place of the vanilla almond bark, or tint white chocolate or almond bark with oil-based or candy dyes to get any shade you want.
- Decorate differently: drizzle a contrasting color on top, press in chopped nuts or shredded coconut instead of sprinkles, or sprinkle edible glitter to really make them sparkle.
- Add flavor boosts: brush cookies lightly with caramel or a spoonful of easy berry chia seed jam before dipping to give an extra layer of yum (just know this can change how long they last).
- Try new shapes: smaller cookies, mini Oreos, or even pretzels dipped and decorated the same way (these caramel pretzel bites are a fun example) make fun alternatives with a spring feel.
Storage and Make-Ahead Advice
- At room temperature: Store your dipped Oreos in a single layer or stacked with parchment paper between layers inside an airtight container. They’ll stay fresh for 3 to 5 days this way.
- In the fridge: You can keep them in the refrigerator for 1 to 2 weeks, but be aware this might cause some moisture and soften or dull the decorations. Take them out and let them come to room temp before serving so they taste and look their best.
- Freezing for later: To keep them longer, freeze the Oreos in one layer on a baking sheet until firm, then transfer to an airtight container with parchment between layers. Freeze for up to a month. When ready to eat, thaw briefly in the fridge or just leave at room temperature for 10–20 minutes. Cut-out cookies are also freezer-friendly—see Lemon Cut Out Cookies for a springy make-ahead option.
- Transporting: Keep the Oreos flat in an airtight container with parchment between layers to keep them from smudging or breaking while you’re on the go. For sturdy additions to a cookie box, Pistachio Shortbread Cookies travel especially well.

Answers to Common Questions
-
Can I use regular chocolate instead of almond bark?
Sure! You can use regular chocolate or chocolate chips, but they may need a little vegetable oil or shortening to thin them for dipping. Melt them gently to avoid burning. Candy melts or almond bark are usually easier because they melt smoothly and set up quickly.
-
Will the sprinkles fall off?
If you add sprinkles right after dipping when the coating is still wet, they’ll stick well. If some feel loose, give them a very gentle press to help them stay put.
-
How much coating do I need per pack of Oreos?
This recipe uses 4 ounces of almond bark to make about 12 dipped Oreos (serving 12). For bigger packs, like the standard family-size with around 36 cookies, just multiply the coating amount by three.
-
Why did my coating seize or get grainy?
This can happen if the coating overheats or if even a tiny bit of water sneaks in during melting. Heat in short bursts, stir well, and make sure your utensils and bowls are completely dry.
-
Can I make these ahead?
Absolutely — you can dip them a day or two before you need them. Just store them properly as mentioned above. For longer storage, freezing is your friend.

Easy and pretty Spring Dipped Oreos: no-bake decorated cookies dipped in melted vanilla almond bark and sprinkled with colorful decorations, perfect for spring treats and gatherings.
- Total Time: 10 minutes
- Yield: 12 dipped Oreos 1x
Ingredients
- 1 package of Oreos (any variety)
- 4 oz. vanilla almond bark
- Sprinkles of your choice
Instructions
- Heat almond bark in the microwave in 30-second intervals, stirring well between each, until completely melted and smooth.
- Dip each Oreo halfway into the warm melted almond bark.
- Place dipped Oreos on a baking sheet lined with parchment paper or a silicone baking mat.
- While the coating is still wet, sprinkle your chosen decorations on each Oreo.
- Let the dipped Oreos set at room temperature until the coating is fully dry, or chill briefly (5-10 minutes) in the refrigerator to speed up setting.
Notes
Use parchment paper or silicone baking mats to prevent sticking and ease cleanup., Tap the utensil on the bowl edge to shake off extra coating for a neat finish., If almond bark thickens during dipping, reheat briefly and stir to smooth again., Hold cookies by edges or use cupcake liners to avoid fingerprints on coating., Customize by swapping cookie types, using colored candy melts, or adding drizzles and edible glitter., Store dipped Oreos in an airtight container at room temperature (3-5 days), refrigerator (1-2 weeks), or frozen (up to one month)., For freezing, freeze in a single layer until firm, then layer with parchment paper in an airtight container., Add flavor boosts such as caramel or jam before dipping but note this can affect shelf life.
- Prep Time: 10 minutes
- Cook Time: 0 minutes
- Category: Dessert
- Cuisine: American
Nutrition
- Serving Size: 1 dipped Oreo
- Calories: Approximately 100-120 calories per dipped Oreo (estimate)
- Fat: 6 g per serving (estimate)
- Carbohydrates: 15 g per serving (estimate)
- Protein: 1 g per serving (estimate)

More in Desserts

Blueberry Cream Cheese Bread

Easy German Pancakes
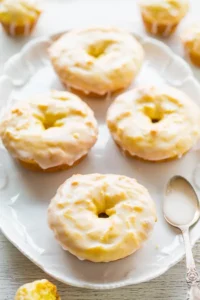
Baked Lemon Donuts with Lemon Glaze