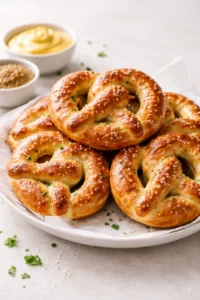
Sourdough Discard Garlic Pull Apart Bread
If you love classic garlic bread with a fun twist, you’re going to adore this Sourdough Discard Garlic Pull Apart Bread. It’s not only tasty but an interactive way to serve up garlic bread. Just peel away each soft, buttery, garlicky layer and enjoy it as a snack, appetizer, or alongside your favorite meal. Plus, it’s flexible enough to make with sourdough discard or your active sourdough starter if that’s what you have on hand!

This bread was such a joy to make and came out perfectly. Absolutely loved it — thank you for sharing!
– Mary
Why you’ll love this recipe
-
The charming unevenness is what makes this recipe so special. Don’t worry about making each dough piece perfectly even or shaped just right — those little quirks are part of the fun!
- This forgiving nature makes it a fantastic recipe for cooking with kids or bread bakers who are just starting out.
- The garlic bread layers come out soft, rich, and bursting with buttery garlic flavor you’ll love to peel apart bite by bite! And if you’re a garlic lover like me, be sure to try our Sourdough Discard Garlic Rolls too!
- This bread tastes best warm, when the layers are tender and full of that lovely garlic aroma.
- You can swap sourdough discard for your active starter with ease, making this recipe super flexible for what you have in your kitchen.
- Feel free to mix up the herbs! Whether you prefer rosemary alone, parsley by itself, a combo, or even something unique like sage, it’s all delicious here.
Ingredients
All you need are a few staple ingredients to get this pull-apart garlic bread on your table.
- Sourdough discard: Use your sourdough discard at room temperature and unfed here. This recipe assumes you have a 1:1 starter feed ratio (equal parts flour and water). If your starter feed ratio is different, you might need to tweak the ingredient amounts just a bit.
- Garlic powder: Make sure it’s garlic powder, not garlic salt, to get that perfect garlicky punch without extra saltiness.
- Fresh herbs: Fresh parsley and/or rosemary really take this bread up a notch. I recommend fresh herbs over dried for the best taste, though dried can work if you’re in a pinch.
- Flaky sea salt: Sprinkling flaky sea salt on top at the end adds the perfect little pop of flavor that finishes this bread beautifully.
Scroll down for the full recipe with step-by-step directions.
Substitutions & Variations
This recipe is super adaptable, so don’t hesitate to play around with it. Here are some easy tweaks and ideas to make it your own.
- Try active sourdough starter instead of discard. Skip the yeast in this case, but be prepared to extend your rise times as active starter takes a bit longer to work (I’ve yet to perfect the timing for active starter, so keep an eye on it).
- Switch up the herbs: Whether you’re partial to just rosemary, prefer parsley, or dream of sage, go for it! Mixing herbs can create your own signature flavor, too.
- Add cheesy goodness: Sprinkle about ¼ cup shredded parmesan between your dough layers as you build the bread. Spread the butter mixture first, add cheese, then fold up the dough—so good!
- Use fresh garlic: If you want to swap garlic powder for fresh, remember that 1 clove equals roughly ¼ teaspoon of garlic powder. Fresh garlic will give you a more intense, vibrant flavor.
How to Make Sourdough Discard Garlic Pull Apart Bread
These steps are easy to follow, and honestly, the best part is layering and assembling the dough—what a satisfying hands-on experience! See the full instructions at the end of this post for all the details.

- Step 1: Mix all your ingredients except the butter in a stand mixer bowl. While mixing on low speed, slowly add the melted butter until your dough looks rough and shaggy.

- Step 2: Turn the dough onto a work surface and knead it for 3-4 minutes until it’s smooth and soft but not sticky. If it’s a little too tacky, sprinkle in a touch more flour or add a splash of milk (a tablespoon at a time) to get just the right feel.

- Step 3: Pop your dough into a big oiled bowl. Cover it with plastic wrap and let it rest for 60-90 minutes, until it nearly doubles in size.

- Step 4: Time for the buttery herb garlic topping! Mix softened butter, your chosen fresh herbs, garlic powder, and salt in a small bowl until it’s packed with flavor. Make sure your butter is nice and soft to make mixing easier.

- Step 5: Dump your dough onto the counter and split it into 12 even-ish pieces. No need for perfection here!

- Step 6: Flatten each piece gently with your hand (or use a rolling pin if you like) into an oval shape about 4 inches wide—about the size of your loaf pan. Don’t stress about it being perfect; those irregular shapes add to the rustic charm.
- Step 7: Slather each flattened piece with a generous 1-2 teaspoons of the butter-herb-garlic mix. This buttery layer is what makes all the magic happen!
- Step 8: Fold each buttered dough piece in half like a cozy little taco.
- Step 9: Nestle the folded pieces, fold-side down, in a greased 9×5-inch loaf pan. Keep going until the pan is filled with your little dough bundles.
- Step 10: Cover the pan with plastic wrap and let the dough rest for 30-45 minutes until puffy (but don’t let it rise above the top of the pan).
- Step 11: Bake your bread at 350°F until it’s golden on top and reaches an internal temperature of about 200°F (a kitchen thermometer really helps here). While it’s still warm, brush on any leftover butter mixture and finish with a sprinkle of flaky sea salt. Let it cool just a bit, then dig in while it’s still cozy warm!
Expert Baking Tips
- Knead your dough just right. Make sure it feels smooth and is slightly tacky but not sticky. Add flour or milk gradually (1 tablespoon at a time) if adjustments are needed for the perfect dough texture.
- Forget perfection when shaping. This recipe shines because of its rustic, uneven layers. Embrace shaping by hand and let those little variations make your bread special.
- Don’t skimp on the butter topping. Each piece needs plenty of that garlicky butter, plus a little reserved for brushing the loaf fresh out of the oven—so flavorful!
- Keep an eye on that second rise. The dough should puff up nicely, but don’t let it crawl over the edge of your pan or it might overflow in the oven.
- Use a kitchen thermometer for baking perfection. Your loaf is done when it hits 200°F inside—no guessing, no cutting into it too early.
Can you add cheese to this recipe?
Absolutely! To jazz up this garlic bread with cheese, just sprinkle about ¼ cup shredded Parmesan between each buttered dough layer as you build the loaf. This adds a lovely cheesy richness that pairs perfectly with the garlic and herbs.
Storage
Room Temperature Storage: This pull-apart bread is best fresh and warm. If you have leftovers, pop the bread into an airtight container or sealed plastic bag and enjoy within 3 days. When you want it soft again, just warm it up in the microwave for about 30 seconds—easy and quick to revive that fresh-baked feeling.
Freezer Storage: Want to save some for a future cozy night? Let the bread cool completely, then tuck it into an airtight, freezer-safe bag or container. Freeze up to 3 months. When you’re ready, thaw overnight in the fridge and reheat in the microwave for 30-60 seconds, or warm the whole loaf in a 350°F oven for about 10 minutes. It reheats beautifully!

Recipe FAQs
Can I make pull-apart bread with active sourdough starter?
Yes, you sure can! Just swap in equal parts active sourdough starter for the discard, and leave out the yeast. Keep in mind, you’ll need to allow more time for the dough to rise since active starter works more slowly.
Can I add cheese to this garlic pull-apart bread?
Definitely. Sprinkle about a ¼ cup of shredded Parmesan cheese onto each dough piece after spreading the butter mixture, then fold and assemble. It adds a lovely extra richness.
Can I use dried herbs for garlic bread?
I always recommend fresh herbs for the best flavor, but if that’s not an option, dried herbs will work fine. Use about 1 teaspoon of dried herbs in place of a tablespoon of fresh.
Can I use fresh garlic instead of garlic powder for garlic bread?
Yes! Just remember that 1 fresh garlic clove is roughly the same as ¼ teaspoon of garlic powder, so adjust according to your taste for that fresh garlic kick.
How do I know when a loaf is fully baked?
There are a few visual clues like golden brown color and puffiness, but the foolproof way is to use a kitchen thermometer. The loaf should reach an internal temperature of 200°F when fully baked.

Delicious sourdough discard garlic pull apart bread with soft, buttery, garlicky layers that peel apart easily—a fun twist on classic garlic bread.
- Total Time: 3 hrs 20 mins
- Yield: 6 servings 1x
Ingredients
- ¼ cup non-dairy or regular dairy milk, warmed to 110℉
- 1 ½ teaspoons instant yeast
- 2 teaspoons granulated sugar
- 2 cups + 1 Tablespoon all-purpose flour
- 200 grams (about ¾ cup) sourdough discard, unfed and at room temperature
- 1 egg, lightly beaten
- 1 Tablespoon fresh parsley or rosemary, chopped
- 1 teaspoon kosher salt
- 1 teaspoon garlic powder
- 2 Tablespoons unsalted butter, melted
- Topping:
- 7 Tablespoons unsalted butter, softened
- 1 Tablespoon fresh parsley or rosemary, chopped
- 1 Tablespoon garlic powder
- ½ teaspoon kosher salt
- Flaky sea salt for topping
Instructions
- Mix warmed milk, instant yeast, and sugar in a stand mixer bowl fitted with a dough hook.
- Add flour, sourdough discard, lightly beaten egg, chopped herbs, salt, and garlic powder to the mix.
- Turn mixer on low and slowly pour in 2 tablespoons melted butter.
- Increase speed to medium and mix until a rough, shaggy dough forms.
- Dump dough onto a clean surface and knead for 3-4 minutes until smooth, soft, and slightly tacky but not sticky.
- Adjust dough consistency by adding flour or milk (1 tablespoon at a time) if necessary.
- Place dough in large lightly oiled bowl, cover with plastic wrap, and let rise for 60-90 minutes until doubled in size.
- While dough rises, prepare topping by mixing softened butter, chopped herbs, garlic powder, and ½ teaspoon salt in a small bowl; reserve about 1 tablespoon for after baking.
- Grease a 9×5-inch loaf pan and set aside.
- Turn risen dough onto a surface and cut into 12 equal pieces.
- Flatten each piece into roughly 4-inch circles.
- Spread 1-2 teaspoons of butter mixture on each circle.
- Fold each circle in half like a taco and place fold-side down in prepared loaf pan.
- Use all butter mixture except reserved tablespoon.
- Cover pan with plastic wrap or towel; let dough rise another 30-45 minutes until puffy but not overflowing the pan.
- Preheat oven to 350°F (175°C).
- Bake bread for 30 minutes, then cover with foil and bake additional 5-10 minutes until golden and internal temperature reaches 200°F (93°C).
- Immediately brush warm bread with reserved butter mixture and sprinkle flaky sea salt on top.
- Let bread sit in pan for 10 minutes before serving warm.
Notes
No stand mixer required; dough can be mixed in a bowl and kneaded by hand., To double or triple recipe, use multiple 9×5-inch loaf pans., When using active sourdough starter instead of discard, leave out yeast and allow extra rising time.
- Prep Time: 25 mins
- Cook Time: 40 mins
- Category: Side Dish
- Cuisine: American
Nutrition
- Serving Size: 1 piece
- Calories: 510 kcal
- Fat: 19 g
- Carbohydrates: 73 g
- Protein: 12 g