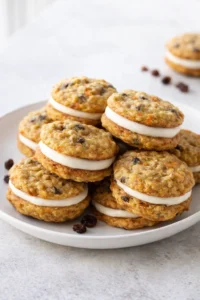
Slice and Bake Heart Cookies – Crowded Kitchen
Do you remember those classic slice and bake cookies that came in a tube when we were kids? Well, these homemade slice and bake heart cookies bring that nostalgia back—with a fresh twist! They’re super simple to make, way tastier than the store-bought kind, and completely free from any preservatives or artificial colors. Perfect for a sweet treat that feels both nostalgic and wholesome.

Here’s the fun part: we make a smooth sugar cookie dough from scratch, tint a chunk of it with some natural food coloring, then roll it into a log of tender little hearts. After that, we wrap the plain dough around the colorful hearts, chill everything to firm up, slice, bake, and enjoy. Seriously, the trick is in chilling! You’ll see the heart shapes perfectly pop out in each cookie slice.
Why We Love This Recipe
- Nostalgic vibes: These cookies took me right back to those beloved tube cookies I adored growing up. But the best part? They taste even better—freshly made and full of real, simple ingredients. If you love that classic slice-and-bake look, check out Valentine’s Day Swirl Cookies.
- Hands-on fun: Yes, it takes a little patience with the chilling steps, but shaping the hearts and slicing the cookie log is a super enjoyable process. It’s a delightful activity to do with kids or friends—trust me, they’ll love watching the hearts come to life. For another hands-on heart project, try these heart-shaped chocolate chip cookies.
- Delicious texture: These cookies come out soft and chewy with just a slight golden crunch on the edges. Warning: you’ll be reaching for more than one, guaranteed!
Ingredients
Here’s everything you need to whip up these charming heart cookies:
Ingredient Notes
- Natural food coloring: To get those pretty pink hearts, we used a natural vegetable juice-based coloring. While it won’t give you a bright red pop, it creates a lovely pink-purple shade that’s gentle and natural.
- Butter: Make sure your butter is softened to room temperature before mixing—it helps create that soft, tender cookie texture. We used unsalted butter, so if you go with salted, just tone down the salt a bit in the recipe.
- Flour: We stuck with good ol’ all-purpose flour here. A quick tip: spoon your flour into the measuring cup and then level it off for the perfect amount. Too much flour can dry out your cookies, so this little trick goes a long way.
- Heart cookie cutter: Our favorite cutter is about 1.5 inches wide—perfect for these sweet little hearts. We have a set with various sizes, and this smaller one makes perfectly sized heart cutouts. The larger ones we save for regular cookies.
Step-by-step Instructions
STEP 1: Start by combining your softened butter, sugar, and vanilla extract in a big mixing bowl—or better yet, a stand mixer. Beat on medium speed until the mixture turns light, creamy, and fluffy—about 3 minutes. This step is key for that tender cookie texture.
STEP 2: Crack in the eggs, one at a time, mixing each just until it’s blended in. Don’t overmix here, just bring it together.

Cream the butter and sugar.

Add in eggs.
STEP 3: In a separate bowl, whisk together the flour, baking powder, and salt. This helps to evenly distribute the leavening agents and salt throughout the flour for a smooth dough.
STEP 4: Gradually add your dry ingredients to the wet mixture in about 3 to 4 batches. Mix just until the dough starts to pull together. If it feels a bit too soft or sticky, sprinkle in an extra tablespoon or two of flour to get just the right consistency.

Whisk together the dry ingredients.

Combine dry ingredients with the wet ingredients.
STEP 5: Take about half to two-thirds of this plain dough and set it aside—this will be the part that surrounds your hearts. To the remaining dough, add several drops of your natural food coloring, stirring well. Keep adding drops until you get the pretty pink shade you want. It’s so fun to see the color deepen!
STEP 6: Pop the pink dough into the freezer for 5 minutes to firm up a little. Then, on a lightly floured surface, roll it out into a rectangle about half an inch thick. Put it back in the freezer for another 15-20 minutes—this makes cutting out the hearts a breeze and keeps them crisp in shape.

Add food coloring to roughly ⅔ of the dough

Roll out the dough and chill it.
STEP 7: Now, take your small heart cookie cutter—ours measures about 1.5 inches across—and start pressing out heart shapes from the chilled pink dough. To stick the hearts together into a “log,” dip your finger in some water and lightly brush the floured side of each heart before pressing another on top. Just a tiny touch of water does the trick—too much can make things messy! Keep going until you have a heart log about 10 inches long.

Cut out all of your hearts…

…and stick them together.
STEP 8: Place your heart log back in the freezer for at least 30 minutes until completely firm. Once frozen solid, take it out and gently press the plain cookie dough all around the hearts. Be sure to really press in the plain dough so you don’t get gaps showing around the colored hearts. Roll everything carefully into a smooth, neat log.
STEP 9: Wrap the whole log tightly in plastic wrap and chill it in your fridge for at least 30 minutes to let it relax and firm up again.

Start adding dough around your hearts…

…and roll into a log.
STEP 10: Go ahead and preheat your oven to 350˚F. Line two baking sheets with parchment paper so your cookies don’t stick and bake evenly.
STEP 11: When your log is cold and firm, unwrap and slice it into ¼-inch thick rounds. Arrange the slices on your prepared baking sheets about 2 inches apart—they will spread just a bit as they bake. Bake for about 12 minutes, or until the bottoms turn a light golden brown. Let your cookies cool before enjoying those beautiful heart designs.

Before baking.

After baking.
Expert Tips and FAQs
- Don’t skip chilling your colored dough: To get those crisp, perfect hearts, chilling the pink dough in the freezer for around 15 minutes is a must. If the dough is too soft, the hearts will lose their shape when cutting. You also need to freeze the heart log after assembling so those cute shapes hold steady when you add the plain dough around them. Trust me, this part is key to get those sharp, dreamy hearts.
- Keep plain dough soft, not cold: You want the uncolored dough nice and pliable for wrapping around the hearts. So, skip chilling this one before assembly — soft is good here!
- Switch up the shapes for any celebration: The slice-and-bake magic works for every holiday. Think ghosts for Halloween, Christmas trees for the holidays, even pumpkins or stars. Just choose a cookie cutter large enough so you can see the pattern clearly when you slice.
- Measuring flour right is everything: Always spoon and level your flour to avoid overpacking. Too much flour dries out dough and makes shaping tricky—no one wants crumbly cookies! For a step-by-step on rolling and cutting sugar cookies that hold their shape, see our go-to recipe.
- Freezing dough is your friend: If you want to prep ahead, wrap the dough tightly and stash it in the freezer — it lasts for months this way. When you’re ready, thaw it at room temp for about 15 minutes before slicing and baking. Having ready-to-go dough is like cookie magic anytime! Shortbread-style logs like these pistachio shortbread cookies also freeze beautifully for make-ahead baking.

Homemade slice and bake heart sugar cookies with a nostalgic feel, featuring natural food coloring for pink heart shapes, soft and chewy texture, perfect for Valentine’s Day or any celebration.
- Total Time: 1 hour 42 minutes
- Yield: Makes about 24 cookies 1x
Ingredients
- 3/4 cup unsalted butter, softened to room temperature
- 1 cup granulated sugar
- 1 teaspoon vanilla extract
- 2 large eggs
- 2 1/2 cups all-purpose flour
- 1 teaspoon baking powder
- 1/2 teaspoon salt
- Red or pink natural food coloring
Instructions
- Add butter, sugar, and vanilla extract to a large mixing bowl or stand mixer. Beat on medium speed until the mixture is light, creamy, and fluffy, about 3 minutes.
- Add eggs one at a time, mixing just until combined after each addition.
- In a separate bowl, whisk together the flour, baking powder, and salt.
- Gradually add the dry ingredients to the wet ingredients in 3-4 batches, mixing just until dough comes together. If dough feels too soft or sticky, add 1-2 tablespoons more flour to achieve proper consistency.
- Remove about half to two-thirds of the plain dough and set aside for surrounding the hearts.
- Add several drops of natural food coloring to the remaining dough and mix well until desired pink shade is reached.
- Place the pink dough in the freezer for 5 minutes to firm up slightly.
- On a lightly floured surface, roll the pink dough into a rectangle about 1/2 inch thick. Return to freezer for 15-20 minutes to chill.
- Use a small heart cookie cutter (~1.5 inches) to cut out heart shapes from chilled pink dough.
- Lightly wet your finger and brush on the floured side of each heart before adhering another heart on top to create a heart log about 10 inches long.
- Freeze the heart log for at least 30 minutes until solid.
- Remove from freezer. Press the plain dough around the frozen heart log, ensuring there are no gaps. Roll carefully into a smooth log.
- Wrap the log tightly in plastic wrap and refrigerate for at least 30 minutes.
- Preheat oven to 350°F (175°C) and line two baking sheets with parchment paper.
- Slice the chilled dough log into 1/4-inch thick rounds and arrange on baking sheets about 2 inches apart.
- Bake for about 12 minutes or until bottoms are lightly golden brown.
- Remove from oven and let cookies cool before serving.
Notes
Use softened unsalted butter for best texture; if using salted butter, reduce added salt in recipe., Accurately measure flour by spooning into measuring cup and leveling off to avoid dry, crumbly dough., Chilling the colored dough and freezing the heart log are essential for crisp, well-defined heart shapes., Do not chill plain dough before assembly; it should be soft and pliable for easy wrapping around hearts., Dough can be frozen for months if tightly wrapped; thaw at room temperature about 15 minutes before slicing and baking., Heart cookie cutter used is approximately 1.5 inches across, ideal for this recipe., This slice and bake method can be adapted to other shapes for various holidays or celebrations.
- Prep Time: 90 minutes
- Cook Time: 12 minutes
- Category: Cookies
- Cuisine: American
Nutrition
- Serving Size: 2 cookies
- Calories: 275 calories per serving (2 cookies)
- Fat: 12.6 g per serving
- Carbohydrates: 37.1 g per serving
- Protein: 3.9 g per serving