Easy Puff Pastry Snowflake – Just a Taste
Picture this: a festive, eye-catching treat made with just four easy ingredients! That’s exactly what you get with this Easy Puff Pastry Snowflake, loaded with your favorite chocolate spread or jam. It’s not only a gorgeous centerpiece but also a tasty crowd-pleaser that’s perfect for holiday gatherings or cozy family moments.

I have to confess—besides vanilla bean ice cream, there’s one must-have always hanging out in my freezer: store-bought puff pastry. It’s my secret weapon in the kitchen that quickly turns simple ingredients into something special, saving time and fuss, especially on busy days.
What I love most about puff pastry is how versatile it is. It’s such an affordable pantry hero that effortlessly shifts from savory dinners to sweet treats, making both weeknight meals and festive occasions totally stress-free and delicious.

When it comes to savory cravings, my family goes crazy for things like Bacon, Egg and Cheese Toast Cups or Everything Pigs In a Blanket. But honestly, puff pastry’s real magic shows when it takes the simplest ingredients and turns them into something memorable and totally crave-worthy!

Now, let’s switch to the sweet side with a treat that’s sure to wow everyone around the table: the Puff Pastry Snowflake. If you adored the Puff Pastry Christmas Tree, you’re going to absolutely love this fresh spin — just as festive, just as fun, and packed with flavor.
I’m all about recipes that deliver “wow” with minimal effort, and this one is a total winner. Just four ingredients and a handful of simple steps transform into a stunning, pull-apart snowflake that’s almost too pretty to eat. Almost!

Don’t let the beautiful look scare you off—it’s super beginner-friendly. Start by spreading a generous layer of Nutella or your favorite jam on one sheet of puff pastry. Then, sandwich it with the second sheet on top, creating a flaky, sweet pocket ready for magic.

Here’s a simple trick I swear by: place a small bowl or glass right in the center of your stacked pastry sheets before you start cutting. This helps you skip cutting through the middle and keeps your snowflake perfectly balanced and pretty.
Next, slice four straight cuts at the top, bottom, left, and right sides to divide your circle into four equal quarters. Then, cut each quarter into four smaller wedge shapes—giving you 16 pieces total that are all set for twisting into those beautiful points.

Now comes the fun part! Grab two of those wedges and twist them around each other two or three times, then pinch the ends to seal them tight. Keep going with every pair until your snowflake has eight elegant, twisted arms. It almost feels like creating edible art you can eat!

Before it goes into the oven, give your snowflake a brush of egg wash for a gorgeous golden shine. Then sprinkle on some coarse sanding sugar for a festive sparkle and a nice, crunchy bite. And the best part? After baking and cooling just a bit, dust it all over with powdered sugar to get that perfect snowy, holiday vibe.


Storage Tips
If you happen to have leftovers (which might be rare because this treat disappears fast!), store them in an airtight container at room temperature for up to two days. To keep it fresh longer, pop it in the fridge, but just know the pastry won’t be as crisp.
When you’re ready to enjoy it again, simply warm it up for a few minutes in the oven to bring back that flaky, golden perfection—no soggy bites here! This same gentle reheating method works for other festive shapes, like a Puff Pastry Star Appetizer.
Make-Ahead Tips
This recipe is a lifesaver for busy days or holiday prep. You can make the snowflake right up to the twisting step, then cover it with plastic wrap and chill it in the fridge for a few hours or overnight. If you prefer to start from scratch, you can prep the dough ahead too—see how to make puff pastry dough.
When you’re ready to bake, just brush with egg wash, sprinkle on sugar, and pop it in the oven. This way, you cut down on last-minute fuss and keep things super easy.
Variations
Want to mix it up? Try swapping Nutella for peanut butter and jelly for a nostalgic twist that kids love. Or, use cream cheese and your favorite fruit preserves for a tangy, rich filling. Sticking with the chocolate-hazelnut vibe? Try Puff Pastry Nutella Twists for another festive, shareable option.
For a grown-up version, spread some almond butter and sprinkle sliced almonds on top before twisting. Planning brunch instead? Bake Nutella Morning Buns for a warm, flaky centerpiece. The possibilities are endless—and delicious!
Serving Suggestions
This puff pastry snowflake makes a fantastic centerpiece for holiday brunch, served alongside a steaming cup of coffee or hot chocolate. It’s a gorgeous way to impress guests and share something homemade without the stress.
Pair with fresh fruit or a scoop of vanilla ice cream for a cozy dessert that keeps everyone smiling, or serve as a sweet snack with afternoon tea. It’s truly a crowd-pleaser any time of day.
Recipe FAQs
- Can I use frozen puff pastry? Absolutely! Just thaw it according to package instructions before starting the recipe. Fresh puff pastry usually works best, but frozen is a great time-saver.
- What kind of jam works best? Any kind you love! Raspberry, strawberry, apricot… pick your favorite or mix a few to keep things interesting. If you’d like a quick, lower-sugar option, you can make easy berry chia seed jam in minutes.
- Can I make this gluten-free? Unfortunately, puff pastry is typically made with wheat flour, so a gluten-free version will need a specialty pastry. Store-bought gluten-free puff pastry options vary, so check your local store.
- How do I prevent the pastry from getting soggy? Be sure not to overload the filling, and bake right after twisting and applying egg wash. This helps keep the layers flaky and crisp.
- Can I freeze the unbaked snowflake? Yes! Place it on a baking sheet, freeze until solid, then wrap tightly and store in the freezer. When ready, bake it from frozen, adding a few extra minutes to baking time.
A festive and easy dessert featuring a puff pastry snowflake filled with Nutella or jam, baked to a golden finish and dusted with confectioners’ sugar.
- Total Time: 45 mins
- Yield: 8 servings 1x
Ingredients
- All-purpose flour, for dusting your work surface
- 1 (17.3-oz.) package frozen puff pastry (2 sheets), thawed
- 1/3 cup Nutella or jam of your choice
- 1 large egg beaten with 1 tablespoon water (for egg wash)
- Crystal sanding sugar, for sprinkling on top (optional)
- Confectioners’ sugar, for dusting the finished pastry
Instructions
- Preheat your oven to 400°F and line a baking sheet with parchment paper.
- Lightly flour your work area, then unfold your thawed puff pastry sheets. Roll each sheet gently to seal any perforations.
- Cut each sheet into a 9-inch circle by tracing around a large bowl. Place one circle on the baking sheet.
- Spread Nutella or your jam choice in the center of the first puff pastry circle, leaving a 1/2-inch border around the edges.
- Place the second puff pastry circle on top of the filling and gently press edges together to seal.
- Place a 2-3 inch glass or small bowl in the center (do not cut through center). Slice from edge of the glass outward to make 16 wedges.
- Remove the glass, then brush the entire pastry surface with the egg wash for a shiny golden finish.
- Take two adjacent wedges, twist them 2-3 times toward each other and pinch ends to seal. Repeat for all wedges, forming 8 twisted points.
- Sprinkle sanding sugar over the top if desired. Bake for 20-25 minutes, until puffed and golden.
- Let cool slightly, dust with confectioners’ sugar, then slice, pull apart, and enjoy!
Notes
Ensure puff pastry is thawed before starting for easy handling., Rolling the puff pastry sheets seals pre-cut lines preventing uneven puffing., Twisting the wedges creates the beautiful snowflake shape and texture., Egg wash gives the pastry a golden, shiny finish., Sanding sugar adds a sparkly crunch and festive look, but is optional.
- Prep Time: 20 mins
- Cook Time: 25 mins
- Category: Dessert
- Cuisine: American
Nutrition
- Serving Size: 1 serving
- Calories: 76 kcal
- Fat: 4 g
- Carbohydrates: 8 g
- Protein: 1 g
More in Breakfast
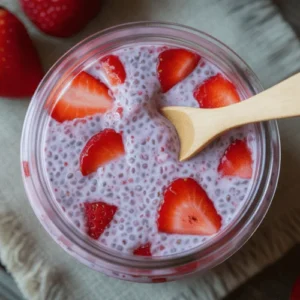
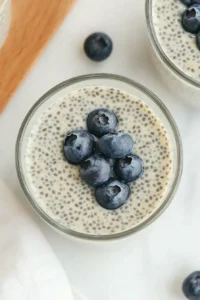
Vanilla Chia Pudding
Refreshing Earl Grey Chia Seed Pudding