Perfect Shortbread Cookies (tender & buttery) – Lauren’s Latest
Shortbread cookies don’t have to be just a holiday treat anymore! These buttery little bites are so delicious, you’ll want to enjoy them anytime you need a cozy snack. I’ve taken the traditional shortbread recipe and kept it super simple and reliable, so you can easily bake a batch whenever that comforting cookie craving hits. Whether you dunk them in chocolate, spread a scoop of your favorite jam on top, or eat them plain, these cookies always hit the spot just right.

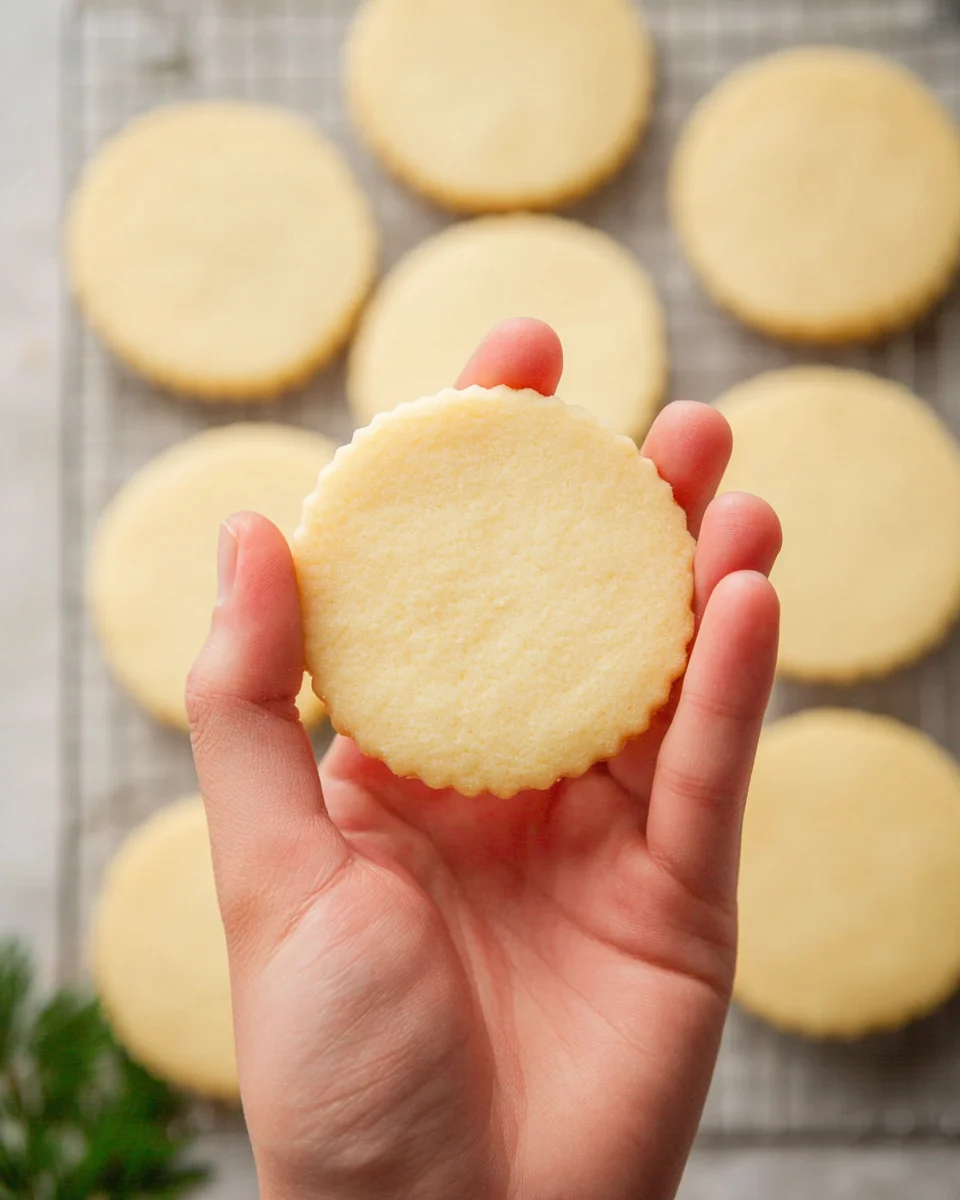
If you look closely at the photos, you’ll see I sometimes use a small round cookie cutter for petite, bite-sized shortbreads, and other times a larger crinkle-edge cutter for chunkier, more rustic cookies. Both ways turn out amazing — honestly, it just depends on whether you want dainty little bites or big, satisfying cookies!
The Three Simple Ingredients You’ll Need
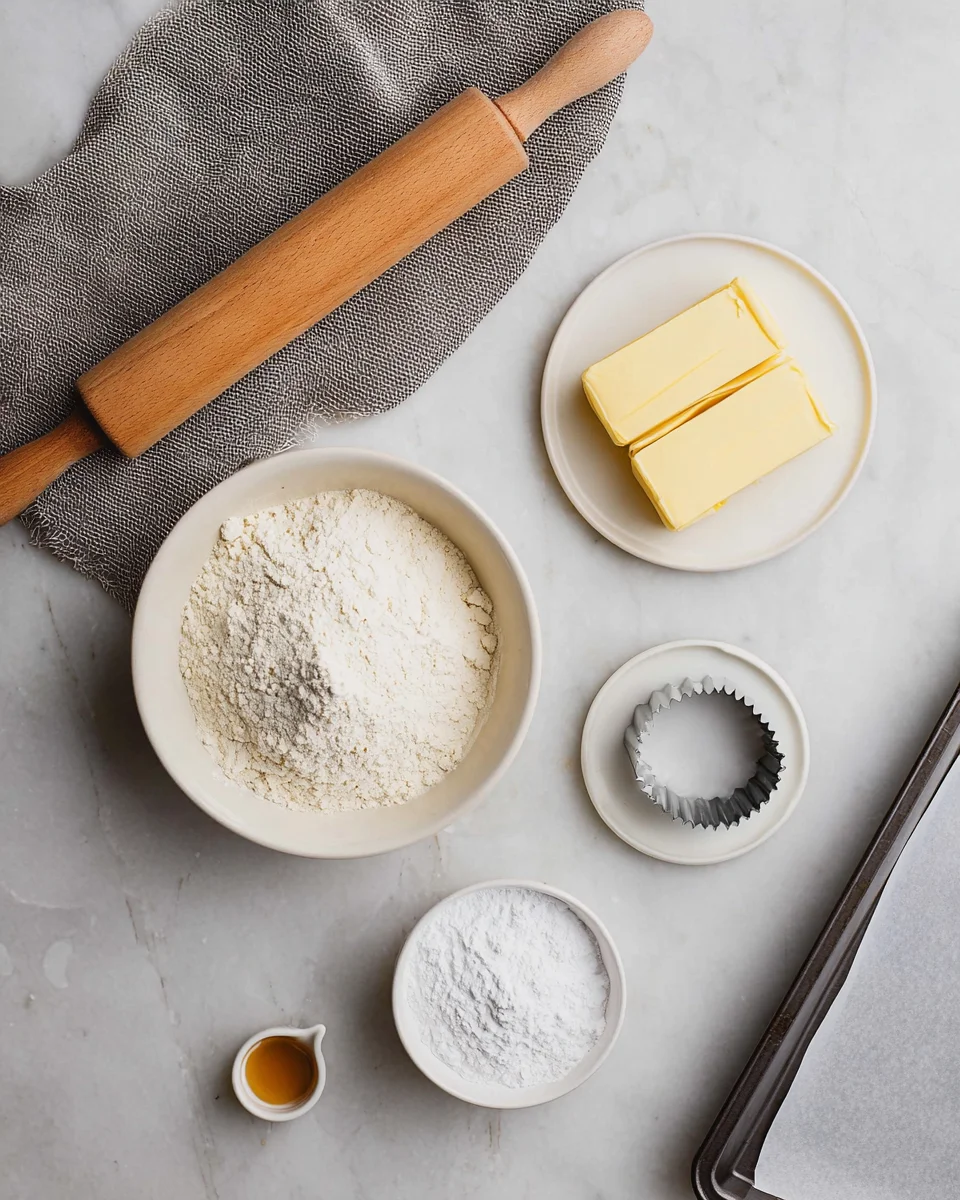
The magic of shortbread is in its simplicity, and every good shortbread recipe relies on just three basic ingredients you probably already have in your kitchen:
- Butter – Make sure your butter is softened and at room temperature before you start. I always use salted butter because it brings a little extra flavor that I just adore.
- Flour – Plain old all-purpose flour works perfectly here. I prefer unbleached, but regular all-purpose flour is totally fine.
- Sugar – I really like using powdered sugar (also called confectioner’s sugar) because it helps make the cookies melt in your mouth. But if you only have granulated sugar, don’t worry — your shortbread will still taste lovely.
Pro Tip: A splash of vanilla extract adds such a warm, homey touch that really lifts these cookies. If you want your shortbread perfectly classic and pure, you can leave it out, no problem!
How to Make These Easy Shortbread Cookies
Believe me, this classic shortbread recipe is surprisingly easy to make! The trick is starting with soft, room-temp butter and carefully measuring your flour. The dough will look crumbly at first, but don’t stress — once you begin working it with your hands, everything comes together nicely. (Your warm hands are like magic here!)
1. Preheat and Prep Your Baking Sheets
Preheat your oven to 325°F. Line two baking sheets with parchment paper. I usually use light-colored parchment so the bottoms don’t brown too fast. Have them ready while you mix your dough — it helps keep the process smooth.
2. Mix the Dough Together
Toss softened butter, sugar, vanilla, and flour into the bowl of a stand mixer. If you don’t have one, a hand mixer works well too. Use the paddle attachment and mix on low speed until the mixture looks crumbly but holds together slightly. At first, it might seem dry and crumbly — that’s exactly right! Hand mixing can be tricky here, so a mixer is your best buddy, but a hand mixer is a great backup plan.

3. Shape, Roll, and Cut Your Dough
Lightly flour your countertop or rolling surface. Then, gather your dough into a ball. Place it between two sheets of parchment paper and roll it out to about 1/3 to 1/2 inch thick. Use your favorite cookie cutter — I often go for 3-inch rounds, but any shape works! Lay the cut cookies on your baking sheets, leaving a little gap between each one.

Helpful Hint: If rolling and cutting feels like too much work, no worries! You can just roll the dough into small balls and press them flat with the bottom of a glass. Want to add that classic shortbread look? Press a fork gently into the dough for a charming pattern. Or get creative and mix up your cookie cutters — cookie shapes make baking even more fun!
4. Bake and Cool Your Cookies
Bake your shortbreads for 12 to 15 minutes, until the bottoms start to turn a light golden color. Oven temperatures can vary, so keep an eye on them so they don’t overbrown. Once out of the oven, let the cookies rest on the warm baking sheet for 5 minutes to firm up a bit, then carefully move them to a wire rack to cool completely.

Make These Shortbreads Your Own
Once you’ve nailed the classic shortbread, it’s so fun to play around with flavors and toppings! Here are some easy ways to personalize your batch:
- Change Up the Extract. Try almond, lemon, or even lavender extract for a fresh twist. A tiny splash can add a wonderful floral note!
- Chocolate Boost. Mix in mini chocolate chips, dip the baked cookies in melted chocolate, or sandwich two together with Nutella—or try Chocolate Hazelnut Shortbread Cookies for a built-in swirl. Honestly, chocolate makes everything better!
- Jammy Goodness. Set up a jam dip station or spread a spoonful of jam right on top of your shortbreads after baking—try making an easy berry chia seed jam. So good!
- Citrus Zest. Stir in a teaspoon of fresh lemon, lime, or orange zest to add a bright, zesty pop of flavor. For a full citrus-forward version, check out Lemon Shortbread Cookies.
- Nutty Crunch. Add finely chopped pecans or almonds to the dough for a little extra texture that pairs beautifully with the crumbly cookie—or try Pistachio Shortbread Cookies (with Raspberry Glaze) for a nutty-meets-fruity twist.
- Fun with Sprinkles. Kids and grown-ups both love rolling dough balls in colorful sprinkles before baking, or frosting the cooled cookies and then coating them with sprinkles for a cheerful look.

Honestly, these might be some of the best shortbread cookies you’ll ever bake. I often catch myself sneaking another one! What makes this recipe so much fun is how easy it is to try new flavor combos each time you bake. Don’t forget to scroll down and grab the printable recipe card so these cookies can become a staple in your home. Enjoy every buttery bite, friends! 🙂
FAQ and Troubleshooting for Your Shortbread Cookies
I was pretty surprised at how many questions came up when I first shared this recipe—shortbread baking can have its little quirks! Here are my top tips to help you get perfect, buttery shortbread every single time. Since this recipe uses volume measurements, expect some wiggle room — that’s part of the charm.
Why is my shortbread dough so crumbly?
If your dough feels crumbly, try gently pressing it together with your hands. The warmth from your palms really helps the dough stick. Also, make sure your butter is nicely softened and at room temp — this really makes a big difference! If the edges crumble when you roll it out, just press them back on. And if rolling feels tough, no worries — just roll your dough into balls and flatten them with your palm or a fork, as in these soft vanilla shortbread cookies with vanilla bean. Works like a charm every time!
How should I measure my flour?
Measuring flour can be tricky! I always start by fluffing my flour with a fork or whisk to break up any lumps. Then I spoon it lightly into my measuring cup and level it off with the back of a knife. This stops you from packing in too much flour, which can make the cookies tough or dry.
Why did my cookies spread out too much?
If your cookies come out flat and spread too far, that usually means there wasn’t enough flour in your dough. Shortbread needs just the right amount of flour to hold its shape. Next time, try adding a little more flour if your cookies spread too much. Another tip: chilling the dough before rolling helps control spreading too.
Why aren’t my shortbreads crunchy?
Shortbread is meant to be tender and crumbly, not hard or crunchy — so if your cookies feel soft, that’s totally normal. If you want a bit more crunch, try rolling your dough to an even thickness; too thick makes them softer inside. Also, baking at a lower temperature like 325°F ensures they cook through without browning too much on the outside, which helps with texture. Prefer a crisper, sweeter cookie? Try our classic butter cookies.
Do I need to chill the dough before baking?
Chilling isn’t required for this recipe. You can bake right after mixing and shaping your dough. But if you want cookies that hold their shape a bit better, chilling for 20 to 30 minutes can help. It’s a nice extra step if you have time, but definitely not a must. For ultra-neat edges, try a slice-and-bake brown sugar shortbread—the quick chill makes clean slicing easy.
Storage Tips
Shortbread cookies keep really well! Store them in an airtight container at room temperature, and they’ll stay fresh and buttery for up to a week. If you want to keep them longer, pop them in the fridge for up to two weeks—but I find that sometimes changes the texture a bit. For even longer storage, you can freeze the baked cookies in a freezer-safe container for up to 3 months. Just let them thaw at room temp when you’re ready to enjoy them again. These storage tips also apply to flavored shortbread, like Pistachio Shortbread Cookies and Buttery Matcha Shortbread Cookies.
Make-Ahead Tips
You can definitely make the dough ahead of time! Wrap it tightly in plastic wrap and store it in the refrigerator for up to 48 hours before rolling and baking. This not only saves time on busy days but also makes the dough easier to handle. If you want, you can even freeze the dough balls before baking—for example, these pecan snowball cookies go straight from the freezer to the oven; just add a couple extra minutes to the baking time.
Variations
- Try swapping some of the all-purpose flour for whole wheat flour for a nuttier, heartier cookie.
- Add a pinch of cinnamon or nutmeg to the dough for a warm, cozy spice touch.
- Mix in a tablespoon of finely ground coffee for a subtle mocha flavor that pairs beautifully with the buttery shortbread.
- For a vegan twist, swap the butter with a plant-based margarine and use powdered sugar that’s labeled vegan.
Serving Suggestions
- Serve your shortbread with a cup of tea or coffee for a simple, relaxing afternoon treat.
- Stack them alongside fresh berries and a dollop of whipped cream for a light dessert.
- Use these cookies as a base for a shortbread pie crust — just bake the dough pressed into a pie pan!
- Offer a platter of shortbread alongside other classic cookies for a festive holiday cookie exchange.
Classic buttery shortbread cookies, tender and sweet, perfect for any occasion year-round. Simple three-ingredient recipe with an optional splash of vanilla for extra flavor.
- Total Time: 35 minutes
- Yield: 24 cookies 1x
Ingredients
- 1 cup butter, softened
- 3/4 cup powdered sugar
- 1/2 teaspoon vanilla extract
- 2 cups all purpose flour
Instructions
- Preheat your oven to 325°F (163°C). Line two baking sheets with parchment paper and set aside.
- Add softened butter, powdered sugar, vanilla extract, and all-purpose flour into a stand mixer bowl. Mix slowly on low speed until mixture looks crumbly but holds together when squeezed.
- Roll dough into a ball and place between two sheets of parchment paper. Roll out dough to about 1/3 to 1/2 inch thick.
- Cut dough into 3-inch circles (or desired shapes) with cookie cutters and arrange cut-outs on prepared baking sheets, leaving space between each cookie.
- Bake for 12-15 minutes or until the bottoms are just starting to turn golden brown.
- Remove from oven and let cookies cool on the baking sheets for 5 minutes before transferring to wire racks to cool completely.
- Store cookies in an airtight container to keep fresh for up to 5 days at room temperature.
Notes
For a classic look, roll dough into balls and press flat with a fork for a crisscross pattern before baking., If dough is too crumbly while rolling, press scraps back onto dough or roll dough into balls and flatten with a glass or palm., Do not refrigerate dough unless desired; chilling for 30 minutes can reduce spreading., Cookies can be frozen after baking for up to 3 months or freeze unbaked cut dough shapes for baking later.
- Prep Time: 20 minutes
- Cook Time: 15 minutes
- Category: Cookies, Dessert
- Cuisine: American
Nutrition
- Serving Size: 1 cookie
- Calories: 130 kcal per cookie
- Fat: 8 g
- Carbohydrates: 14 g
- Protein: 1 g