The Best Homemade Cherry Pie Filling
You only need a handful of simple ingredients to make this incredible homemade cherry pie filling with great depth of flavor. Can be made with frozen cherries too, and it’s so much better than store-bought!
Unlike most recipes, my trick is to use two cherry components for the best flavor in this filling; a thick, concentrated cherry flavor base + juicy, whole cherries coated in that base. Plus, an optional dash of red wine for even more flavor.


Why this cherry pie filling is so much better than store-bought!
I developed this delicious cherry pie filling for one simple reason. I just don’t like canned cherry pie filling. I’ve tried a few different brands, and they all had such an off-putting flavor.
So I came up with this recipe because I wanted to make homemade cherry pie with great depth of flavor, with a filling that did justice to the delicious cherries.
- Traditional cherry pie filling only involves cooking the cherries with the thickener. But this recipe contains two cherry components!
- Thick, concentrated cherry flavored base
- Juicy, whole cherries coated in the thick, concentrated sauce
- This additional step adds so much flavor and you can even add spices to make it taste even better.
- I add red wine for an extra layer of flavor. But you can easily substitute this with a non-alcoholic choice and still retain just as much flavor.
- Such an easy recipe. The longest part of the recipe is actually pitting cherries.
- This filling can be used to make homemade cherry pie with your favorite pie crust recipe, but can also be used as a topping for other desserts.
- Adaptable recipe, and can be made with fresh or frozen cherries or even both (this is what I do!).
Ingredients
- I’mRipe cherries (I use a combination of fresh and frozen, which is more cost effective while also yielding the best results).
- Sugar – I use both brown and white sugar, but just white sugar will work too.
- Cornstarch – Cornstarch is the thickener for this recipe. You can also use Clearjel starch (both the cook type and the instant no cook type).
- Red wine – Adds flavor to the cherry pie filling. Use a red wine that you like to drink, because the wine will be cooked down and be concentrated in flavor, and the pie filling will have that infused red wine flavor.
- Non alcoholic options – Cherry juice, pomegranate juice, raspberry or blackberry puree, orange juice, along with a few spices such as cinnamon, cloves, cardamom.
- Lemon juice – To help bring out the flavor of cherries.
- Salt – To balance the sweetness.
What kind of cherries to use?
For the best texture and flavor, I recommend using fresh cherries for this recipe. However, since I cook down about 1/3 of the cherries, I find that it’s more cost effective to use frozen cherries for part of this recipe.
Cherries have become quite a bit more expensive now (like most things, unfortunately), so if I can substitute at least some of the fresh fruit with frozen and still get great results, that’s precisely what I’ll do!
For this recipe I use dark sweet cherries such as Bing cherries.
But you can use sour cherries as well. However, adjust the sweetness to your liking if you use tart cherries.
If you only have frozen cherries (frozen sweet or sour cherries), you can still make this recipe with some adjustments. Frozen cherries will break down and soften more easily.
So some adjustments are needed to keep the texture as similar to the fresh cherry pie filling recipe.
How to make cherry pie filling
How to pit the cherries
The very first step is to pit the cherries. This is honestly the longest part of the recipe.
There are a few ways to remove cherry pits. Below is from the hardest to the easiest method. I’m not a big fan of paying for one job kitchen items, but a cherry pitter is one exception.
Cut the cherries in half and manually remove the pit – Messy, and you risk crushing them which will make the cherries softer in the filling.
Large piping tip method – You’ll need a large piping tip, where the opening is about 0.5 cm. Place the cherry on top of the tip and push it down. The pit should pop out from the cherry and you should be able to separate it from the fruit.
Chopstick and bottle method – Use a glass beer bottle with a narrow neck and a wooden or steel chopstick. Place the cherry on top of the bottle opening. It should nestle on top, and not go through the opening. Hold the cherry firmly with the the bottle, and push the chopstick through the middle of the cherry into the bottle opening. This should also push the pit out. Very cost effective and you don’t have to buy a separate pitter.
Cherry pitter – Just place the cherry in the receptacle and close the pitter. The metal rod will push the pit out. Easy and not finicky at all. But still time consuming as the cherries are pitted one by one, and you have to purchase this one job kitchen item.
Multiple cherry pitter – This gadget will pit multiple cherries at once OR pit cherries very quickly one after the other. Much faster than other methods, but also more expensive. If you make a lot of cherry pies with in-season cherries, then this will be a good investment.
Step by step instructions to make the pie filling

Divide the cherries – After pitting the cherries, divide them into two portions. About 1/3 goes into a saucepan and 2/3 in a larger bowl. I also substitute the 1/3 of the cherries with frozen, since this will be cooked down anyway.
Make the concentrated cherry base – Into the saucepan with the cherries, add the red wine and sugar. Cook the cherry mixture until you have a thick base with softened and syrupy cherries.
Prepare the remaining cherries – Whisk together the remaining sugar and cornstarch. Add this to the remaining fresh cherries in the big bowl and mix to coat.

Cook the cherry pie filling – Add these cherries (and any remaining sugar and cornstarch in the bowl) into the saucepan with the thickened cherry base. Mix in the cherries with the base.
Cook the mixture until it starts to bubble, and continue to cook for a further few minutes until the mixture is thick, glossy, and the cherries are still whole, but just a little softened.
Stir in lemon juice – Finally, add the lemon juice and let the mixture boil for a further minute.
Store and serve – Once the pie filling is cooked, store it in clean jars and in the fridge for up to 7 days. Serve this homemade pie filling however you like, or make a delicious juicy cherry pie with it!

Recipe tips for success!
- For the best texture, use at least 2/3 fresh cherries! Fresh sweet cherries hold their shape better, and will result in a thick and juicy pie filling with intact whole cherries!
- To really capitalize on the delicious cherry flavor, take your time to make a concentrated flavor base with cherries and wine. This will make your final pie filling taste that much better. Everyone’s going to ask you how you made the best cherry filling they’ve ever tasted in their lives!
- Substitute the red wine with port, sherry, or even bourbon if you like. But a non-alcoholic substitution will also add a lot of flavor.
- The first batch of cherries should be cooked down to an almost jammy texture.
- The cherries you add last should still retain their shape – so do not overcook them!
- If you want to freeze the cherry pie filling, use Instant ClearJel.

Ways to use cherry filling
There are SO MANY amazing ways to use this extra delicious, thick, juicy cherry pie filling!
The most obvious is to make a wonderful cherry pie with this filling, paired with store-bought or homemade pie crust. One filling recipe will fill a deep pie dish very generously, and result in a cherry pie with such fantastic and complex depth of flavor.
But there are lots of other options for desserts with cherry pie filling,
- Topping for ice cream (a scoop of vanilla ice cream is always a great choice)
- Topping for yogurt
- Topping for cheesecake
- Cherry trifle dessert
- To make a variation of black forest cake or chocolate cake with cherry pie filling
- As a topping for chocolate brownie to make cherry pie brownie
- To make cherry pie cheesecake
- Top your focaccia bread to make a sweet cherry focaccia
- Make ice cream
- Toping for waffles or pancakes
Storage tips
Fridge
This easy cherry pie filling will last in the fridge for up to 1 week, if stored in an airtight container.
If the filling is kept out of the fridge for prolonged periods of time, so that the temperature regularly fluctuates between room temperature and chilled, then the shelf life will be reduced.
The same goes for using spoons that are not clean to scoop out the filling.
Freezer
However, if I want to freeze this pie filling for later, then I prefer to substitute the cornstarch with Instant Clear Jel when cooking the filling.
This modified cornstarch withstands freezing and thawing much better than regular cornstarch. Then the cherry pie filling will last in the freezer for up to 1 month!
Just let it thaw out in the fridge before using it.
Canning
Unfortunately, I am not familiar with canning and I haven’t canned this particular recipe.
It is not recommended that you can mixtures that have been thickened with cornstarch, because the prolonged high heat can denature the cornstarch and make the filling liquid again.
Instead,
- Make the pie filling WITHOUT cornstarch and can it. Then thicken it with cornstarch before using it. OR
- Substitute the cornstarch with ClearJel cook type starch. This modified cornstarch handles high heat much better. Howeever, this starch will not thicken much during the cooking process, and will only thicken while it’s cooling down.

Recipe FAQ
Can I use canned cherries?
Unfortunately, I have not made this recipe with canned cherries. So I can’t be 100% sure if the results will be the same when using canned cherries.
Can I use frozen cherries?
Yes, you can! In this recipe, I do use some frozen cherries. But if you wanted to use all frozen cherries, then you can do that too.
The texture of the pie filling will be softer with only frozen cherries because they are already softened when thawed out. The full instructions on how to substitute frozen cherries in this cherry pie filling are included under recipe notes.
Can I use different sweeteners to make cherry pie filling?
I have not tried other sweeteners here.
You could use honey, but substitute the honey at a 1:1 ratio by weight. Honey will add more liquid, so the cook time should be increased, or you can slightly increase the cornstarch amount instead.
I have not used artificial sweeteners. The ratio of artificial sweetener and regular sugar varies, which will result in a change in the pie filling texture. I highly recommend following a recipe that has been tested with artificial sweetener instead.
How to add more spices and flavor variation?
You can absolutely add more flavor complexity to make your own best cherry pie filling.
Instead of red wine, you can use bourbon or whiskey! Due to the higher alcohol percentage, this filling will be more boozy as well then.
You can also add spices to the filling. Cinnamon is a classic, but how about making the flavor more interesting with spices and other flavors such as,
Ginger
Cardamom
Cloves
Orange peel
Pureed raspberry or blackberry
Elderberry puree etc.

Homemade cherry pie filling with two cherry components for depth of flavor, including a concentrated cherry base and whole cherries coated in a thick sauce, enhanced with optional red wine. Suitable for fresh or frozen cherries.
- Total Time: 50 minutes
- Yield: About 22 servings (¼ cup each) 1x
Ingredients
- 1600 g pitted cherries (about 3.5 lbs / 10 cups; recommend 2/3 fresh and 1/3 frozen for best texture)
- 50 g sugar (¼ cup, white or brown)
- ¼ tsp fine sea salt (not table salt)
- 80 mL red wine (⅓ cup; can substitute with pomegranate juice, cherry juice, orange juice, or other non-alcoholic options)
- 150 g white sugar (¾ cup)
- 45 g cornstarch (4½ packed tbsp; can substitute with Instant ClearJel for freezing)
- 30 mL lemon juice (2 tbsp)
Instructions
- Pit the cherries using preferred method (cherry pitter recommended).
- Divide the pitted cherries into two portions: 600 g (3⅓ cups) and 1000 g (6⅔ cups).
- In a large saucepan, combine 600 g cherries, 50 g sugar, salt, and red wine. Cook over medium-high heat, stirring to dissolve sugar and bring to a boil. Reduce heat and simmer for about 20 minutes until jammy and thick.
- While the cherry base cooks, place remaining 1000 g cherries in a large bowl.
- Whisk together 150 g sugar and cornstarch. Add the mixture to the cherries in the bowl and toss to coat.
- Add the coated cherries and any remaining sugar-cornstarch mixture to the saucepan with the cooked cherry base. Stir to combine.
- Cook over medium heat, stirring, bring to a gentle boil. Continue cooking for 5-10 minutes until the mixture is thick, glossy, and cherries remain mostly whole but softened.
- Add lemon juice and cook for about 1 minute.
- Remove from heat and let cool.
- Store in clean airtight containers in the refrigerator for up to 7 days.
Notes
Using 2/3 fresh cherries gives best texture as they hold shape better during cooking., Frozen cherries break down more, so they are best used in the cooked down base portion., Non-alcoholic substitutions for red wine include cherry juice, pomegranate juice, or orange juice with spices like cinnamon or cloves., To freeze, substitute cornstarch with Instant ClearJel for better freeze-thaw stability; filling lasts up to 1 month in freezer., Canning not recommended with cornstarch; use ClearJel starch for canning or thicken after canning., Variations can include adding spices such as cinnamon, ginger, cardamom, cloves, or adding berry purees for flavor complexity., Serving size: ¼ cup., Approximate nutritional information per serving: 92 kcal, 23 g carbohydrates, 1 g protein, 0.2 g fat, 2 g fiber, 18 g sugar, 27 mg sodium.
- Prep Time: 20 minutes (includes pitting cherries)
- Cook Time: 30 minutes
- Category: Dessert
- Cuisine: American
Nutrition
- Serving Size: ¼ cup
- Calories: 92 kcal per ¼ cup serving
- Fat: 0.2 g per ¼ cup serving
- Carbohydrates: 23 g per ¼ cup serving
- Protein: 1 g per ¼ cup serving
More in Breakfast
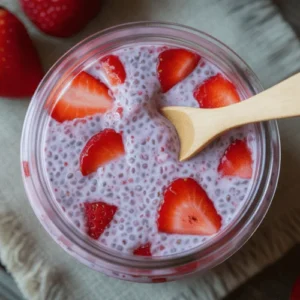
Vanilla Chia Pudding
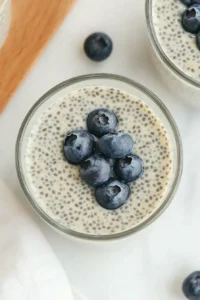
Refreshing Earl Grey Chia Seed Pudding