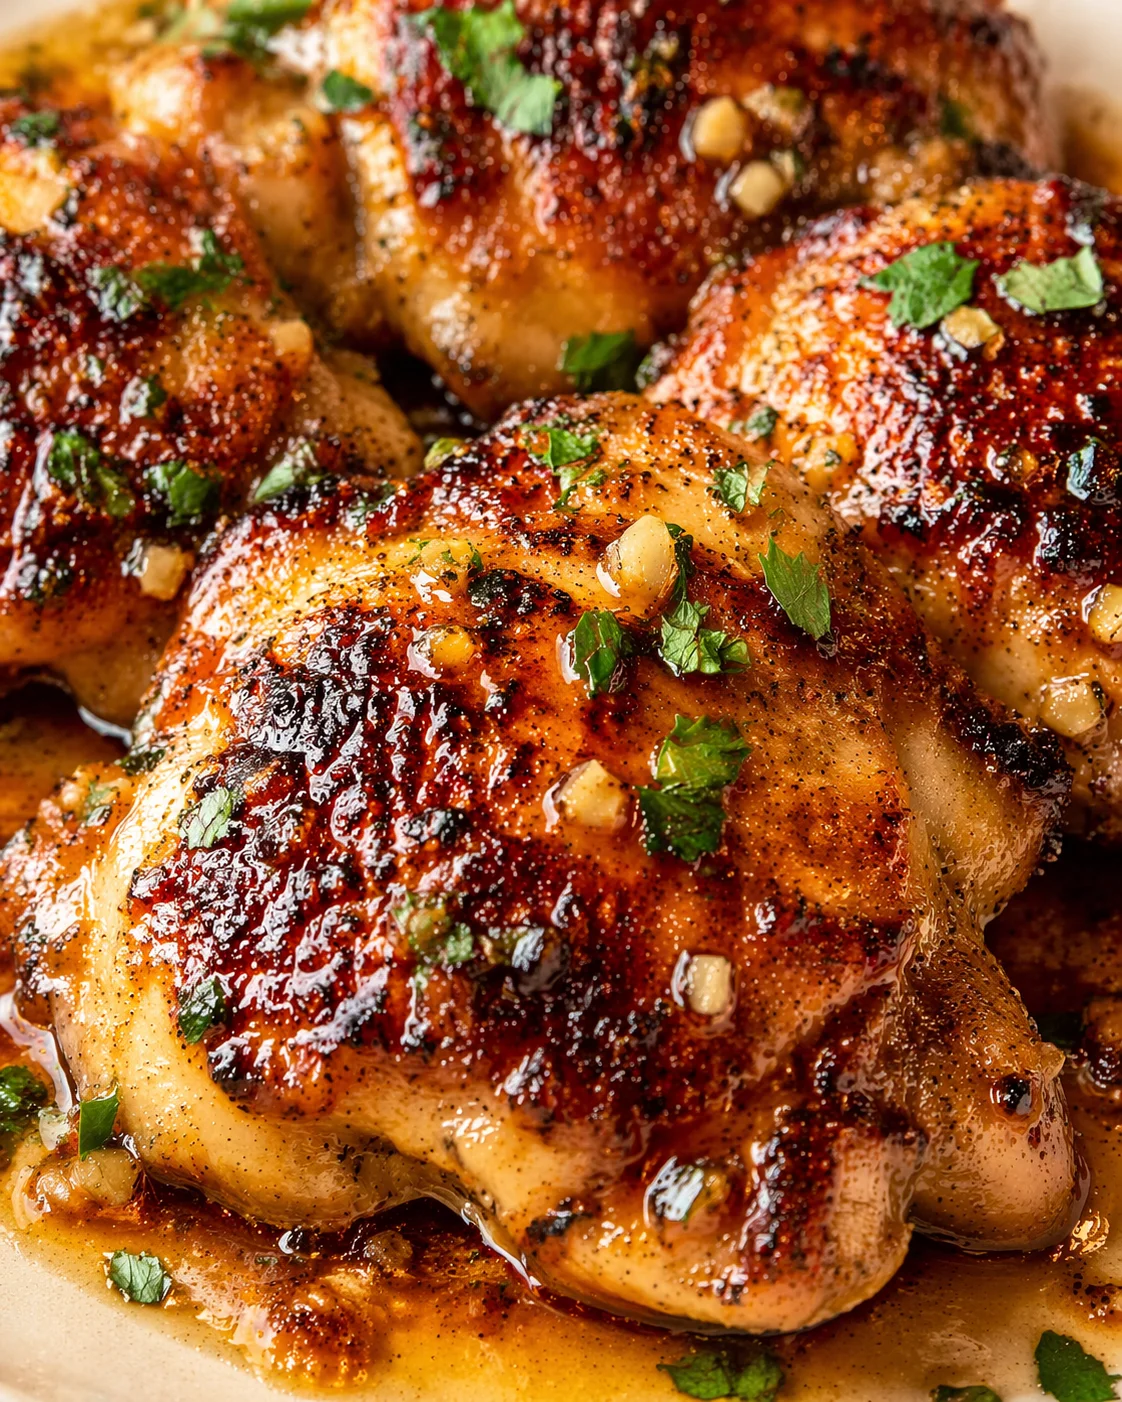
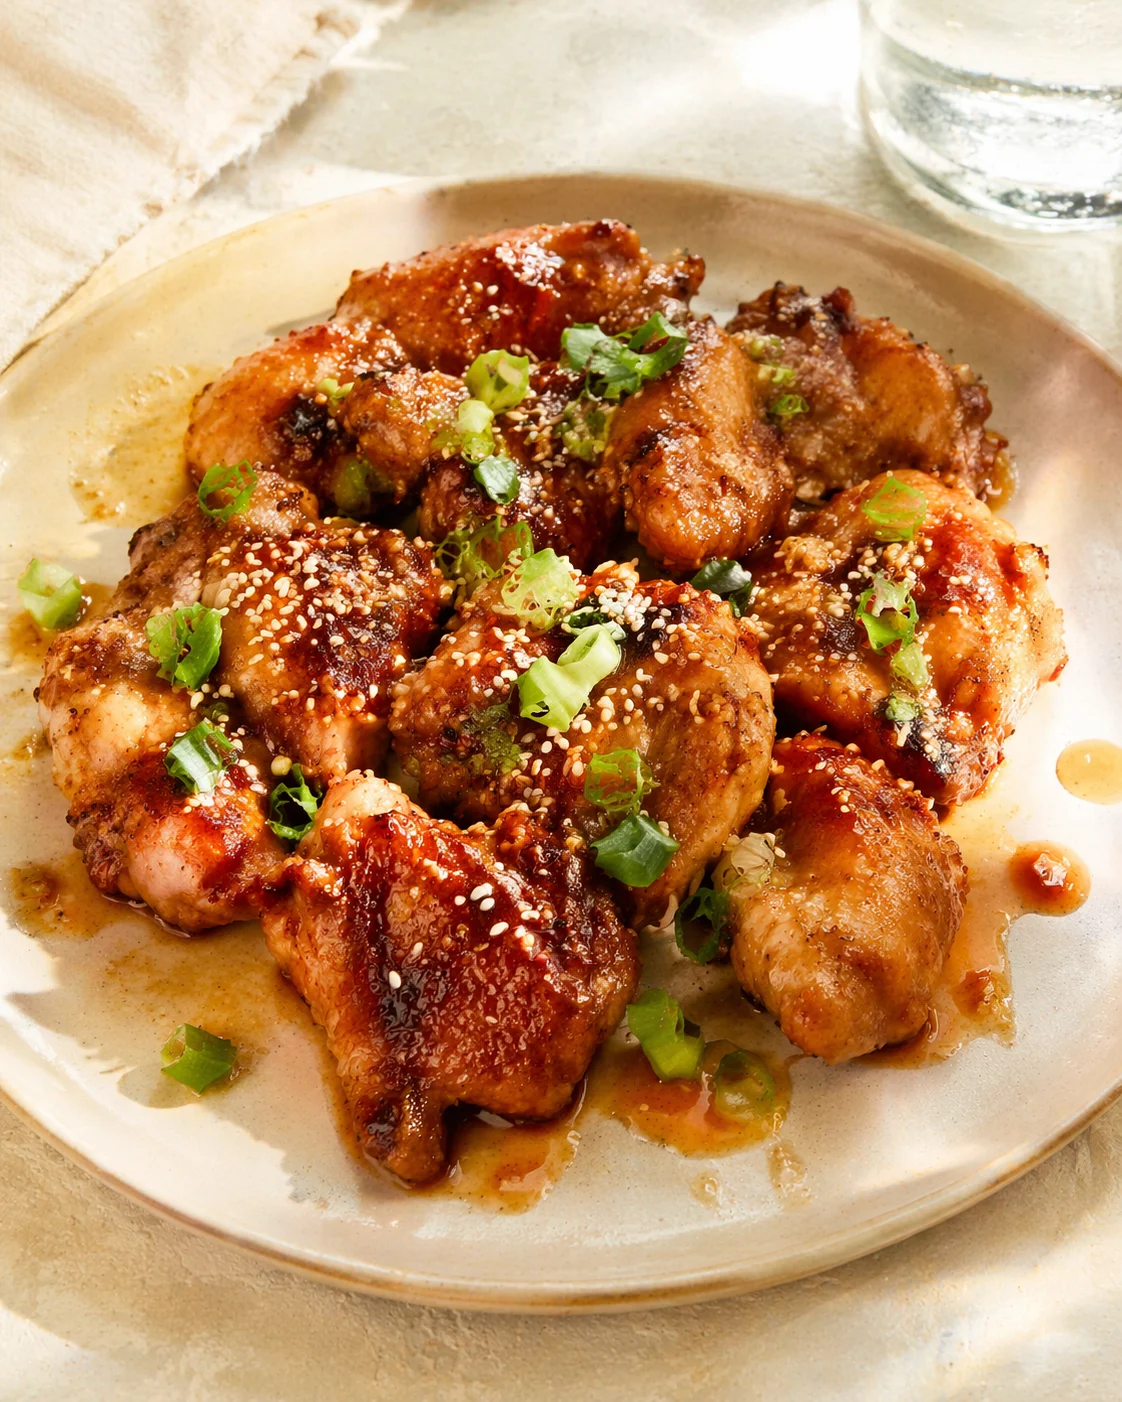
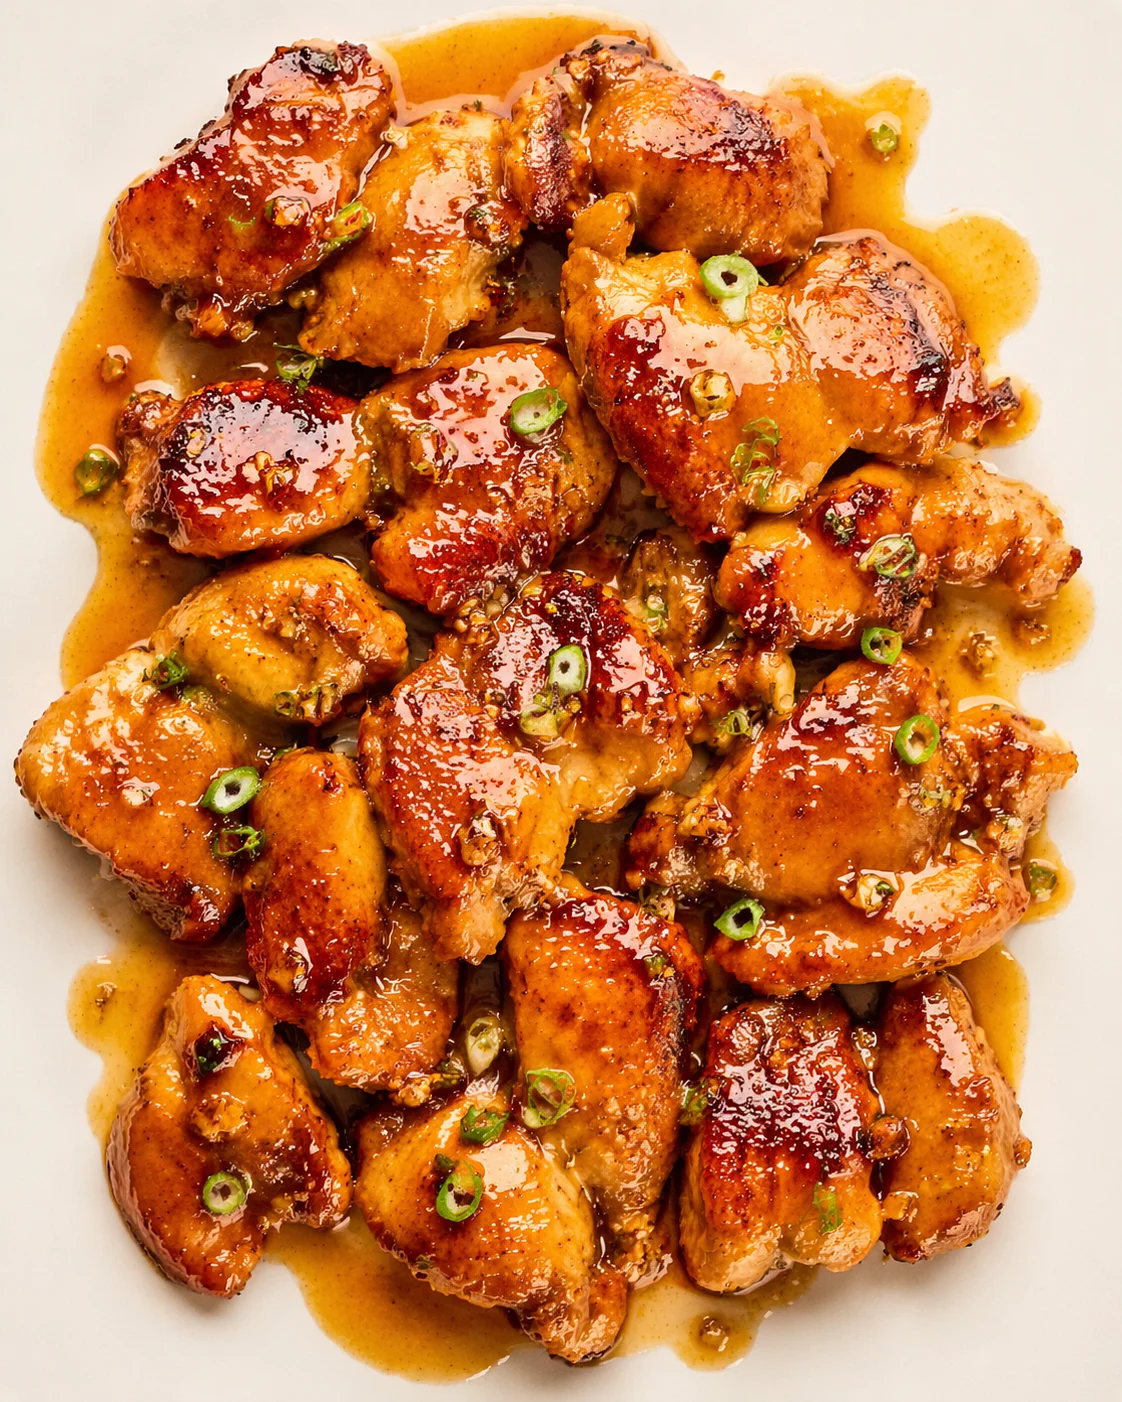
Honey Garlic Boneless Chicken Thighs
I make a big batch of chicken thighs like this nearly every week to have ready for my lunches. I cook them one time, then slice them up to toss into big salads. They add such amazing flavor that I don’t even miss using heavy dressings anymore.
We also love these for dinner, usually paired with rice and roasted carrots. This recipe is the kind of winner that shines just as much for meal prep as it does for a cozy family dinner around the table.
I almost always go with chicken thighs instead of chicken breasts for dishes like this. Thighs have a bit more fat, making them juicier and more tender—way less likely to dry out. Plus, they’re forgiving in the oven, so even if they cook a little longer, they still turn out perfectly. When you’re juggling a hectic weeknight or prepping meals ahead, they’re the easiest choice.
Big Flavor, Minimal Fuss
- Bold flavor from simple ingredients—just honey, garlic, butter, and soy sauce do all the magic.
- One-pan wonder—sear, sauce, and bake right in the same skillet for easy cleanup.
- Always juicy—chicken thighs keep tender, no matter what.
- Family-friendly—sweet and savory, with no heat unless you want it.
- Easy to adjust—double the sauce for leftovers that taste fresh.
Chicken thighs are the top pick for honey garlic dishes because they stay juicy naturally compared to chicken breasts. The extra fat in thigh meat means it handles high heat really well—whether you’re searing or baking—without drying out.
They’re also way more forgiving. Even if the chicken stays in the oven a little longer while your sauce thickens, the thighs remain tender and flavorful. That’s a lifesaver when the clock is ticking on busy weeknights or you’re cooking ahead for meal prep.
If you’ve ever dealt with dry baked chicken, switching to boneless skinless chicken thighs will make a huge difference every time.
This recipe hits the perfect balance: big, satisfying flavor with hardly any extra work. A quick sear followed by a short bake gives you glossy, honey-garlic-glazed chicken thighs that slice beautifully for lunches and win over even picky eaters at dinner.
- One-and-done cooking: Sear the chicken, make the sauce, then bake everything right in one skillet—minimal hands-on time and cleanup.
- Meal-prep magic: Make it all at once, then enjoy sliced for salads, rice bowls, or reheated lunches all week (keeps well for up to 4 days in the fridge).
- Perfectly juicy every time: Boneless skinless thighs are forgiving and don’t dry out easily, even if timing isn’t perfect.
- Flavor from simple staples: Honey, garlic, butter, and soy sauce team up for a glossy, sticky sauce packed with layered flavor but a short ingredient list.
- Family-friendly: If you want it mild and crowd-pleasing, this hits the mark—add spice only if you like.
- Fully adaptable: Craving more sauce, a ginger kick, or some heat? Making little swaps or doubling sauce ingredients personalizes the dish without changing how you cook it.
Whether served over rice with roasted carrots for dinner or sliced cold in bright, fresh salads for lunch, this recipe’s flexibility keeps me coming back again and again.
Ingredients and Measurements
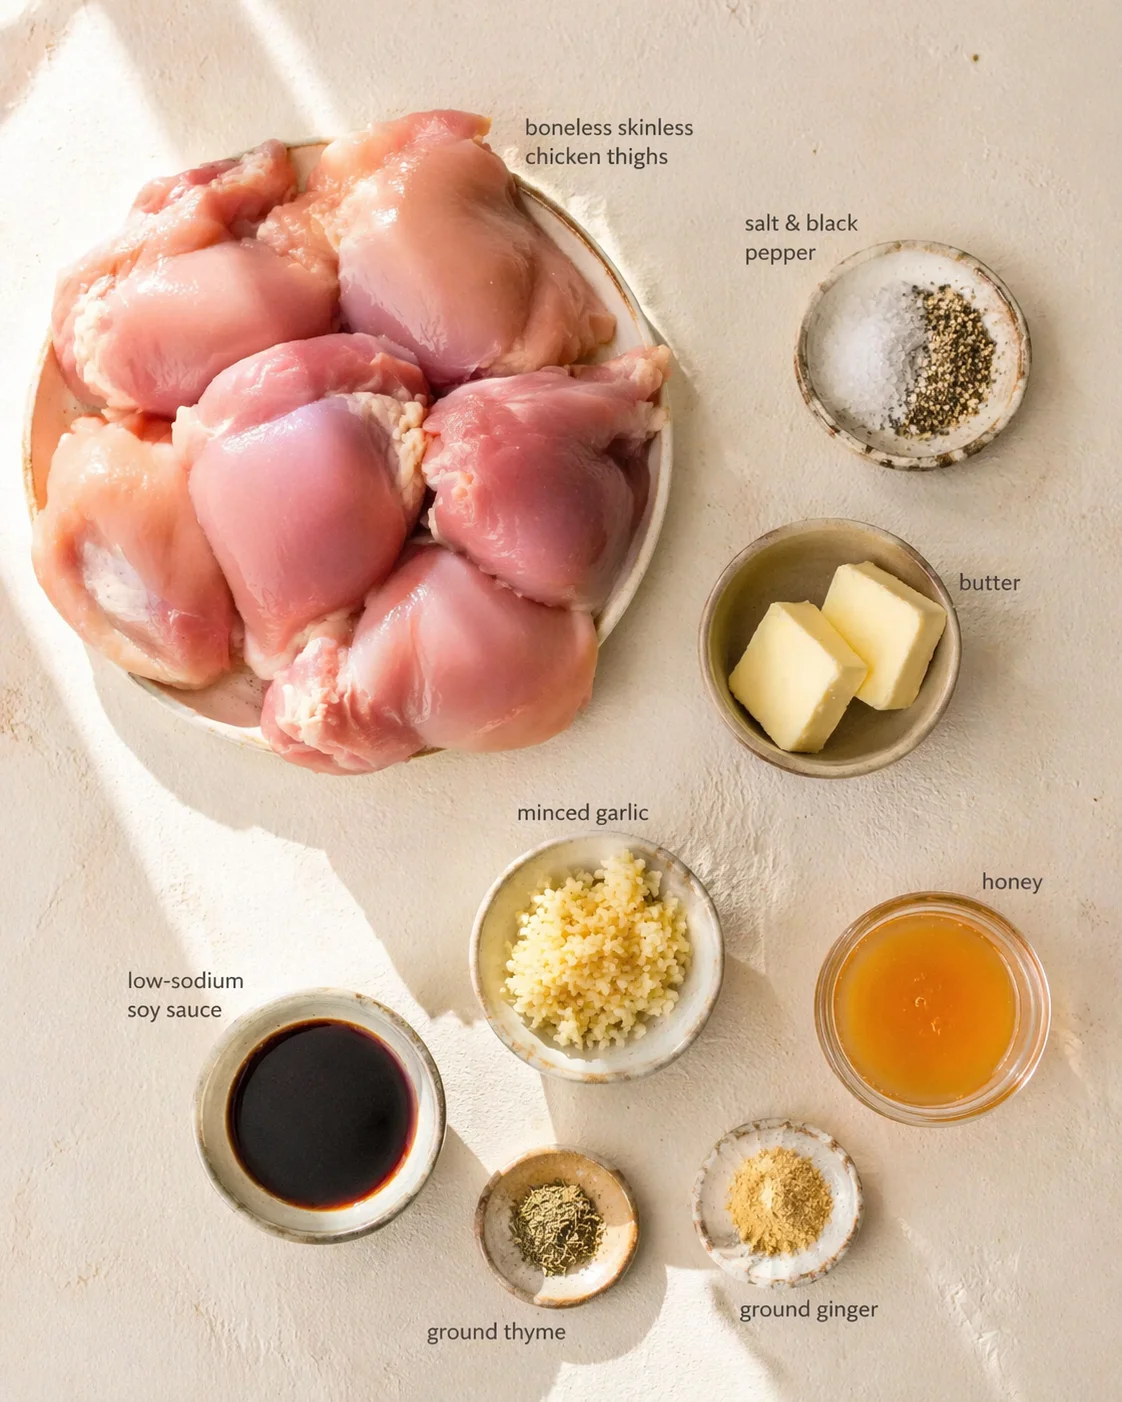
- 5-6 boneless skinless chicken thighs
- Salt and black pepper, to taste
- 2 tablespoons salted butter, divided
- 6 garlic cloves, minced
- 3 tablespoons honey
- 2 tablespoons low-sodium soy sauce
- ½ teaspoon ground thyme
- ½ teaspoon ground ginger, or up to ¾ teaspoon if you love ginger’s warmth
Step-by-Step Instructions
- Preheat oven to 400°F.
- Pat 5–6 boneless skinless chicken thighs dry with paper towels.
- Season both sides of the thighs generously with salt and black pepper.
-
Heat an oven-safe skillet over medium-high heat and melt 1 tablespoon of the butter.
- Sear the chicken thighs in the skillet, browning both sides.
- Remove the chicken from the skillet and set aside.
- Reduce heat to medium, add the remaining butter and minced garlic to the skillet and cook until fragrant.
-
Remove the skillet from heat and stir in honey, low-sodium soy sauce, ground thyme, and ground ginger to make the sauce.
- Return the chicken to the skillet and spoon sauce over each piece to coat.
- Bake the skillet uncovered in the preheated oven until the chicken reaches an internal temperature of 165°F.
-
Spoon the sauce over the chicken one or two times during baking to build a caramelized glaze.
Chef Tips and Serving Ideas
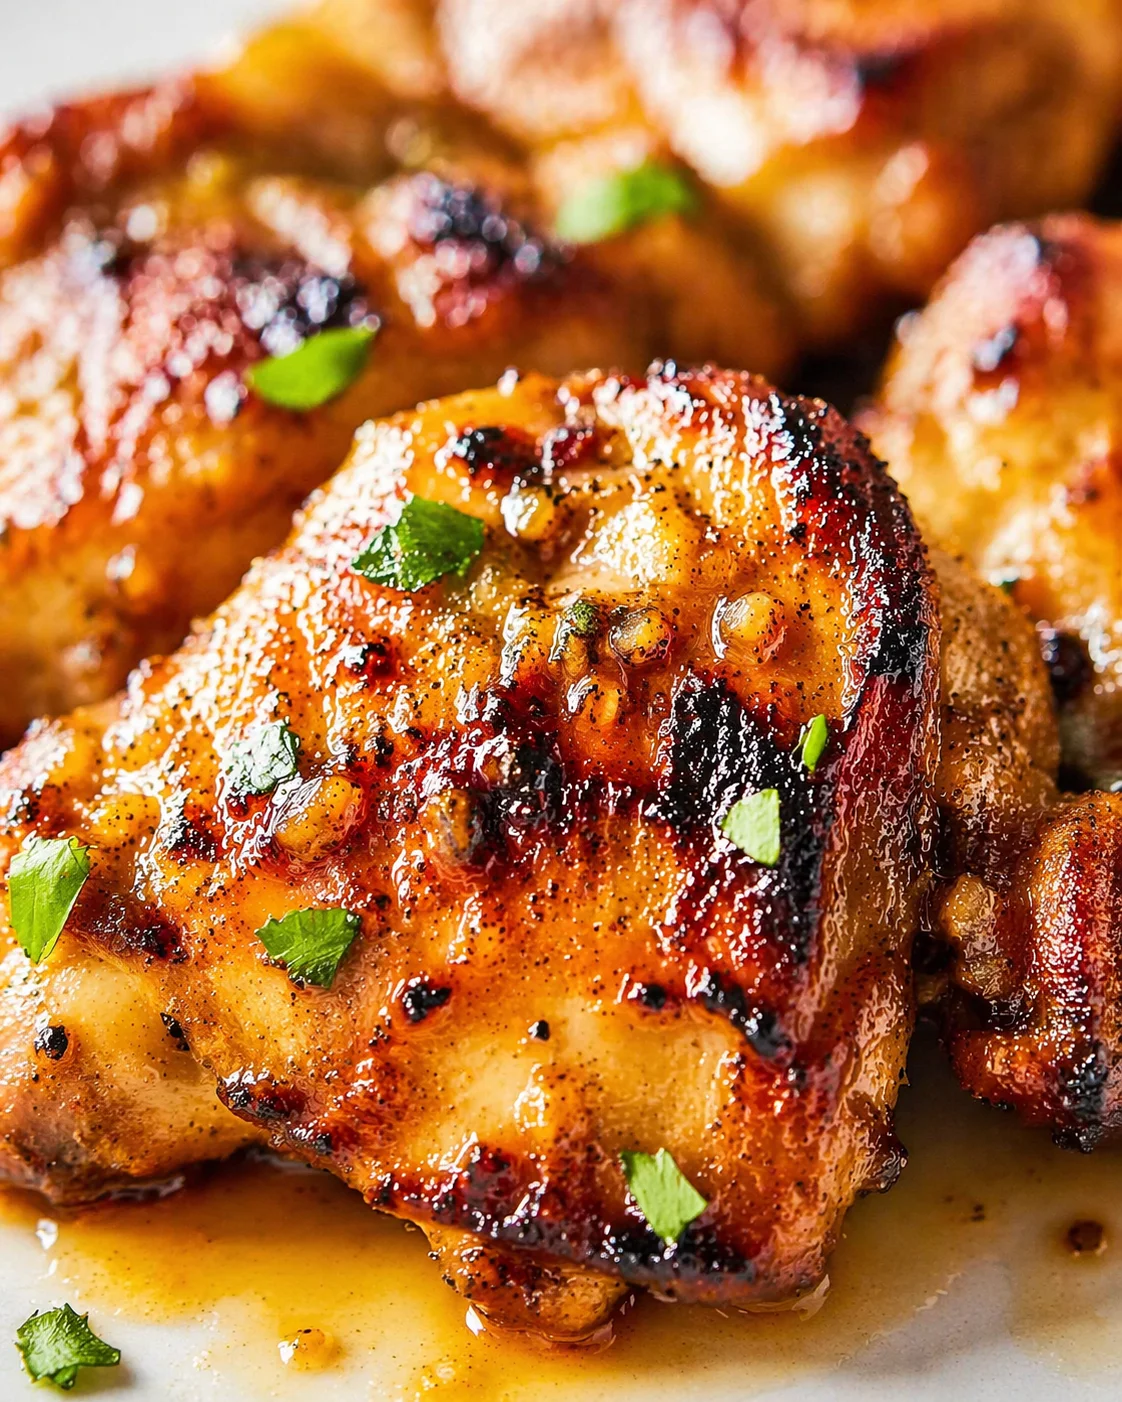
- Sear for color and flavor—this browning step gives you lots of tasty depth.
- Use a meat thermometer—the chicken is perfectly done when it hits 165°F.
- If the sauce is too thick, stir in 1 tablespoon warm water or broth to loosen it.
- Too sweet? Add a splash of soy sauce or squeeze a little lemon juice for balance.
- Want extra sauce next time? Double the honey, soy sauce, and garlic.
- Cleanup hack: Line your skillet with foil before baking if it’s oven-safe—it makes for easier cleanup.
The magic behind this sticky, shiny sauce is layering your flavors just right.
First, searing the chicken builds those tasty browned bits that help the sauce stick better. Next, removing the pan from heat before stirring in the honey keeps it from burning and ensures the sauce stays silky smooth. Then, baking uncovered lets moisture evaporate so the sauce thickens up naturally.
For an even deeper caramelized glaze, spoon that sauce over the chicken one or two times during baking. This layers on flavor without needing any extra ingredients or steps.
- Serve over fluffy white or brown rice to soak up the sauce.
- Add roasted or steamed vegetables like carrots, broccoli, or green beans for a balanced dinner.
- Slice cold and toss into a spinach or kale salad with avocado for a bright lunch.
- Serve with garlic mashed potatoes for a comforting, hearty meal.
Flavor Variations & Swaps
- Kick things up: Toss in ½ teaspoon red pepper flakes or 1 tablespoon chili garlic sauce for some heat.
- Make it ginger-forward: Increase the ginger to ¾ teaspoon and add 1 teaspoon sesame oil for a lovely aroma.
- Extra saucy: Double the sauce ingredients and pour over rice or noodles for a saucier dish.
- Lemon honey twist: Add 1 teaspoon lemon zest to brighten it up.
- Air fryer option: Cook at 390°F for 15 minutes, flipping halfway for crispy edges.
- Swap proteins: Try turkey thighs or boneless pork chops for a tasty twist.
- Add veggies: Roast carrots, broccoli, or bell peppers in the skillet alongside the chicken for a one-pan meal.
- Go gluten-free: Use tamari instead of soy sauce and it’s safe for gluten sensitivities.
- Make it spicy: Stir in chili flakes or sriracha for a kick everyone will love.
Storage and Make-Ahead Tips
- Fridge: Keep leftovers in an airtight container for up to 4 days.
- Reheat: Warm gently in a skillet or microwave, adding extra sauce if needed to keep it moist.
- Meal prep tip: Slice leftover chicken and serve it on rice bowls or salads for quick, tasty lunches.
Store your leftover honey garlic chicken thighs in an airtight container in the fridge for up to four days. This keeps the chicken juicy and the sauce flavorful. If you want to freeze, put the chicken and sauce in a freezer-safe container for up to three months—just thaw overnight in the fridge before reheating.
This dish is a dream for busy weeks. Make the chicken completely, cool it down, and refrigerate with the sauce for up to four days. You can also prep the sauce ahead and add it when cooking. For quick lunches, slice the chicken cold into salads or warm it up in minutes.
Frequently Asked Questions
Can I use chicken breasts instead?
You sure can, but chicken breasts cook faster and tend to dry out more easily. If you want to use breasts, cut down the baking time and check for doneness early. For juicy, tender results every time, I recommend boneless skinless chicken thighs.
Can I make this ahead?
Definitely! This recipe is perfect for meal prep. Cook the chicken fully, let it cool, and then store it with the sauce in an airtight container. When you’re ready to eat, gently reheat in a skillet or microwave, adding a spoonful of extra sauce to keep it nice and moist.
Is this very sweet?
Not at all. The honey brings a natural sweetness, but the soy sauce and garlic balance it out with savory notes. If you prefer less sweet, simply use a little less honey or add an extra splash of soy sauce or lemon juice to brighten the flavor.
- Can I use bone-in chicken thighs? Yes! Bone-in thighs work too but may need a few extra minutes cooking.
- How do I know when the chicken is done? The internal temperature should reach 165°F—a meat thermometer makes this easy.
- Can I make this dairy-free? Absolutely. Swap butter for olive oil or a dairy-free spread.
- Is this recipe freezer friendly? Yes, leftovers freeze well in a sealed container for up to 3 months.
- What do I serve with this? Think simple sides like rice, roasted veggies, or even noodles to soak up all that sauce.
Juicy boneless skinless chicken thighs seared and baked in a sticky honey garlic sauce, perfect for meal prep or family dinners.
- Total Time: 35 minutes
- Yield: 5-6 servings 1x
Ingredients
- 5–6 boneless skinless chicken thighs
- Salt, to taste
- Black pepper, to taste
- 2 tablespoons salted butter, divided
- 6 garlic cloves, minced
- 3 tablespoons honey
- 2 tablespoons low-sodium soy sauce
- ½ teaspoon ground thyme
- ½ teaspoon ground ginger (up to ¾ teaspoon if you prefer more ginger flavor)
Instructions
- Preheat oven to 400°F (200°C).
- Pat the chicken thighs dry with paper towels.
- Season both sides of the chicken thighs generously with salt and black pepper.
- Heat an oven-safe skillet over medium-high heat and melt 1 tablespoon of the butter.
- Sear the chicken thighs in the skillet, browning both sides.
- Remove the chicken from the skillet and set aside.
- Reduce heat to medium, add the remaining butter and minced garlic to the skillet and cook until fragrant.
- Remove skillet from heat; stir in honey, low-sodium soy sauce, ground thyme, and ground ginger to make the sauce.
- Return the chicken to the skillet and spoon the sauce over each piece to coat.
- Bake the skillet uncovered in the preheated oven until the chicken reaches an internal temperature of 165°F (74°C).
- Spoon sauce over the chicken one or two times during baking to build a caramelized glaze.
Notes
Use a meat thermometer for best doneness verification (165°F internal temperature)., If the sauce is too thick, add 1 tablespoon warm water or broth to loosen., For more sauce, double the honey, soy sauce, and garlic in the recipe., Line the skillet with foil before baking for easier cleanup if using an oven-safe skillet., This recipe keeps well in the fridge for up to 4 days., To store longer, freeze leftovers in a freezer-safe container for up to 3 months; thaw overnight in fridge before reheating., Reheat gently in a skillet or microwave, adding extra sauce if needed to keep moist., Bone-in chicken thighs can be used but may require longer cooking time., To make this dairy-free, substitute butter with olive oil or a dairy-free spread.
- Prep Time: 10 minutes
- Cook Time: 25 minutes
- Category: Main Course
- Cuisine: American
Nutrition
- Serving Size: 1 chicken thigh
- Calories: Approximately 250 calories per serving
- Fat: Approximately 12g per serving
- Carbohydrates: Approximately 8g per serving
- Protein: Approximately 25g per serving